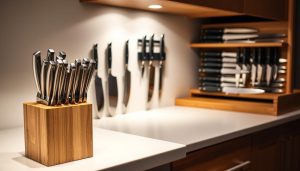
Did you know 72% of homebuyers look for homes with great outdoor areas? A study shows that upgrading your backyard can raise your home’s value by up to 15%. Fire pits are among the top 3 things people want in their outdoor spaces.
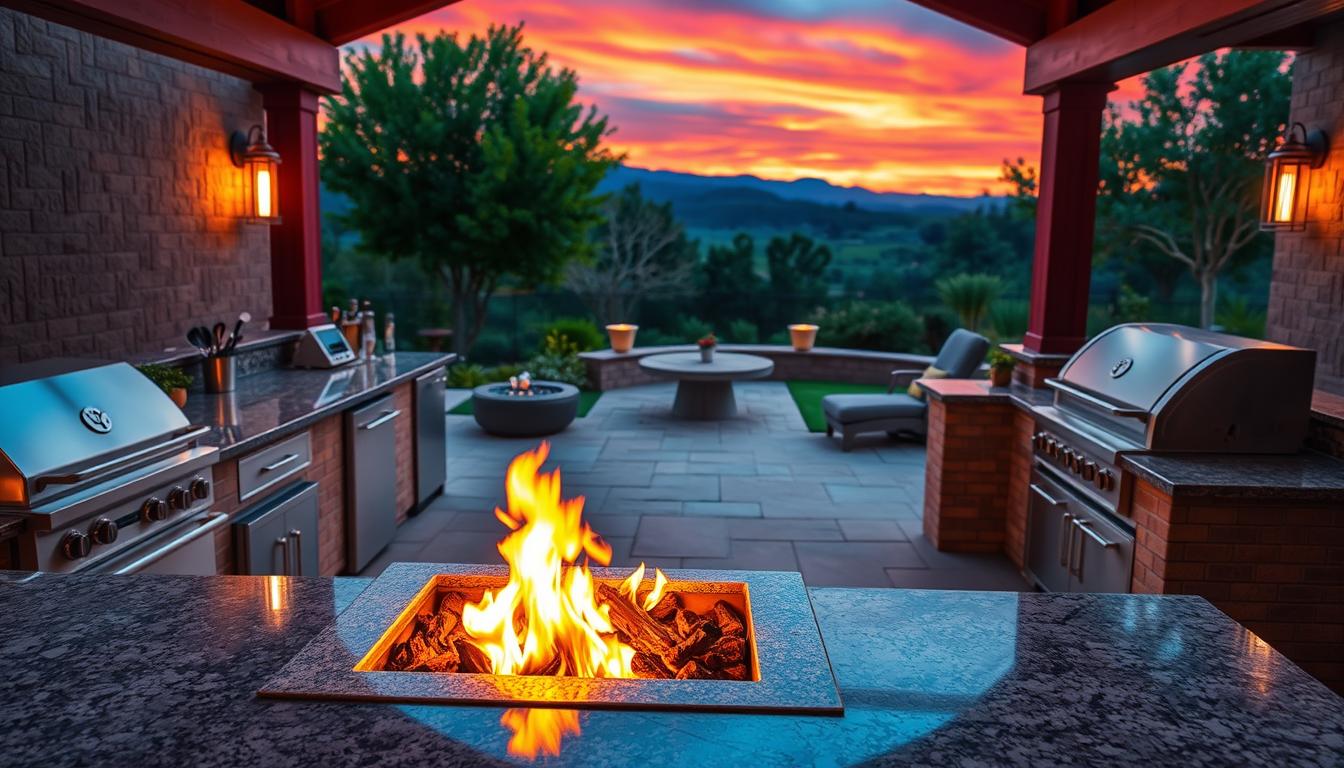
Outdoor spaces today are more than just places to grill. Homeowners want areas that are both useful for cooking and inviting for gatherings. A well-placed fire pit can turn your outdoor area into the heart of your home’s entertainment.
Integrating a fire pit needs careful thought about safety, looks, and use. Think about wind direction, where people will sit, and how it fits with your current setup. The right spot means you can enjoy it all year, from summer barbecues to winter roasting marshmallows.
Key Takeaways
- Fire features increase property appeal and buyer interest
- Multi-season designs require strategic wind protection
- Maintain 10-foot clearance from combustible structures
- Match materials to existing patio surfaces for cohesion
- Incorporate adjustable heat controls for versatility
Assessing Your Outdoor Space for Fire Pit Integration
Before you start, it’s key to look at your outdoor area’s layout. Sketch your kitchen and note any fixed features like trees or slopes. This helps your fire pit fit right in, not just as an add-on.

Measuring Available Square Footage
Minimum clearance requirements are important for where you place your fire pit. Make sure there’s at least 10 feet of space:
- From your home’s walls
- Under trees
- From sheds or gazebos
Traffic Flow Considerations
Plan paths from your grill to seating and home. Keep 3-4 feet around the fire pit for easy movement. Experts say circular shapes help avoid crowding.
Evaluating Existing Kitchen Layout
Proximity to cooking surfaces matters for safety and ease. Place your fire pit:
- Downwind to avoid smoke
- At least 7 feet from grills
- Near counters for easy food transfer
Wind Direction Analysis
Use weather apps or local data to track wind. Try temporary windsocks to spot bad airflow. In most U.S. areas, a southwest-facing fire pit works well, but check local fire department rules.
These steps lay the groundwork for fire pit safety in outdoor kitchen designs. Use garden hoses or chalk to test layouts before you decide.
Choosing Your Fire Pit Style
Your fire pit is the heart of your outdoor kitchen. The style you choose affects both function and feel. We’ll look at fuel type and installation, making sure they fit your cooking and design needs.

Wood-Burning vs Gas Fire Features
Authentic Ambiance vs Convenience Factors
Wood fires offer a cozy feel but need more work. You’ll need to store dry wood and clean up ash often. Gas fire pits, on the other hand, light up fast, ideal for quick gatherings.
RTF Systems’ gas units fit right into countertops. Wood burners work best in open spaces.
| Feature | Wood-Burning | Gas |
|---|---|---|
| Startup Time | 15-30 minutes | Instant |
| Maintenance | Weekly ash removal | Annual line checks |
| Heat Output | Variable | Controlled |
Fuel Storage Solutions
- Wood racks: Keep logs dry with cedar storage 6+ feet from flames
- Propane tanks: Conceal 20-lb tanks in custom enclosures
- Natural gas: Requires professional line installation
Built-In vs Portable Options
Permanent Installation Benefits
A built-in fire pit adds value and safety. Masonry and fire-rated bricks handle high heat. Concrete units from Belgard make installation quicker.
Make sure there’s enough air space – 18″ from flammable materials.
Flexible Arrangement Advantages
- Test layouts before committing to permanent builds
- Store portable units during harsh winters
- Pair lightweight models with modular outdoor kitchens
Most homeowners, 68%, like built-in fire pits for modern outdoor kitchen fire pit designs. But, portable copper bowls are cheaper and flexible. Just keep a 10-foot safety zone from buildings.
Design Integration Strategies
Merging fire features with cooking areas needs careful thought. You must consider how they fit together and use the same materials. This way, you create a single space for entertainment.
Modern designs blend cooking areas with social spots. They use tiered layouts and matching finishes for a balanced look.

Creating Visual Harmony
Creating Focal Points
Make your fire pit the center of attention. Place it 7-10 feet from cooking areas for safety and to keep the view open. Circular seating around the fire encourages talking without blocking the kitchen.
RTF Systems’ modular fire tables are flexible. You can change their layout with the seasons or add cooking grates for roasting marshmallows. For built-in designs, align the fire feature with your kitchen’s sight axis for a striking visual effect.
Matching Material Palettes
Match your kitchen’s countertop materials with the fire pit. A granite prep station goes well with granite fire pit walls. Modern designs often use concrete benches that match concrete countertops for a sleek look.
Match metal accents with your grill’s finish. Use stainless steel for the fire pit trim. For a rustic look, reclaimed wood mantels above the fire pit can match wooden cabinets in the kitchen.
Elevating Spatial Dynamics
Raised Cooking Surfaces
Elevate grilling stations 12-18 inches above the fire pit using Opulands’ tiered system. This setup creates separate areas while keeping them connected. Built-in cabinets under raised counters can hide firewood or cooking tools.
Key benefits include:
- Improved sightlines across the entire outdoor space
- Natural separation between cooking and lounging areas
- Enhanced airflow for smoke management
Sunken Conversation Pits
Dig down 6-12 inches to make cozy seating areas around the fire. Use retaining walls made from materials like stacked stone veneer to connect the spaces. Add weatherproof cushions in colors that match your outdoor kitchen.
For safety, install:
- Low-voltage LED step lighting
- Non-slip textured surfaces on sunken floors
- Childproof mesh screens when not in use
Material Selection Guide
Choosing the right materials for your fire pit area is key. It ensures safety and style in your outdoor kitchen. Look for materials that resist heat, last long, and match your kitchen’s look. Let’s explore the best options for surfaces and countertops.

Heat-Resistant Surfacing Options
Your fire pit’s base must handle high temperatures without damage. Tests show natural stone and concrete are top choices for lasting well.
Natural Stone Comparisons
Granite can handle up to 1,200°F without damage. Basalt is similar but needs more sealing. Slate looks textured but chips faster when heated.
- Granite: 1,200°F tolerance, low maintenance
- Basalt: 1,150°F tolerance, needs annual sealing
- Slate: 900°F tolerance, prone to surface wear
Concrete Finish Durability
Stamped concrete can handle up to 800°F and looks like flagstone. Polished finishes reflect heat but show ash residue. Data shows textured concrete lasts longer than smooth types near fire pits.
Complementary Countertop Materials
Countertops near fire pits must resist heat and stains. Choose materials that are both functional and stylish for your kitchen.
Granite Heat Tolerance
Granite countertops can handle hot cookware better than quartz. Quartz resists scratches but discolors at 400°F. Armand’s Discount offers 3cm-thick granite slabs that handle more heat than standard slabs.
Stainless Steel Accents
Add stainless steel trim or tool stations for a modern look and practical use:
- Reflects heat away from seating areas
- Wipes clean of ash and grease easily
- Pairs well with stone or concrete surfaces
Experts suggest brushed finishes to hide fingerprints. Pair with granite countertops for a heat-resistant workspace that enhances your outdoor kitchen.
Ventilation and Safety Systems
Creating a safe outdoor kitchen needs smart ventilation and safety steps. Good airflow stops smoke buildup. Safety features make your fire pit safe for families. We’ll look at solutions that follow NFPA codes and make your kitchen better.

Smoke Management Solutions
Controlling smoke starts with knowing wind and heat patterns. Building codes set rules for fire pits and buildings. These rules vary by fuel type, usually 10-25 feet.
Overhead Hood Installations
Commercial hoods cut smoke risks by 60-75% if sized right. Stainless steel hoods with dampers are best for wood pits. For gas pits, choose aluminum hoods with spark arrestors.
Strategic Wind Breaks
Use glass or metal barriers 3-5 feet from your fire pit to guide smoke. Here’s a table of popular windbreak materials:
| Material | Height | Maintenance | Cost |
|---|---|---|---|
| Tempered Glass | 24-36″ | Monthly cleaning | $45-$65/sq.ft |
| Powder-Coated Steel | 18-30″ | Annual inspection | $28-$40/sq.ft |
| Stone Veneer | 12-24″ | Seal every 2 years | $60-$85/sq.ft |
Childproofing Measures
RTF Systems’ ignition tech works well with barriers for safety. Keep 42″ clear around fire pits and seating.
Safety Screen Options
Three layers are best:
- Primary layer: 16-gauge steel mesh around fire bowl
- Secondary layer: Retractable glass panels on tracks
- Tertiary layer: Motion-activated perimeter lighting
Automatic Shut-Off Systems
Modern gas pits need these safety parts:
| Feature | Response Time | Activation Trigger |
|---|---|---|
| Flame Failure Device | Gas flow interruption | |
| Tip-Over Switch | Instant | 15° angle detection |
| Overheat Sensor | 5-7 seconds | 250°F surface temp |
Installers say test safety systems monthly. Keep a Class B fire extinguisher 15 feet from your fire pit. It’s required in 38 states.
Cooking-Centric Fire Pit Features
Professional chefs and outdoor lovers are making fire pits more than just for warmth. They’re turning them into full cooking stations. Now, you can sear, simmer, and smoke food with great precision.

Mastering Grilling Accessory Integration
Rotisserie attachments make your fire pit a slow-cooking dream. Brands like Armand’s Discount offer motorized kits that fit most circular pits. They’re perfect for evenly cooked meats. RTF Systems’ modular mounting brackets make installation easy.
Adjustable grill grates solve the biggest cooking challenge: managing heat. “Lift-and-lock mechanisms let you sear steaks at 600°F or gently toast marshmallows over embers,” says Texas pitmaster Carla Reyes. Look for cast iron models with telescoping handles for safe adjustments.
Designing Dutch Oven Cooking Stations
Multi-zone heat configuration turns your fire pit into different cooking areas. Use fire bricks to create:
- A blazing-hot coal bed for boiling
- Medium-heat zone for simmering
- Warm ledge for keeping dishes hot
Where you place prep surfaces is key. Install heat-resistant countertops near the flames – stainless steel or soapstone work best. Professional installers say keep a 18-24″ gap between cooking zones and prep areas to avoid burns.
“The secret to fire pit cooking? Treat it like a live stove – create multiple heat levels and always keep tools within reach.”
Seating Configuration Planning
Creating the perfect seating layout turns your fire pit into a social spot. We’ll look at how to mix comfort and function while keeping your outdoor kitchen flowing.

Circular vs Linear Arrangements
The shape of your fire pit guides your seating plan. Circular setups are great for smaller gatherings, encouraging close talks. Linear designs fit well in rectangular spaces, making it easy to move between cooking and lounging.
Conversation Group Sizing
Place chairs 24-36″ from the fire pit for safety and comfort. For a 6-foot diameter fire feature:
- 4-6 seats: Perfect for family gatherings
- 8-10 seats: Ideal for parties
Bar-Style Counter Integration
Combine seating and serving space with a 42″-high counter. This setup is great for DIY outdoor kitchen with fire pit projects, providing:
| Feature | Benefit | Material Tip |
|---|---|---|
| Overhang | Knee clearance | 12″ minimum |
| Stools | Space efficiency | Weather-resistant steel |
| Storage | Utensil access | Lockable cabinets |
“Modular seating allows flexibility – you can rearrange components as your needs evolve.”
Built-In Bench Design Options
Permanent seating saves space in small areas. Opulands’ curved concrete benches show how to mix style and function. DIY stone seating adds a rustic touch at a lower cost.
Storage-Integrated Seating
Lift-up bench lids hide storage for:
- Firewood
- Cushion protection
- Grilling tool organization
Cushion Material Selection
Top outdoor furniture brands suggest solution-dyed acrylic fabrics. These materials resist:
- UV fading (500+ hours tested)
- Mold growth
- Water absorption
Lighting Design Synergy
Good lighting makes your outdoor kitchen safe and stylish. It lets you grill at night and makes your space cozy for parties. Mix bright task lights with soft ambient ones to make your area perfect for evening fun.
Task Lighting Integration
Overhead grill lighting is key for safe cooking. Armand’s Discount suggests 1,500-lumen LED lights, 6-7 feet up. These lights are weather-proof and fit well with your fire pit design.
Pathway illumination does two things:
- It helps guests avoid tripping over heat sources
- It shows where to walk between cooking and sitting areas
Low-voltage bollard lights, 8-10 feet apart, offer clear light without glare.
Ambient Lighting Techniques
Recessed deck lights softly outline your space. Use RTF Systems’ dimmable models, 12-18 inches from the fire pit. A warm 2700K color makes flames look great without overpowering.
LED accent strips add a modern touch:
| Location | Function | Brightness |
|---|---|---|
| Under countertops | Highlight stone textures | 400 lumens |
| Behind fire pit | Create depth illusion | 600 lumens |
| Along stairs | Improve safety | 300 lumens |
Layer your lighting for different times. Use smart controls to change light levels for cooking or relaxing.
Landscaping Enhancements
Good landscaping makes fire pit and kitchen areas better and more beautiful. Choosing the right plants and materials helps with wind and heat. It makes your outdoor space welcoming and well-designed.

Natural Windbreak Plantings
Keep your cooking and seating safe from strong winds with plants. Opulands suggests plants that grow well in your area and need little care.
Evergreen Shrub Selection
Boxwood and juniper keep wind out all year with their thick leaves. Plant them 3-4 feet apart for best coverage. Choose dwarf types for areas where you sit, so they don’t block your view.
Decorative Stone Borders
RTF Systems says to use flagstone or tumbled granite around plants. These borders:
- Stop soil from washing away near fire pits
- Make a clean look
- Help water flow away
Hardscape Material Blending
Make your outdoor kitchen and fire pit look like they belong together. Use the same stones for your patio and fire pit for a smooth look.
Paving Pattern Continuity
Match your kitchen floor with the fire pit area. Here are some good matches:
| Kitchen Surface | Fire Pit Match | Benefits |
|---|---|---|
| Bluestone | Irregular flagstone | Natural texture blend |
| Concrete pavers | Stamped fire ring | Modern uniformity |
Retaining Wall Integration
Use sloped areas for seating and storage. Use the same stone as your kitchen for walls. RTF’s systems make it easy to install and add secret spots for firewood or tools.
Budget Planning Breakdown
Creating your dream outdoor kitchen with a fire pit needs careful budgeting. It’s important to balance your design dreams with what you can afford. This way, you can avoid unexpected costs and create a space that fits your lifestyle.
Material Cost Comparisons
The materials you choose affect both the initial cost and the long-term value. High-end options like natural stone or stainless steel fire pits are durable but pricey. On the other hand, cheaper alternatives like concrete blocks or powder-coated steel offer similar looks but at a lower cost.
| Material Type | Premium Cost/Sq.Ft | Budget Cost/Sq.Ft | Avg. Lifespan |
|---|---|---|---|
| Natural Stone | $45-$80 | – | 25+ years |
| Concrete | – | $15-$30 | 10-15 years |
| Stainless Steel | $120-$200 | – | 20+ years |
| Powder-Coated Steel | – | $60-$90 | 8-12 years |

Think about ongoing costs when picking materials. Natural stone needs sealing every year ($150-$300), while concrete might need repairs every 3-5 years. A Bay Area contractor says:
“Choosing mid-grade materials with professional installation can save 40% on lifetime costs.”
DIY vs Professional Installation
Doing it yourself can save 30-50% on labor costs. But, complex jobs like gas line installations or masonry work often need a pro for safety.
Permitting Requirements
In most Bay Area counties, you need permits for permanent fire pits ($250-$800). Portable pits under 24″ don’t usually need permits. Always check local burn rules before starting.
Labor Cost Estimates
Professional setups can cost from $4,500 for simple designs to $18,000+ for fancy ones. Compare DIY kits ($1,200-$3,500) with complete solutions ($9,800-$22,000) based on your skills and time.
Remember: “A well-planned budget today prevents costly redesigns tomorrow.” Consider material durability, local laws, and your time when deciding between DIY or hiring a pro.
Step-by-Step Installation Guide
Installing your outdoor kitchen with a built-in fire pit is key to making it real. Whether you choose modular parts or traditional masonry, being precise is important. This guide will help you create a safe and functional centerpiece that meets NFPA standards. It will also fit well with your outdoor living space.

Site Preparation Process
Ground leveling is what separates amateur setups from professional-grade installations. Start by marking the fire pit’s area with stakes and string. Remove 12″ of topsoil in the marked area, using a laser level to check depth. Then, compact the subbase with a plate compactor to prevent shifting.
Gas Line Installation (If Applicable)
For gas fire pits, following NFPA 54 is not optional—it’s essential. Only licensed technicians should handle gas work. They must follow these NFPA 54 requirements:
| Component | Specification | DIY Friendly? |
|---|---|---|
| Pipe Material | CSST or Black Iron | No |
| Pressure Test | 15 psi for 30 minutes | Professional Only |
| Shutoff Valve | Within 6 feet | Yes (if pre-installed) |
“Gas line errors account for 42% of outdoor kitchen fire incidents. Always verify local codes before digging.”
Masonry Construction Basics
Firebrick patterns affect heat distribution and look. The herringbone layout is best for heat, while running bond is easier for beginners. Use a margin trowel for mortar, keeping joints at 3/8″ for expansion.
Mortar Mix Selection
Not all mortars can handle fire pit temperatures. Here’s a comparison to help you choose:
| Type | Heat Resistance | Cure Time | Best For |
|---|---|---|---|
| Type N | 650°F | 24h | Decorative surrounds |
| Type S | 1,200°F | 48h | Structural layers |
| Refractory | 2,800°F | 72h | Firebox lining |
Mix refractory mortar to peanut butter consistency. Too wet, it’s weak; too dry, it won’t bond. Let each layer set for 8 hours before adding weight. Your outdoor kitchen design with a built-in fire pit needs this careful approach for safe enjoyment for decades.
Maintenance and Cleaning Protocols
Keeping your outdoor kitchen fire pit in top shape is key. Regular care keeps it looking good and safe for use. Here’s what you need to know about ash management and surface protection.

Ash Removal Systems
Managing ash well stops damage to your fire pit. There are two main ways to do this:
Built-In Ash Catchers
These trays catch most of the ash automatically. Stainless steel ones can hold up to 5 lbs and have handles that won’t burn. Clean them every week to keep air flowing well.
Vacuum Compatibility
Using a vacuum with a HEPA filter gets rid of small ash particles. Look for vacuums with:
- Heat-resistant hoses (up to 1500°F)
- Wet/dry capabilities
- Metal collection canisters
| Ash Removal Method | Best For | Maintenance Frequency |
|---|---|---|
| Built-In Catchers | Daily use fire pits | Weekly emptying |
| Ash Vacuums | Deep cleaning | Monthly treatment |
Surface Protection Methods
Outdoor fire pits face more wear and tear than indoor ones. Here’s how to protect them:
Weatherproof Covers
Heavy-duty covers with vents keep moisture out and protect from UV rays. The Outdoor Kitchen Association suggests:
“Pick covers with strong stitching and adjustable straps for windy spots. Swap them out every 2-3 years for best protection.”
Seasonal Sealing Treatments
Natural stone needs special sealants to handle heat and stains. Popular choices include:
- Penetrating siloxane sealers (for porous materials)
- Acrylic topical coatings (for smooth surfaces)
Apply sealants every 12-18 months, based on your area’s weather. Make sure the sealant is dry before lighting your fire pit again.
Real-World Design Inspiration
Looking at how fire pits fit into outdoor kitchens shows us design options. We’ll see two ways to mix looks with function. One is traditional, the other is modern.
Southwest Style Case Study
The Saratoga project by Opulands shows the power of local materials. They use adobe bricks, which hold 65% more heat than concrete. The design also includes smart airflow to keep smoke away.
Adobe Construction Techniques
Adobe bricks are built around a steel fire ring, sealed with lime mortar. This method can handle high temperatures and withstand freezing and thawing. Adobe stays cooler than stone when it’s hot.
Terracotta Accent Pieces
Hand-painted terracotta tiles surround the fire pit. They reflect the fire’s glow. The design uses patterns and clay planters for agave plants. The colors match the nearby sandstone countertops.
| Material | Heat Resistance | Maintenance | Cost/Sq Ft |
|---|---|---|---|
| Adobe | 1,800°F | Annual resealing | $18 |
| Concrete | 1,200°F | None | $25 |
| Terracotta | 900°F | Biweekly cleaning | $32 |
Modern Urban Example
RTF Systems’ rooftop in Manhattan shows fire pits can fit in small spaces. A concrete bench wraps around an ethanol burner, creating a cozy spot without blocking views.
Cantilevered Concrete Designs
Precast slabs create overhangs for seating. The design is sleek and easy to clean. It fits well with modern countertops.
Ethanol Fire Feature Integration
Ventless bioethanol burners are built into quartzite tables. They can be controlled with an app. These burners are clean and efficient, needing only a wick change every 500 hours.
| Feature | Ethanol | Natural Gas | Wood |
|---|---|---|---|
| Heat Output | 15k BTUs | 40k BTUs | 30k BTUs |
| Installation Cost | $1,200 | $3,800 | $2,500 |
| Annual Fuel Cost | $280 | $150 | $90 |
Both designs show how a modern outdoor kitchen fire pit can fit any style. Whether you like earthy or modern looks, choose materials that are safe and enhance social gatherings.
Conclusion
Learning how to add a fire pit to your outdoor kitchen makes it a place for cooking and hanging out. It’s all about finding the right mix of durability and creativity. Whether you go for RTF Systems’ modular gas units or custom masonry, your space should show off your style and be practical.
When combining fire pits with cooking areas, safety is key. Make sure you have good ventilation and use materials that can handle heat, like granite. Companies like Opulands in the Bay Area know how to work with local wind and space to create great designs.
Adding a fire pit changes how you use your outdoor space, from cooking to enjoying the evening. Think about built-in seating and lights to make it good for nighttime use. Whether you like Southwest-inspired natural stone or modern stainless steel, there’s a look for everyone.
For the best results, talk to certified pros who know the rules and materials. RTF Systems and Opulands can help make your ideas real and safe. They’ll work with your space to create something that lasts.
Fire pits turn your outdoor kitchen into a special place. With careful planning and the right help, meals become unforgettable. Your design should bring people together, with nature, friends, and the joy of cooking over an open flame.
FAQ
What clearance requirements should I follow when integrating a fire pit into my outdoor kitchen?
How do RTF Systems’ modular fire pits compare to traditional masonry builds?
Which materials perform best for heat-resistant surfaces near outdoor kitchen fire pits?
What safety features should a fire pit include for outdoor kitchen use?
Can I incorporate cooking features like grills into my fire pit design?
How do built-in bench designs compare to DIY seating for fire pit areas?
What lighting specifications ensure safe food prep near fire pits?
How do I manage drainage for fire pit-adjacent planting beds?
What permit costs should I anticipate for Bay Area fire pit installations?
FAQ
What clearance requirements should I follow when integrating a fire pit into my outdoor kitchen?
Keep a 10-foot gap from buildings, as First Source advises. Installers might add more space based on wind. Always check local codes for specific needs.
How do RTF Systems’ modular fire pits compare to traditional masonry builds?
RTF Systems’ units are quick to install and easy to change. Masonry builds offer lasting customizations. Opulands combines both, using concrete for support and modular parts.
Which materials perform best for heat-resistant surfaces near outdoor kitchen fire pits?
Granite can handle 1,200°F, while quartz tops out at 300°F. Armand’s Discount suggests basalt for high heat. Opulands uses concrete for cooking stations.
What safety features should a fire pit include for outdoor kitchen use?
Use Opulands’ ignition systems and RTF Systems’ barriers to keep kids safe. Gas lines must follow NFPA codes, with 18-inch gaps from flammable materials.
Can I incorporate cooking features like grills into my fire pit design?
Yes. RTF Systems’ parts fit grill inserts. Armand’s Discount has adjustable grates. Chefs suggest zones for direct and indirect cooking.
How do built-in bench designs compare to DIY seating for fire pit areas?
Opulands’ benches with Sunbrella cushions last long. DIY stone seating needs sealing yearly but costs less upfront.
What lighting specifications ensure safe food prep near fire pits?
Use 450-lumen lights for prep, with RTF Systems’ 2700K LEDs for ambiance. Lights must be wet-rated and 36 inches from flames.
How do I manage drainage for fire pit-adjacent planting beds?
Opulands uses French drains with gravel. RTF Systems’ hardscaping has slopes to avoid water pooling and protect roots.
What permit costs should I anticipate for Bay Area fire pit installations?
Expect 0-
FAQ
What clearance requirements should I follow when integrating a fire pit into my outdoor kitchen?
Keep a 10-foot gap from buildings, as First Source advises. Installers might add more space based on wind. Always check local codes for specific needs.
How do RTF Systems’ modular fire pits compare to traditional masonry builds?
RTF Systems’ units are quick to install and easy to change. Masonry builds offer lasting customizations. Opulands combines both, using concrete for support and modular parts.
Which materials perform best for heat-resistant surfaces near outdoor kitchen fire pits?
Granite can handle 1,200°F, while quartz tops out at 300°F. Armand’s Discount suggests basalt for high heat. Opulands uses concrete for cooking stations.
What safety features should a fire pit include for outdoor kitchen use?
Use Opulands’ ignition systems and RTF Systems’ barriers to keep kids safe. Gas lines must follow NFPA codes, with 18-inch gaps from flammable materials.
Can I incorporate cooking features like grills into my fire pit design?
Yes. RTF Systems’ parts fit grill inserts. Armand’s Discount has adjustable grates. Chefs suggest zones for direct and indirect cooking.
How do built-in bench designs compare to DIY seating for fire pit areas?
Opulands’ benches with Sunbrella cushions last long. DIY stone seating needs sealing yearly but costs less upfront.
What lighting specifications ensure safe food prep near fire pits?
Use 450-lumen lights for prep, with RTF Systems’ 2700K LEDs for ambiance. Lights must be wet-rated and 36 inches from flames.
How do I manage drainage for fire pit-adjacent planting beds?
Opulands uses French drains with gravel. RTF Systems’ hardscaping has slopes to avoid water pooling and protect roots.
What permit costs should I anticipate for Bay Area fire pit installations?
Expect $350-$1,200 for gas permits and $500-$900 for structural checks. Opulands handles permits, while DIY kits need homeowner filings.
How often should I seal natural stone surfaces near outdoor kitchen fire pits?
Seal travertine yearly and bluestone every two years. Opulands suggests washing every 90 days. DIY needs quarterly applications in busy areas.
,200 for gas permits and 0-0 for structural checks. Opulands handles permits, while DIY kits need homeowner filings.
How often should I seal natural stone surfaces near outdoor kitchen fire pits?
Seal travertine yearly and bluestone every two years. Opulands suggests washing every 90 days. DIY needs quarterly applications in busy areas.