Classrooms across America are buzzing with a simple yet mesmerizing activity that transforms ordinary kitchen items into vivid science lessons. This hands-on project reveals how varying amounts of sugar in water produce distinct liquid layers – a perfect blend of art and chemistry.
You’ll need just four materials: food coloring, clear glasses, and the two stars of the show – granulated sugar and warm water. When mixed at different ratios, these solutions naturally separate into bands of color. The heaviest (most sugary) layer sinks, while lighter ones float above it. This visual phenomenon demonstrates core principles like solubility and specific gravity without complex equipment.
Educators love this activity because it sticks with students. Research shows kids retain 65% more information when lessons include colorful, interactive elements. It’s particularly effective for explaining why objects float or sink in various liquids – a key concept in middle school physical science curricula.
Key Takeaways
- Reveals density principles through visible liquid layers
- Uses common household items for easy setup
- Teaches solution chemistry and specific gravity
- Ideal for visual learners in grades 3-8
- Connects to real-world phenomena like ocean currents
Introduction to the Sugar Density Rainbow Experiment
A colorful demonstration is capturing students’ attention nationwide. Using everyday materials, this activity makes abstract science concepts pop like food coloring in water. At its core, it’s about how substances interact based on their physical properties.

What Is a Density Rainbow?
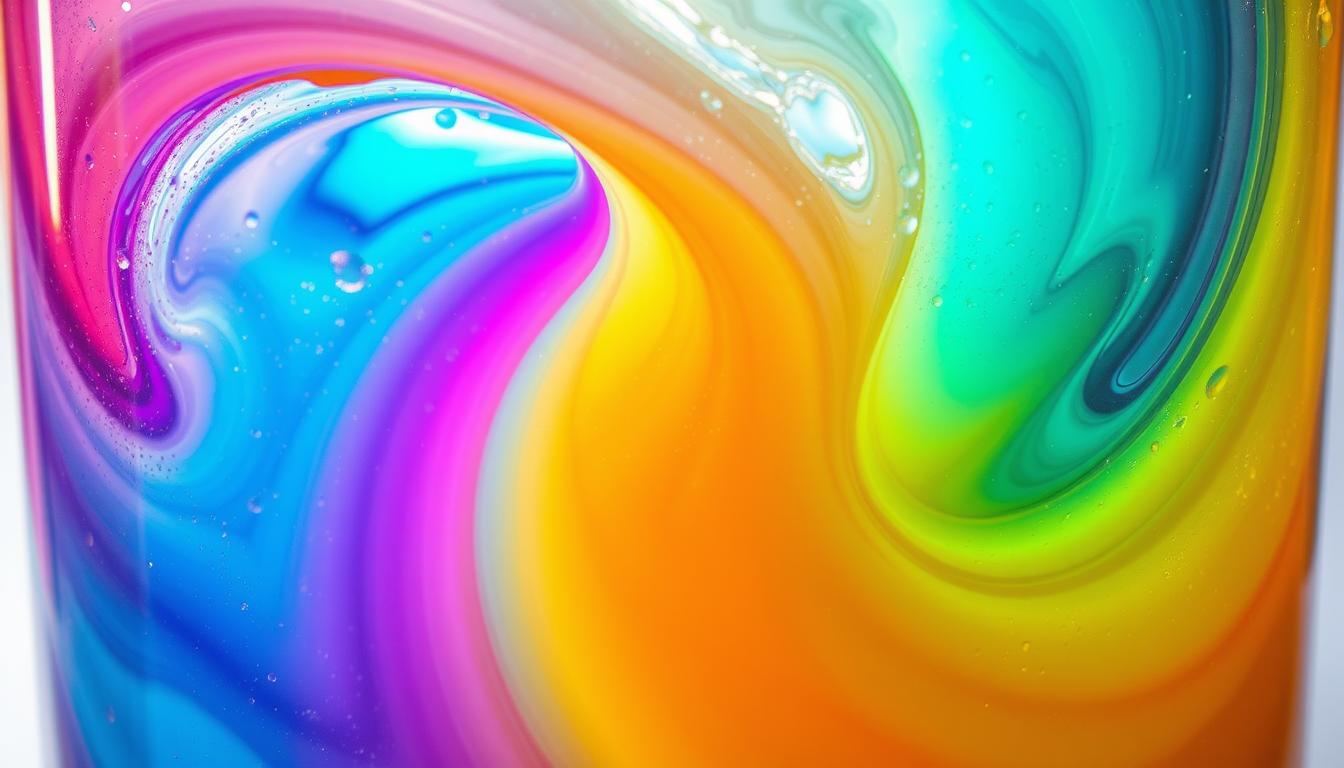
Density determines whether objects sink or float. In this case, different sugar-water mixtures form stacked layers. More dissolved sugar means heavier liquid. The formula Density = Mass ÷ Volume explains why purple might sit below yellow in your glass.
These liquid bands stay separate because their densities vary. Heavy solutions resist mixing with lighter ones above. This creates stable, eye-catching stripes that mimic a rainbow’s arc.
Why This Experiment Is Exciting
Educators praise how this hands-on approach sticks with learners. Watching colors layer themselves makes density principles unforgettable. One teacher notes: “Students grasp specific gravity faster when they see red syrup sinking through blue water.”
It’s also accessible. With just food coloring and kitchen supplies, you can show how ocean currents form or why oil floats on water. The instant visual feedback keeps kids engaged longer than textbook diagrams.
Fundamentals of Density and Solution Science
Ever wonder why some liquids stack like pancakes? The answer lies in their density – a property determined by how tightly packed molecules are within a substance. This invisible force governs everything from icebergs floating to your layered rainbow effect.

The Science Behind Sugar Solutions
When you stir granulated sugar into water, something remarkable happens. Each crystal breaks apart into microscopic particles that spread evenly – a process called dissolution. As one teacher explains:
“Students are shocked to learn dissolved sugar still exists – it’s just too small to see.”
More sugar means more mass in the same volume. A cup of water with 4 tablespoons of sweetener weighs significantly more than one with just 1 spoonful. This creates solutions with varying densities that naturally separate when carefully layered.
Three key factors make this work:
- Molecular distribution: Sugar particles fill spaces between water molecules without expanding the liquid much
- Mass accumulation: Each added teaspoon increases weight without dramatically changing volume
- Gravity’s pull: Heavier solutions sink while lighter ones rise, creating stable bands
This principle explains real-world phenomena like salty ocean currents sinking below fresh river water. When you pour the most concentrated sugar solution first, it forms a base for subsequent layers – a hands-on lesson in solution chemistry.
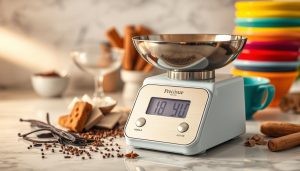
Gathering Materials and Supplies
Perfecting your liquid rainbow starts with proper preparation. You’ll need identical glasses – four to six clear containers work best – to maintain consistent measurements. Warm water dissolves sugar faster, so keep a kettle or microwave nearby.

Essential supplies include measuring tools: a 1-cup measure for water and teaspoons for sugar. Use different food coloring shades for clear layer differentiation. A plastic straw or kitchen baster becomes your precision tool for stacking solutions without mixing.
Consider these extras for smoother execution:
- Tall test tubes for dramatic vertical displays
- Paper towels for quick cleanups
- Funnel to prevent spills during transfers
Verify your display container’s capacity matches the combined water volume from all glasses. This prevents overflow when layering. Matching container sizes ensure each colored solution occupies equal space, making density differences visually striking.
Step-by-Step Guide to Creating a Sugar Density Rainbow
Transform ordinary kitchen staples into a vibrant science display through methodical preparation. This process combines measurement accuracy with careful pouring techniques to achieve crisp color separation.

Preparing Colored Sugar Solutions
Begin with four identical glasses filled with 1 cup warm water each. Add 2-3 drops of different food coloring to each container – red, yellow, green, and blue work well. Gradually mix increasing amounts of sweetener: 0, 2, 4, 6, and 8 tablespoons respectively.
Stir each sugar solution until crystals vanish completely. Warm liquid accelerates dissolution, creating uniform mixtures. Label containers to track concentrations – this prevents confusion during layering.
Layering Techniques Using a Baster or Straw
Load your densest liquid (8-tbsp mix) into a straw or baster. Tilt the display glass and slowly release the solution against its inner wall. The heavy syrup will pool at the bottom without disturbing future layers.
Repeat with progressively lighter solutions, maintaining the tilt angle. A science teacher advises:
“Pour at glacier speed – patience prevents color bleeding between bands.”
Watch as each new layer floats atop the previous one, forming distinct stripes.
Ensuring Precise Measurements
Use leveled tablespoons when adding sweetener – heaping scoops alter density ratios. Verify water volumes match exactly across all glasses. Even ¼ cup variation can disrupt the stacking sequence.
For optimal results:
- Maintain solution temperatures within 5°F
- Use graduated cylinders for advanced accuracy
- Allow layers to settle 30 seconds before adding next
These controls help achieve razor-sharp divisions between colored liquids, making density differences unmistakably clear.
Tips, Tricks, and Best Practices for a Successful Experiment
Mastering liquid stratification requires precision and a few expert strategies. Four distinct colors typically yield the clearest results while maintaining manageable complexity. Always begin with your most concentrated solution and work downward to lighter mixtures.

Troubleshooting Common Layering Issues
If colors bleed together, check your pouring speed. A science instructor advises:
“Move like honey dripping from a spoon – slower than you think necessary.”
Use yourstrawto gently release each new layer against the container’s side, letting gravity guide the flow.
Temperature inconsistencies often sabotage crisp divisions. Keep all solutions at room temperature – cold liquids sink unpredictably while warm ones rise. Verify complete sugar dissolution by holding glasses to light; undissolved crystals scatter light visibly.
When bands refuse to separate, adjust sweetener ratios. Add ½ tablespoon increments to denser mixtures until layers stabilize. Tall, narrow containers prevent sideways spreading, giving clearer vertical layers. Practice with two-color trials first to refine your straw technique.
Persistent mixing? Try these fixes:
- Rinse tools between uses to remove residue
- Let each layer settle 45 seconds before adding next
- Verify identical temperature across all colored liquids
Record each attempt’s results to identify patterns. With patience, you’ll develop the steady hands and observational skills needed for flawless liquid stratification every time.
Create a Sugar Density Rainbow
Witness physics in action as colored liquids defy mixing through strategic density differences. Start with your heaviest solution – typically the deepest hue – poured slowly into a clear container. As one educator observes:
“The tower effect mirrors how saltwater wedges form where rivers meet oceans.”

Use your straw like a precision instrument. Angle it against the glass wall when adding subsequent layers, letting gravity position each band. Lighter solutions naturally float atop denser ones, creating stable divisions through molecular interactions.
Four critical factors ensure success:
- Maintain temperature consistency across all liquids
- Verify complete sweetener dissolution before layering
- Pour at 45-degree angles using controlled pressure
- Allow 20-second settling between additions
This hands-on experiment demonstrates why Mediterranean seawater sinks below Atlantic currents. The completed tower becomes a tangible model of liquid stratification – a concept usually explained through abstract textbook diagrams.
Through careful construction, you’ll reveal hidden fluid dynamics using everyday materials. The vivid results make complex principles like specific gravity and solution chemistry instantly understandable for visual learners.
Enhancing the Experiment with Scientific Inquiry
Turn your colorful demonstration into a full scientific investigation by asking probing questions. Start with testable queries like “How does sugar concentration impact how solutions stack?” This approach transforms playful exploration into structured science discovery.
Recording Observations and Results
Keep a detailed log tracking each step and outcome. Note exact measurements of water density variations and layer stability. A teacher suggests:
“Sketch the final layered result – the visual record often reveals patterns numbers miss.”
Use charts to compare sweetener amounts against how long layers stay distinct. Track environmental factors like room temperature that might affect results. Digital timers help record separation durations accurately.
Interpreting the Density Differences
Analyze why certain solutions stack better than others. Higher sugar content increases water density, creating more stable divisions. Compare your findings to known liquid behaviors – like how oil floats on vinegar in salad dressing.
Unexpected mixing between layers? This could indicate measurement errors or temperature fluctuations. Refine your technique by testing different densities in smaller increments. The process teaches critical thinking through hands-on science analysis.
Conclusion
This vibrant exploration transforms kitchen chemistry into lasting scientific understanding. Your completed density column demonstrates how varying amounts of dissolved sweetener create stable, colorful layers in a single glass. Through precise measurements and careful pouring, you’ve revealed invisible molecular interactions that govern liquid behavior.
The experiment’s beauty lies in its dual purpose – a striking display that survives for days while teaching core principles. Those vivid bands show why ocean currents form distinct layers and how solutions with different weights naturally separate. You’ve practiced essential lab skills like controlling variables and observing gradual changes.
Young scientists particularly benefit from seeing abstract concepts made tangible. The stack top phenomenon helps explain why ice floats or hot air rises. Educators can expand this activity into discussions about marine ecosystems or beverage manufacturing processes.
With your mastered techniques, try testing new variables – swap sweeteners or adjust water temperatures. Each variation reinforces how density impacts our physical world. This hands-on approach turns fleeting curiosity into enduring knowledge, proving science thrives beyond textbook pages.