Did you know that a single preservation method removes up to 99% of moisture from ingredients while keeping nearly all their nutrients intact? This process, perfected by NASA for astronaut meals, now lets you store fruits, meats, and even full meals for over 25 years without refrigeration.
Originally developed for military rations and space missions, this technique uses extreme cold (-40°F) and vacuum pressure to turn ice directly into vapor. The result? Lightweight, shelf-stable items that retain their original taste and texture for decades. Unlike traditional canning or dehydration, it preserves vitamins and antioxidants far more effectively.
Home cooks and preppers alike are adopting this approach to combat food waste and build emergency supplies. Imagine having garden-fresh strawberries in winter or ready-to-eat soups that taste homemade years later. The best part? You don’t need a lab-grade setup to start.
Key Takeaways
- Removes 98-99% of moisture through freezing and sublimation
- Preserves nutritional value better than dehydration or canning
- Extends shelf life to 25+ years with proper storage
- Originally created for space programs and military use
- Reduces food waste while maintaining quality
- Requires specialized equipment for home use
Introduction to Freeze Drying
Centuries before laboratories existed, Andean communities perfected a clever way to store crops. They carried potatoes to mountain peaks, letting freezing nights and low pressure naturally remove moisture. This early preservation method kept vegetables edible for years—no modern tech required.
What Is Freeze Drying?

Today’s version—called lyophilization—uses controlled freezing and vacuum chambers. Items chill to -40°F, turning water into ice crystals. Then, gentle heat lets those crystals vaporize instantly, skipping the liquid phase entirely. This process preserves cell structures better than dehydration or canning.
Modern applications stretch beyond your kitchen. Pharmaceutical companies use industrial-scale systems to stabilize vaccines. Backpackers rely on lightweight meals that regain texture with water. Even pet food brands apply this technique to lock in nutrients.
Why It Matters for Your Food Preservation
Traditional storage often sacrifices quality for longevity. Freeze-dried items retain 97% of vitamins and antioxidants—far higher than other methods. You get shelf-stable ingredients that taste fresh after decades, perfect for emergency kits or seasonal abundance.
Consider these advantages:
- Compact storage: Removes 98% of weight from water-heavy items
- No preservatives: Maintains natural flavors without additives
- Versatile use: Rehydrates quickly for cooking or eats crispy as snacks
This approach solves two modern problems: reducing waste and ensuring food security. Whether preserving garden harvests or preparing for adventures, it offers reliability older techniques can’t match.
Understanding the Science Behind Freeze Drying
Preserving ingredients for decades requires more than basic cooling—it demands precise physics. The key lies in a phenomenon called sublimation, where ice transforms directly into vapor without melting. This scientific principle powers modern preservation while keeping nutrients intact.
The Lyophilization Process Explained

Lyophilization occurs in three stages. First, items freeze at -40°F, locking their structure. Next, vacuum pressure pulls ice crystals into vapor during primary drying. Finally, secondary drying removes leftover moisture using slightly warmer temperatures.
This method leaves tiny pores where ice once existed. These air pockets explain why freeze-dried items crumble easily and rehydrate quickly. Unlike heat-based dehydration, this process maintains 97% of vitamins and antioxidants.
| Method | Moisture Removal | Temperature | Nutrient Retention |
|---|---|---|---|
| Freeze Drying | 98-99% | -40°F to 70°F | 97% |
| Dehydration | 70-95% | 130-160°F | 60-75% |
Low-pressure environments let ice vaporize at colder temperatures than usual. This prevents cell damage, ensuring your food retains its original texture and color. By reducing water content to 1-2%, microbial growth becomes impossible—no preservatives needed.
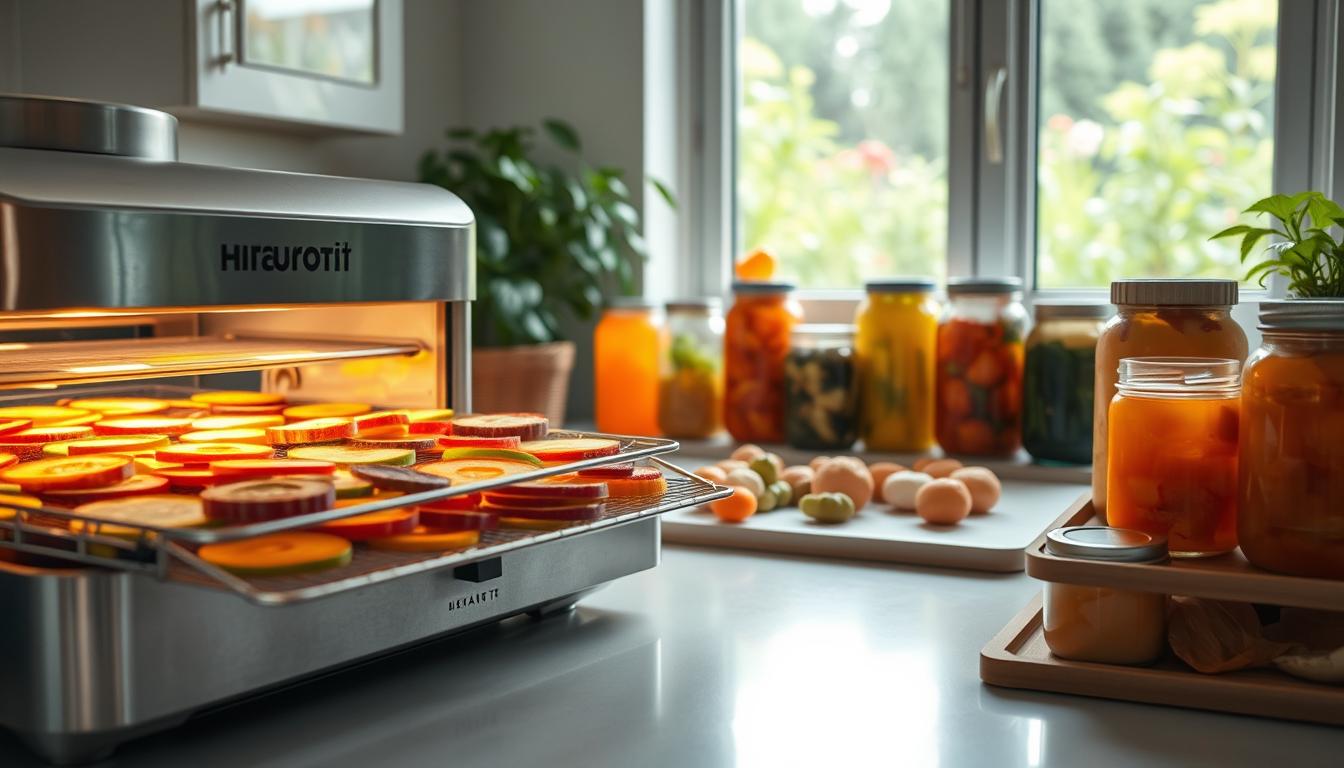
Essential Equipment and Methods for Home Freeze Drying
Modern technology brings professional-grade preservation within reach. Whether you prioritize convenience or cost-effectiveness, multiple approaches exist to achieve shelf-stable results.

Using a Dedicated Freeze Dryer
Specialized units streamline the entire process. These machines handle freezing, vacuum sealing, and drying through automated cycles. Pre-programmed settings adjust temperatures and timings for different food types—berries need different treatment than beef jerky.
Key features to consider include tray capacity (4-7 trays average), cycle duration (20-40 hours), and energy consumption. Advanced models track moisture levels, stopping when items reach 1-2% water content. While pricey upfront, they deliver restaurant-quality preservation with minimal effort.
Alternative Techniques Without a Machine
For occasional use, try dry ice or freezer-based methods. The dry ice approach requires:
- Shallow food trays
- Insulated cooler
- Protective gloves
Layer items with crushed dry ice (-109°F) in a sealed container for 36 hours. This forces sublimation through extreme cold. Home freezers work for small batches but remove less moisture—pair with vacuum sealing for better results.
While budget-friendly, these alternatives demand more monitoring. You’ll sacrifice consistency compared to dedicated freeze dryer outputs. Choose based on your preservation frequency and quality expectations.
Preparing Your Food for the Freeze Drying Process
Proper preparation determines whether your preserved ingredients retain their quality for years. This stage requires strategic planning and precise execution to maximize shelf life while maintaining texture and flavor.
Mastering Cutting and Pre-Treatment
Start by washing and peeling produce thoroughly. Cut ingredients into ½-inch cubes or slices for consistent results. Uniform pieces dry at the same rate, preventing partially preserved sections. For meats, trim excess fat and slice against the grain.
Consider these adjustments:
- Berries: Leave whole or halve large varieties
- Leafy greens: Blanch before processing
- Cooked meals: Reduce seasoning by 30%
Optimizing Freezing and Layout
Pre-freeze prepared items overnight at -10°F or colder. This creates stable ice crystals that sublimate efficiently. Arrange pieces in single layers on trays, leaving space between them like puzzle pieces.
Avoid these common mistakes:
- Overlapping slices of apple or potato
- Piling small items like peas or corn kernels
- Ignoring tray capacity limits
High-water content items like watermelon require thicker cuts, while dense vegetables benefit from thinner slices. Fatty foods like avocado need special treatment—pat dry and process quickly to prevent oxidation.
Techniques for Achieving “Freeze-Drying Magic: Space Food at Home”
Transforming everyday ingredients into long-lasting staples requires mastering a few critical steps. Whether you’re storing seasonal produce or creating emergency-ready meals, precision ensures your efforts yield shelf-stable results that maintain flavor and nutrition.
Step-by-Step Process
Begin by arranging pre-frozen items in thin, even layers on trays. Set your equipment to initiate the primary drying phase, where ice converts directly to vapor under vacuum pressure. Monitor temperature fluctuations closely—consistent -40°F conditions prevent texture degradation.
Complete the cycle with secondary drying to eliminate residual moisture. Store outputs in airtight containers with oxygen absorbers. Test batches first: properly preserved items should snap crisply and rehydrate fully in minutes.
Key Tips for Consistent Results
Prioritize low-moisture ingredients like berries or lean meats for initial attempts. Avoid overcrowding trays, which slows sublimation and creates uneven dryness. Label containers with dates and contents—proper rotation prevents waste.
For optimal longevity, maintain storage temperatures below 70°F and limit light exposure. Pair this method with vacuum sealing for maximum protection against humidity. With practice, you’ll create a pantry stocked with nutritious options ready for any scenario.