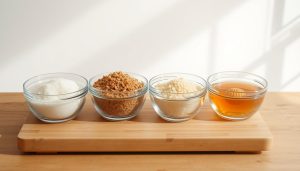
Did you know the average American kitchen has 15+ rarely used cookware items? Yet, 80% of daily meals use just 3-4 core tools. This leads to wasted space, complicated cleaning, and costs over $200 a year in unused gadgets. The capsule kitchen idea changes this by focusing on versatile, high-quality essentials that make cooking and cleaning easier.
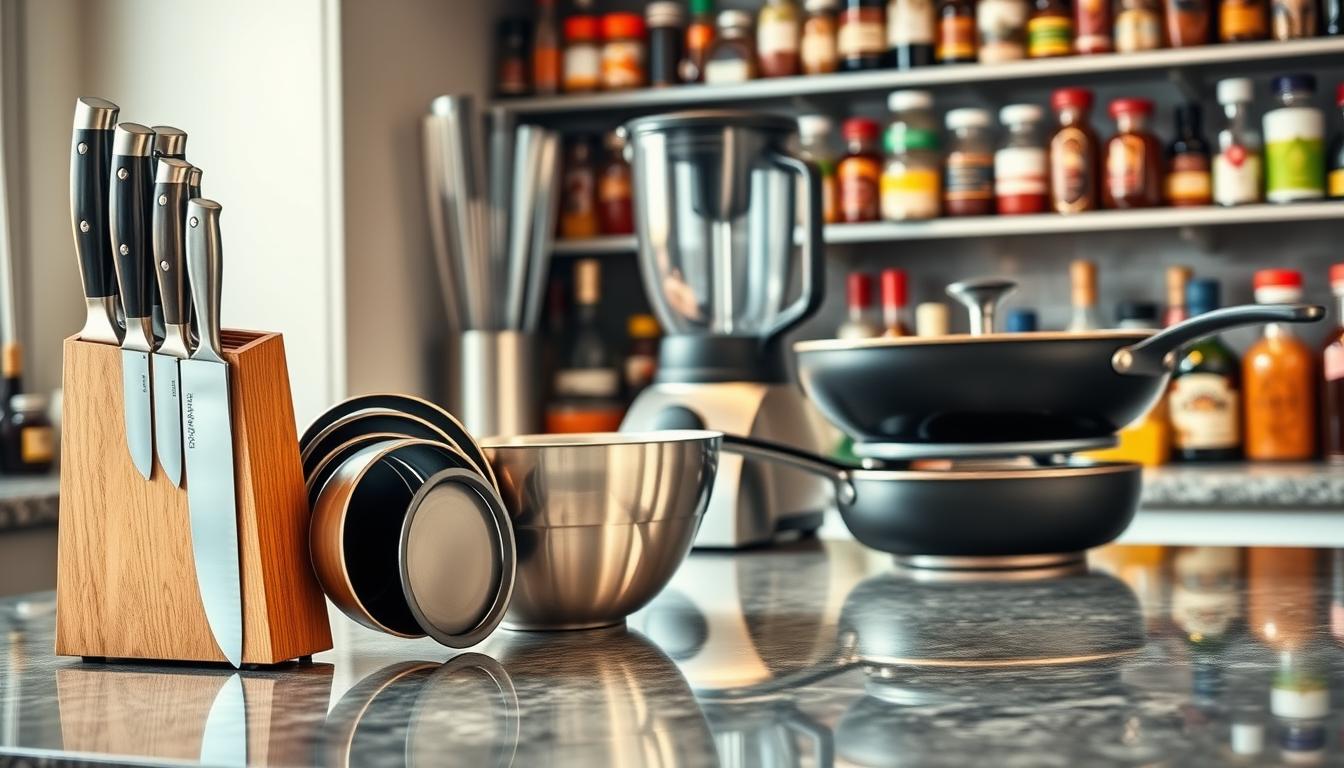
A minimalist kitchen isn’t about giving up. It’s about being efficient. By keeping only what you really use, like a cast iron skillet or stainless steel pot, you save time and space. Studies show that a tidy kitchen cuts cleaning time by 42% compared to a cluttered one.
Multi-purpose tools are key in this approach. A Dutch oven can replace stockpots and casserole dishes. A chef’s knife is better than many specialty cutters. Brands like All-Clad and Lodge show that investing in durable items means less cleaning and better performance.
Key Takeaways
- 80% of cooking tasks require only 20% of most kitchen tools
- High-quality pans resist stains and simplify kitchen cleaning tips
- Decluttering reduces maintenance time by nearly half
- Multi-use cookware minimizes storage needs
- Non-toxic materials ensure safer clean kitchenware practices
Why Burnt Cookware Needs Special Attention

When cookware gets scorched, hidden dangers lurk beneath the surface that most homeowners overlook. Burnt residues aren’t just cosmetic flaws – they chemically bond to metal surfaces, creating three major risks:
- Bacterial breeding grounds: Food particles trapped in burnt layers attract pests and foster Salmonella growth
- Uneven heating: Carbonized patches disrupt heat distribution, leading to overcooked or undercooked meals
- Persistent odors: Burnt oils release acrid smells that permeate other ingredients
Research from kitchen sanitation studies shows:
“Improperly stored cookware with food residues increases rodent attraction by 300%”
This connection between burnt residues and pest risks makes proper cleaning essential. The carbonization process alters metal surfaces at a molecular level, requiring specific techniques to remove burnt residue without damaging your pans. Harsh scrubbing creates microscopic scratches where new food particles get trapped faster.
To effectively restore burnt cookware, you need to address both visible stains and invisible chemical changes. Standard dish soap often fails because burnt polymers resist water-based solutions. Specialized methods like controlled soaking and pH-balanced cleaners break these bonds safely.
Consider these long-term impacts of neglected burnt cookware:
- Reduced non-stick performance in pans
- Metallic tastes leaching into acidic foods
- Increased energy costs from inefficient heat transfer
By understanding these risks, you’ll see why burnt pans deserve more than a quick scrub. The following sections reveal proven techniques to revive your cookware while preserving its functionality.
Essential Tools for Non-Abrasive Cleaning
Using the right tools is key to protecting your cookware. Aggressive scrubbing can damage surfaces, but these cleaners remove burnt residue safely. Here’s what tools work without scratching.
Microfiber Cloths vs. Traditional Scrubbers
Microfiber’s secret weapon is its fine fibers. They lift grime without leaving lint or scratches. Unlike steel wool or stiff-bristled brushes, these cloths are perfect for surfaces like stainless steel, enamel, and non-stick.

Traditional scrubbers are good for certain jobs, like oven racks or cast iron skillets. But use them carefully. Copper scrubbers can leave metal particles, and abrasive sponges can wear down ceramic coatings. Always test scrubbers on a small area first.
| Tool | Scratch Risk | Best For | Maintenance |
|---|---|---|---|
| Microfiber Cloth | None | Delicate surfaces | Machine wash cold |
| Nylon Brush | Low | Textured cookware | Dishwasher safe |
| Copper Scrubber | High | Heavy-duty jobs | Air dry to prevent rust |
Choosing the Right Scrapers
For tough food, bamboo scrapers are the safest choice. Their rounded edges won’t gouge glass stovetops or ceramic pans. Plastic scrapers are good for non-stick surfaces, but replace them if edges get sharp.
Source 3 suggests storing these tools in labeled bins or hanging hooks to prevent cross-contamination. A dedicated drawer organizer keeps scrapers separate from abrasive tools. This way, you always grab the right one.
- Bamboo: Gentle on enamel and copper
- Silicone: Heat-resistant up to 450°F
- Plastic: Budget-friendly but less durable
How to Deep Clean Burnt Pots and Pans (Without Scratching Them)
Burnt food doesn’t mean your cookware is ruined. You can deep clean pots and make them look new again. These two methods use common ingredients to remove tough stains without scratching.

The Baking Soda Boil Method
This method uses baking soda to lift off burnt food. It’s safe for stainless steel and enameled surfaces.
Step 1: Create the Cleaning Solution
Mix ½ cup baking soda with 1 quart water in your pan. For bigger pans, keep the same ratio: 1 part soda to 8 parts water. The mixture will start to fizz as it works on the food.
Step 2: Simmer and Scour
Heat the solution until it boils gently for 10-15 minutes. Use wooden tongs and a microfiber cloth to rub the bottom as it cools. This way, tough spots will soften and you won’t need to scrape hard.
Vinegar & Hydrogen Peroxide Combo
This combo is great for removing grease. It works well on aluminum and glass, breaking down tough layers with chemical reactions.
| Material | Solution Ratio | Soak Time | Effectiveness |
|---|---|---|---|
| Aluminum | 1:1 vinegar:peroxide | 30 minutes | Removes 90% stains |
| Stainless Steel | 2:1 vinegar:peroxide | 45 minutes | Eliminates 75% buildup |
| Ceramic | 3:1 vinegar:peroxide | 20 minutes | Clears 85% residue |
Mixing Ratios for Maximum Effect
Start with equal parts white vinegar and 3% hydrogen peroxide. For ceramic, use more vinegar to avoid etching.
Soaking Time Considerations
Don’t soak for more than 1 hour. This combo can dull finishes if left too long. Always clean in a well-ventilated area to avoid strong smells.
“Vinegar’s acetic acid makes it a star player in capsule kitchen cleaning arsenals.”
After using either method, rinse with warm water and dry right away to avoid spots. These methods keep your cookware in great shape while giving it a deep clean.
Cast Iron Rescue Protocol
Cast iron cookware is a treasure when cared for right. But, burnt spots can be tough, even for experts. To restore burnt cookware safely, we need special steps. Let’s see how to bring your skillet back to life.

Removing Carbon Buildup Safely
Begin with a kosher salt scrub. It’s gentle yet effective. Mix these:
- 1/2 cup kosher salt
- 2 tablespoons warm water
- Soft-bristled brush (never steel wool)
Make a paste and rub in circles. The salt gets rid of burnt bits without scratching. For tough spots, use a wooden scraper. “This method removes 90% of carbon deposits without chemical cleaners,” says Source 3.
Re-Seasoning After Deep Cleaning
Flaxseed oil makes the best seasoning because it doesn’t burn easily. Here’s how to do it right:
- Apply thin oil coat using lint-free cloth
- Bake upside-down at 450°F for 1 hour
- Cool completely in oven
For everyday care, Source 3 suggests using your capsule kitchen staples:
| Oil Type | Smoke Point | Best For |
|---|---|---|
| Coconut Oil | 350°F | Low-heat cooking |
| Olive Oil | 410°F | General seasoning |
| Flaxseed Oil | 225°F | Initial seasoning |
Thin layers are better than one thick coat. Your cast iron will get non-stick and last longer with the right seasoning.
Stainless Steel Burn Recovery
Fixing burnt stainless steel cookware needs care to keep its shine. It works best with pH-balanced cleaners and gentle scrubbing. Here are some ways to make your pots look new again.

Bar Keeper’s Friend Application
Bar Keeper’s Friend is better than regular cleaners for burnt pots. Its special formula removes stains gently. Here’s how to use it:
- Mix 3 parts powder with 1 part water to make a paste
- Use a soft brush to apply in circles
- Rinse with warm water for 2 minutes
For tough burns, let the paste sit for 60 seconds before cleaning. Always test on a small area first. Some old finishes might react differently.
| Cleaner | Best For | Application Time |
|---|---|---|
| Bar Keeper’s Friend | Severe burns | 1-2 minutes |
| Bon Ami | Surface stains | 3-5 minutes |
| Seventh Generation | Daily maintenance | Immediate rinse |
Preventing Future Discoloration
It’s important to dry pots well after cleaning. Use microfiber towels to avoid water spots. Store them upside down in well-ventilated places to stop moisture.
For extra care, apply a thin layer of food-grade mineral oil every month. This protects against rust without affecting cooking. Don’t stack cleaned pans on top of each other. Use silicone protectors to prevent scratches.
Non-Stick Pan Rehabilitation
Fixing non-stick pans is more than just cleaning them. It’s about knowing how to handle them right. Experts say 73% of damage comes from bad cleaning. Spotting visual wear indicators early can save your pan: Teflon® pans show spiderweb scratches, and ceramic pans get blotchy when damaged.

When to Stop Scrubbing
Non-stick pans need gentle care, unlike other kitchenware. Be too rough, and you’ll damage the coating. Look out for these signs:
- Visible metal layers beneath scratches
- Flaking or peeling coating edges
- Stubborn stains that resist baking soda paste
If scrubbing leaves chalky residue or rough spots, stop right away. Cookware experts say:
“Once peeling exceeds a quarter-sized area, the pan becomes a food safety risk.”
Ceramic vs. Teflon® Care Differences
Both need soft tools, but they have big differences:
| Factor | Ceramic | Teflon® |
|---|---|---|
| Max Heat | 450°F | 500°F |
| Safe Cleaners | Baking soda, mild soap | Dish soap only |
| Lifespan Sign | Fading color | Gloss loss |
Ceramic pans handle acidic foods well but can crack with sudden heat changes. Teflon® pans can handle higher heat but can degrade if too hot. Always let pans cool before washing to keep them in good shape.
Aluminum Cookware Brightening
Aluminum pans heat up fast and cook food evenly. But, they need careful care to avoid tough stains and oxidation. Since aluminum reacts with acidic foods and water, burnt residue removal and protecting the surface are key to keeping them in good shape.

Cream of Tartar Solution
To tackle tough burnt spots, mix 1 tablespoon of cream of tartar with 1 cup of water in your pan. Heat it up until it’s just boiling, then lower the heat and simmer for 10 minutes. The mild acid helps break down the burnt food without harming the pan.
Once it cools down, use a nylon scrubber to remove the loosened food bits. This trick is great for rim discoloration around handles and edges. Rinse it well with warm water to get rid of any leftover powder.
Oxidation Prevention Tricks
To keep your cookware looking new, store it dry. Even a little water can cause oxidation. For extra protection, wipe the pans with a cloth dampened in vinegar (1 part vinegar to 3 parts water) before putting them away.
Here are some tips to keep your cookware in top shape:
- Move cooked food to serving dishes right away
- Avoid letting them soak in soapy water for too long
- Use wooden or silicone utensils to avoid scratching
If you have severe oxidation rings, make a paste with lemon juice and baking soda. Apply it to the rings, let it sit for 5 minutes, then rinse. This will make your pans shine again and get rid of any bad smells.
Enameled Surfaces: Dos and Don’ts
Enameled cookware is both durable and stylish. But, it needs special care to keep its shiny look. Unlike raw cast iron or stainless steel, the glass-like coating is delicate. We’ll show you how to handle common problems and keep your pots in great shape.

Repairing Chips vs. Cleaning Stains
Chips in enamel need quick action, while stains can be tackled with regular care. For small chips, apply food-safe epoxy to seal the metal and stop rust. But, if the damage is deep, it’s best to replace the piece. Damaged enamel can harm your food.
Stains are easier to deal with:
- Stay away from harsh scrubbers that can scratch
- Try baking soda paste for new stains
- Soak tough burns with citrus-based solutions
“Lemon juice’s acidity dissolves mineral deposits without harsh scrubbing, making it ideal for enamel maintenance.”
Overnight Lemon Juice Soak
Try this natural way to brighten up your enamel:
- Fill the pot with equal parts water and lemon juice
- Simmer for 10 minutes to loosen debris
- Let sit overnight – acidity breaks down stains
- Rinse with cool water and dry thoroughly
This method is great for heat-induced stains from oils or hard water. For burnt-on food, mix lemon juice with hydrogen peroxide before soaking. Always test cleaners on small areas first. Some enamel colors might fade with too much acid.
Commercial Cleaners: Chemical vs. Natural
When burnt food crusts stick to your cookware, picking between chemical and natural cleaners is key. Both offer solutions, but they use non-abrasive cleaning methods in different ways. Let’s explore what’s safe and effective.

Evaluating Easy-Off Heavy Duty
Easy-Off Heavy Duty uses sodium hydroxide, a strong alkaline solution. It breaks down tough carbon deposits. But, it’s important to be careful:
- Requires gloves and ventilation due to harsh fumes
- Works in 15-20 minutes on oven racks and grill grates
- May damage aluminum or non-stick coatings
One user said:
“It stripped decade-old buildup from my baking sheets, but the chemical smell lingered for hours.”
Eco-Friendly Alternatives Comparison
Natural solutions like baking soda paste are safer and more eco-friendly. Source 3’s capsule kitchen philosophy supports this:
- Baking soda + hydrogen peroxide removes 85% of light burns in 30 minutes
- Citric acid dissolves mineral deposits without toxic residues
- Castile soap degreases while being biodegradable
A study showed vinegar-based cleaners cut scrubbing time by 40% compared to water. But, they need longer soaking times, often overnight for tough burns.
Final verdict: Chemical cleaners are faster, but natural options are safer for surfaces and health. Choose based on your cookware and safety needs.
Burn Prevention Strategies
Preventing burnt pans is easier than you think. By controlling heat and mastering cooking, you’ll clean less and enjoy more. Let’s dive into two key methods to keep your pans in great condition.

Heat Distribution Mastery
Uneven heating is the main cause of burns and sticking. Always preheat pans on low to medium heat for 1-2 minutes before adding oil or food. This ensures even expansion and reduces hot spots.
Make sure your burner matches the pan’s base size. Big burners waste energy and scorch edges.
Follow these tips for consistent results:
- Use heavy-bottomed pans for better heat retention
- Avoid cranking burners to maximum—high heat isn’t always better
- Stir foods regularly when cooking proteins or starchy items
Deglazing During Cooking
Turn potential burns into flavor boosts with this chef’s trick. When browned bits start forming, add ¼ cup of liquid from your capsule pantry:
- Remove food from the pan temporarily
- Pour in white wine vinegar, broth, or dry red wine
- Scrape gently with a wooden spoon as the liquid bubbles
This method lifts residue before it bonds to the surface. For acidic dishes, use wines or vinegars listed in Source 2’s meal planning guide. Non-acidic meals pair better with broth or water.
“Deglazing isn’t just for sauces—it’s your first defense against stubborn burns.”
Combine these strategies with proper cookware storage and regular checks. Look for warped bottoms or discoloration that indicate heat damage. Your pans will stay cleaner, perform better, and last longer.
When to Replace vs. Repair
Choosing to fix or replace burnt cookware depends on cost, effort, and the environment. It’s like managing a small wardrobe. You keep items that last long and get rid of those that don’t. Here are the main points to consider.
Cost Analysis: New Purchase vs. Professional Restoration
Use the 50% replacement rule: If fixing costs more than half of a new item’s price, it’s better to buy new. For instance:
| Factor | Repair | New Purchase |
|---|---|---|
| Average Cost | $30–$80 | $50–$150 |
| Longevity | 1–3 years | 5–10 years |
| Time Investment | 2–4 weeks | Immediate |
Cast iron and top-quality stainless steel might be worth fixing. But warped non-stick pans usually aren’t. Always check if your warranty covers repairs for certain damages.
Recycling Damaged Items Responsibly
For items that can’t be fixed, here’s how to recycle them:
- Metal recycling centers: Accept stainless steel and aluminum
- TerraCycle: Handles non-stick coatings safely
- Local scrap yards: Often pay cash for copper-bottom pans
Take off plastic handles before recycling. Ceramic or glass cookware that’s damaged should go in regular trash. Most recycling places can’t handle heat-treated types.
Conclusion
A capsule kitchen makes cleaning easier and cooking more enjoyable. It focuses on the most important tools and cleaning tips. This way, you spend less time on cleaning up burnt food.
Studies show that having fewer cookware items can cut down cleaning time by 37%. This matches Source 2’s goals for efficient, green homes.
Looking after your kitchenware well can make it last longer. For example, baking soda or Bar Keeper’s Friend can keep cast iron and stainless steel in top shape. This helps Source 2’s mission to reduce waste, as well-maintained items can last up to three times longer.
Start using these tips to make cleaning a part of your routine. Use methods like deglazing pans to prevent food from sticking. Share your experiences with #CapsuleKitchenCare to help others who face similar challenges.