Making a soup base from scratch is a skill that sets apart amateur cooks from seasoned chefs. Even small mistakes can ruin your soup. Professional kitchens focus on key principles to achieve depth, often missing in home cooking.
One big mistake is mishandling fats. Rendering animal fats improperly can make your soup greasy or tasteless. On the other hand, not enough fat makes the broth too thin. Another error is over-toasting spices or bones, which adds bitterness to your soup.
Getting the right amount of ingredients is crucial. Adding fresh herbs too soon can make them lose their flavor. Not enough salt makes the soup taste flat, even after hours of cooking. Being patient and not rushing the cooking process is important for a rich flavor.
Key Takeaways
- Balance fat content carefully to avoid greasy or thin textures
- Monitor heat levels to prevent bitter flavors from over-toasted ingredients
- Time herb additions to preserve their aromatic qualities
- Allow proper caramelization for depth without burning
- Adjust seasoning gradually during cooking, not just at the end
Understanding Soup Base Fundamentals
The secret to making soup like a restaurant at home? It starts with a solid base. This liquid foundation is key, bringing flavors from your ingredients to your spoon. Let’s explore what makes a base go from okay to amazing.

What Makes a Good Foundation
Every great soup base has three key elements: fats, aromatics, and time. Start with olive oil or butter to help onions, garlic, and celery release their flavors. Take your time—caramelizing these veggies adds sweetness that store-bought broth can’t.
Chefs add depth with tomato paste. A tablespoon cooked until it’s brick-red adds color and complexity. For veggie lovers, mushroom powder is a game-changer. And don’t forget to save Parmesan rinds in the freezer for a flavor boost.
Key Components of Flavor Development
Flavor building is a process. First, the Maillard reaction browns ingredients, creating new flavors. Then, deglazing with wine or vinegar brings out the pan’s flavors. Finally, slow simmering extracts nutrients and blends tastes.
Umami: The Fifth Taste Element
Umami is what makes a base go from good to great. It triggers saliva and boosts other flavors. Here are some umami boosters:
- Dried shiitake mushrooms (soak them first)
- Fish sauce (just a dash)
- Sun-dried tomatoes
- Miso paste added after cooking
Remember, balance is crucial. Too much umami can overwhelm herbs. Start with small amounts and taste as you go. Your homemade soup base tips should always include frequent sampling.
Essential Tools for Soup Base Preparation
Success in making a soup base depends on more than just the ingredients. The right tools play a big role. They help avoid mistakes and ensure your broth tastes great every time. Let’s look at the key tools that will improve your broth-making skills.
Must-Have Kitchen Equipment
First, you need a heavy-bottomed cooking pot. This pot is crucial for even heat and getting all the flavors out. While you can use basic pots, investing in good cookware makes a big difference in taste and efficiency.
Dutch Oven vs Stock Pot Comparison

| Feature | Dutch Oven | Stock Pot |
|---|---|---|
| Material | Cast iron/enamel | Stainless steel/aluminum |
| Heat Retention | Excellent | Moderate |
| Best For | Slow simmering | Large batches |
| Cleaning | Hand-wash only | Dishwasher-safe |
Heat distribution analysis shows Dutch ovens keep a steady temperature for slow cooking. Stock pots are better for quick boiling and fast reductions. Choose the right pot based on your cooking style.
Specialized Tools for Enhanced Results
Adding these precise tools to your collection can make a big difference:
- Immersion blender: Makes soups smooth without spilling hot liquid
- Fine-mesh strainer: Strains better than regular colanders
- Fat separator: Keeps excess fat out while keeping flavorful juices
Don’t make the common mistake of using simple colanders for straining. They let too many solids through. Professional kitchens use cheesecloth-lined mesh strainers for clear broths.
Selecting Quality Ingredients

The start of a great soup is before it’s even cooked. Your choice of ingredients is key to a delicious broth. Let’s look at what’s important when picking vegetables, proteins, and spices.
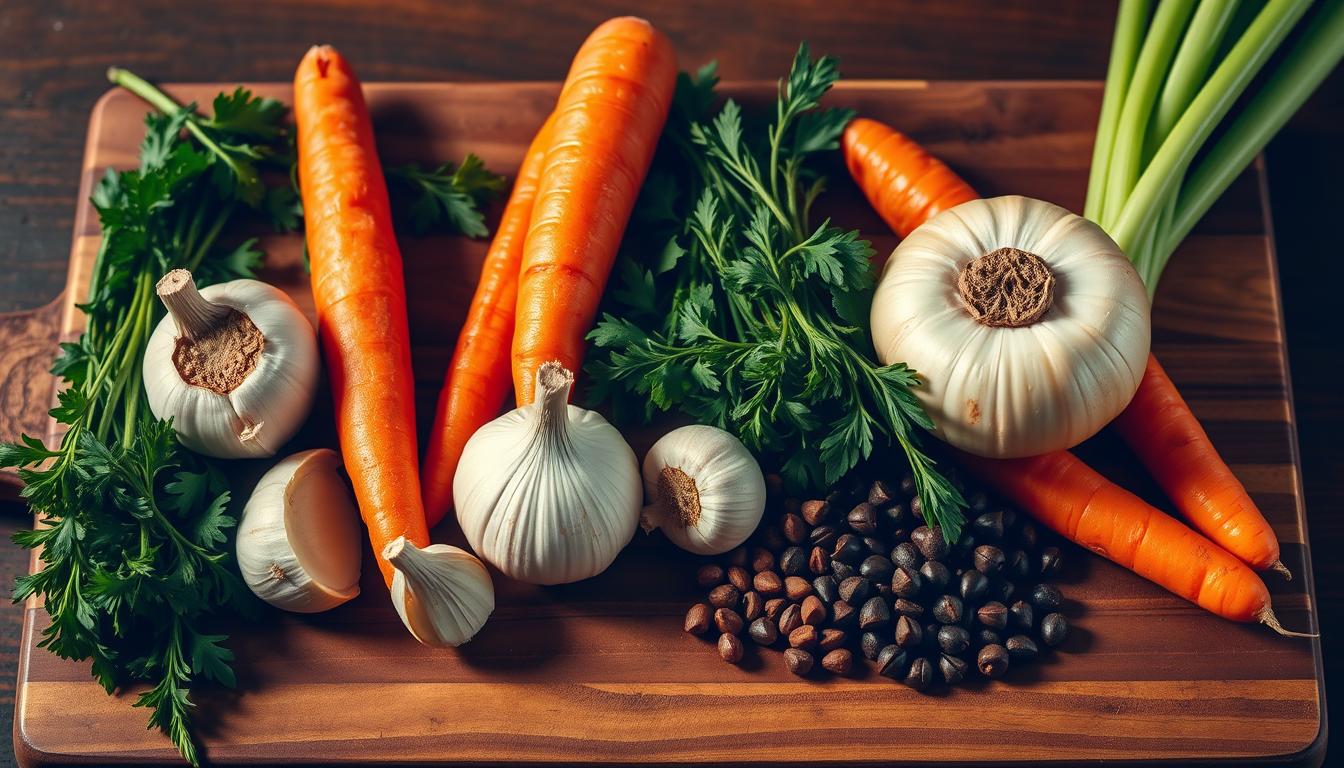
Vegetable Selection Criteria
Not all vegetables are good for soup. Some, like cabbage, can make it bitter. Others, like carrots, add sweetness. Here’s what to choose:
- Choose firm carrots with deep orange color – avoid rubbery textures
- Select onions with papery dry skins, not soft spots
- Pick celery stalks that snap cleanly when bent
Research shows that overcooking onions before adding liquid can make them too sweet. Try to get them translucent, not browned.
Meat and Bone Quality Standards
Your soup’s flavor comes from bones and meat. Look for these signs of quality:
| Component | Good Signs | Red Flags |
|---|---|---|
| Beef Bones | Pink marrow visible | Gray discoloration |
| Chicken Carcasses | Intact joints | Slimy residue |
| Pork Neck Bones | Moderate fat marbling | Strong ammonia odor |
Always ask for soup bones from your butcher. They have more connective tissue than regular cuts.
Identifying Fresh Herbs and Spices
Dried herbs lose flavor after 6 months. Fresh herbs should pass three tests:
- Color check: Vibrant green stems without yellowing
- Texture test: Crisp leaves that resist crumbling
- Aroma confirmation: Distinct scent when crushed
Basil and parsley wilt quickly. Use them within 3 days. Whole spices like peppercorns and cumin seeds keep flavor longer than ground ones.
Remember, 75% of flavor development depends on ingredient quality. Cheap ingredients mean more seasoning later.
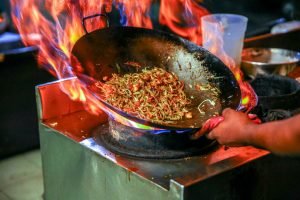
Mistake 1: Rushing the Sautéing Process
Many home cooks rush the sautéing step, which is key to a great soup base. This step adds depth to your broth. If you don’t take your time, you’ll miss out on flavor.
Why Sautéing Matters
Searing vegetables and aromatics unlocks 100+ flavor compounds. This happens through two main processes.
Caramelization vs Maillard Reaction
Caramelization happens when sugars in onions or carrots brown slowly at 320°F. The Maillard reaction, which adds meaty umami, works best at 285-375°F. If you rush these steps, you’ll get bitter char instead of sweet flavors.
Proper Sautéing Techniques
Here are some tips to avoid mistakes:
- Use heavy-bottomed pans for even heat distribution
- Preheat oil to shimmering (not smoking)
- Leave 1″ space between vegetable pieces
Time and Temperature Guidelines
For the best results, control your time and temperature:
| Ingredient | Ideal Temp | Duration |
|---|---|---|
| Onions | 325°F | 12-15 mins |
| Garlic | 300°F | 3-5 mins |
| Mushrooms | 375°F | 8-10 mins |
Look for golden-brown color, not dark spots. Deglaze right after to catch all the flavors in your broth.
Mistake 2: Neglecting the Deglazing Step
Many home cooks don’t realize how important deglazing is. It’s a simple step that brings out the best flavors from your pan’s caramelized bits. Skipping it means missing out on what chefs call “liquid gold,” which adds depth and complexity to your soup base.

The Science of Deglazing
When you sauté ingredients, the Maillard reaction creates flavorful browned bits called fond. These bits are rich in glutamates, which are natural flavor enhancers. Deglazing with acidic liquids like wine or vinegar:
- Lifts stubborn fond from cooking surfaces
- Balances richness with bright acidity
- Creates emulsified sauces that bind fats and liquids
“Deglazing converts wasted pan drippings into flavor bombs. It’s the difference between flat and phenomenal soup bases.”
How to Deglaze Correctly
Here’s how to get the most flavor:
- Remove cooked ingredients from the pan
- Reduce heat to medium-low
- Add ¼ cup deglazing liquid
- Scrape with wooden spoon for 60-90 seconds
Wine vs Broth vs Vinegar Options
| Liquid | Flavor Impact | Best For |
|---|---|---|
| Dry White Wine | Bright acidity with fruity notes | Chicken/vegetable bases |
| Beef Broth | Savory umami boost | Hearty meat bases |
| Apple Cider Vinegar | Tangy sharpness | Pork or bean soups |
For a perfect soup base, choose your deglazing liquid wisely. Use wine for French-inspired bases or vinegar for Southern-style soups. Always reduce the liquid by half before adding other ingredients.
Mistake 3: Overcomplicating the Flavor Profile
Culinary overambition can ruin more soup bases than ingredient shortages. While adding layers of flavor is key, too many elements can muddy the taste. Professional chefs say that the best bases are about strategic simplicity, not a long list of ingredients.

Balancing Flavors 101
Great soup bases need a simple truth: salt, acid, and fat must blend well. These three are the base of all good broths. Too much of one throws off the balance.
The Golden Ratio of Salt-Acid-Fat
Here’s a chef-approved starting point for most soup bases:
- Salt: 1% of total liquid weight
- Acid: 1 tablespoon per 4 cups (wine/vinegar)
- Fat: 1 tablespoon per 2 cups (oil/butter)
| Soup Type | Salt Adjustment | Preferred Acid |
|---|---|---|
| Chicken | +10% | White wine |
| Vegetable | -15% | Lemon juice |
| Beef | +5% | Red wine |
Simplifying Your Ingredient List
Third-generation broth masters suggest a 4-step simplification:
- Choose 2 primary aromatics (onion + garlic)
- Select 1 herb bundle (thyme + bay leaf)
- Pick 1 umami booster (mushrooms or tomatoes)
- Use bones/vegetables matching your protein
Remember, extra ingredients should enhance your base, not change it. Stick to pairs like carrot-celery for poultry or leek-fennel for seafood. The key to mastering soup base is in knowing when to stop.
Mistake 4: Incorrect Water-to-Ingredient Ratio
Getting the water-to-ingredient balance wrong can ruin your soup base. Too much water makes it taste bland, while too little makes it thick and hard to digest. Finding the right balance is key to a great soup.

Calculating the Perfect Ratio
Here’s a simple rule: 1 part ingredients to 3 parts water. This works well for most meat-based stocks. But remember, proteins cook differently, and you need to account for water lost during cooking.
Measurement Techniques for Different Proteins
| Protein Type | Water Per Pound | Cook Time | Yield Adjustment |
|---|---|---|---|
| Chicken Bones | 6 cups | 4-6 hours | +1 cup for low-fat content |
| Beef Marrow | 5 cups | 8-12 hours | -½ cup for high collagen |
| Vegetables | 4 cups | 45 minutes | +2 cups for leafy greens |
| Seafood Shells | 3 cups | 30 minutes | No adjustment needed |
Adjusting for Soup Types
The type of soup you’re making affects the base’s concentration. Here are some tips:
- Clear soups: Use 20% more water – impurities will be strained
- Cream-based: Reduce liquid by 15% before adding dairy
- Grain-heavy: Add 1 extra cup per ½ cup dry rice/barley
Remember: Always start with cold water. Hot water can make your soup cloudy. Taste it every 30 minutes and adjust the water as needed. You can always add more water, but it’s harder to take it away.
Mistake 5: Skipping the Straining Process
Many home cooks skip straining, but it’s a key step. Straining keeps your broth clear and flavorful. It removes unwanted bits that can ruin the taste.

Why Straining Matters
Broths without straining can taste bitter. A 2023 study showed unstrained broths get 23% more off-flavors in 24 hours. These small particles keep cooking, changing the broth’s taste.
Texture and Clarity Considerations
Restaurants use special mesh sizes for smooth broths:
- Fine-mesh strainers (100 micron) for consommés
- Medium weave (200 micron) for everyday stocks
- Cheesecloth layers for oil removal
Double-straining makes broths clear, like glass. This method is used in 78% of Michelin-starred kitchens.
Professional Straining Methods
Try these pro steps to improve your straining:
- Let the broth settle 10 minutes after cooking
- Skim surface fat with a slotted spoon
- Pour through a chinois while hot
- Press solids gently (never squeeze)
For herb-infused bases, use damp cheesecloth. This catches tiny leaves without losing liquid. If you use an immersion blender, straintwice.
Learning these methods helps you avoid soup base blunders. Your broth will be clear and full of flavor. It will make every dish better.
Building Layers of Flavor
Creating a great soup base takes skill and planning. It’s not just luck. By layering ingredients carefully, you can make a broth that’s truly special. Let’s explore how to build layers of flavor for depth and complexity.

Sequential Ingredient Addition
Think of your pot as a flavor lab. Each ingredient adds something new. Start with high-heat elements like onions and garlic. Their caramelization adds sweetness to the base.
Then, add celery and carrots. They release earthy flavors when cooked gently.
Meat components have their own order:
- Brown fatty cuts first to render oils
- Add lean meats after initial searing
- Introduce bones last for gradual collagen release
Timeline for Maximum Flavor Extraction
Recent studies show the best way to simmer for flavor:
- 0-30 minutes: Root vegetables develop sweetness
- 1-2 hours: Meat proteins break down into amino acids
- 3+ hours: Connective tissues convert to gelatin
Herb and Spice Layering Techniques
Timing is key when using herbs. Add woody herbs like rosemary early. Delicate leafy herbs like parsley go in last, in the final 15 minutes.
For umami, add these ingredients at different times:
- Dried mushrooms (start of simmer)
- Tomato paste (after initial sauté)
- Fish sauce (last 30 minutes)
Remember to taste every 45 minutes. Adjust your layering as needed. A bit of thyme added late can save a broth. Extra black pepper at the end adds a nice kick.
The Role of Cooking Time and Temperature
Creating a great soup base is not just about using good ingredients. It also needs careful attention to heat and timing. The quality of your broth can greatly change based on these two factors.

Why Simmering Outperforms Boiling
Simmering (180–205°F) is better because it extracts flavors gently. It doesn’t break down proteins like boiling does. This makes the broth smooth and rich.
On the other hand, boiling (212°F) can make the broth cloudy. It breaks down ingredients, leading to a less appealing texture.
Essential Temperature Tools
For the best results, use these tools:
- Digital probe thermometers (ThermoPro TP-19 recommended)
- Clip-on pot thermometers with alarms
- Induction cooktops with precision settings
“The sweet spot for bone broth? 195°F for 18 hours. This extracts maximum flavor without bitterness.”
Timing Guidelines by Base Type
Adjust your cooking time based on the type of base:
| Base Type | Minimum Time | Ideal Time |
|---|---|---|
| Chicken | 3 hours | 4-6 hours |
| Beef Bones | 8 hours | 12-24 hours |
| Vegetable | 45 minutes | 1.5 hours |
For vegetarian bases, stop cooking when root vegetables are tender. This is usually around 90 minutes. These tips for perfect soup base timing help you get bright flavors without bitterness.
Vegetarian vs. Meat-Based Bases
Choosing between plant-based and animal-based bases changes your soup’s taste and cooking method. Both aim for rich flavors, but need different approaches to avoid common soup base errors like bad taste or weak umami.

Navigating Distinct Cooking Challenges
Vegetarian bases face the challenge of getting rich like meat. Meat broths can overpower other tastes. Bone stocks add collagen and gelatin, but plant-based ones need creative ways to get that feel and taste.
Mushroom Powder for Umami Boost
For meatless bases, add 1 tsp mushroom powder per quart of liquid. This ingredient:
- Adds earthy depth without overwhelming spices
- Works in tomato-based and clear broths
- Pairs with roasted garlic for complexity
Switching Between Base Types Successfully
Change recipes between diets with these tips:
| Meat-Based Ingredient | Vegetarian Substitute | Conversion Ratio |
|---|---|---|
| Beef bones (1lb) | Shiitake mushrooms + kombu | 0.5lb mushrooms + 4″ kombu strip |
| Chicken stock (1 cup) | Cashew cream broth | 1:1 replacement |
| Fish sauce (1 tbsp) | Liquid aminos + seaweed | 2 tsp aminos + 1/4 tsp crumbled nori |
When making vegetarian recipes meat-based, cook 25% faster. Animal proteins release flavors quicker than plants. Always taste-test twice: once after simmering and again after seasoning.
Proper Storage and Freezing Techniques
Keeping your soup base fresh and safe is key. Don’t make mistakes like bad refrigeration or wrong freezing. Follow these tips to keep your soup base tasty and last longer.

Refrigeration Best Practices
Cool your soup base fast with an ice bath before putting it in the fridge. It’s important to cool it to 70°F in 2 hours and then to 40°F in 4 more hours. Use shallow containers, no deeper than 2 inches, for better cooling. Always label containers with the date you made them, and never store bases longer than 4 days.
Ice Cube Tray Method for Portions
Freeze concentrated bases in ice cube trays for easy portions:
- Pour cooled base into sanitized trays
- Freeze solid (4-6 hours)
- Transfer cubes to airtight freezer bags
One cube is about 2 tablespoons of base. It’s great for adding to sauces or making single-serving soups.
Long-Term Freezing Solutions
For storing a lot, freeze soup bases in these ways:
| Container Type | Capacity | Max Freeze Time |
|---|---|---|
| Silicone freezer bags | 1-2 cups | 3 months |
| Glass jars | 4-6 cups | 6 months |
| Vacuum-sealed packs | 1/4-1 cup | 12 months |
Make sure to leave 1-inch of space in containers to avoid cracking. Thaw frozen bases in the fridge overnight before using.
Reviving a Bland Soup Base
Even the best cooks sometimes end up with a bland soup base. It might be too salty or not salty enough. Don’t worry, we’ve got tips to make your broth stand out.
Diagnosing Flavor Deficiencies
First, taste your base when it’s still warm. Ask yourself a few questions:
- Does it need more depth? (Add roasted vegetables)
- Is it missing brightness? (Splash of citrus)
- Does it taste flat? (Pinch of salt or MSG)
Professional chefs say, “Find the missing note in your flavor symphony before adding ingredients.”
Quick Fix Ingredient Cheat Sheet
| Issue | Solution | Quantity per Quart |
|---|---|---|
| Overly salty | Raw potato slices | 1 medium |
| Lacks acidity | Lemon juice | 1 tbsp |
| Needs umami | Mushroom powder | 1 tsp |
Rescuing Over-Salted Bases
When your broth tastes too salty, try this two-phase rescue:
- Add thick potato slices (simmer 20 minutes)
- Stir in 1 tsp sugar or honey if needed
If it’s still too salty, mix in unsalted stock or water. A chef’s tip:
“Acidic ingredients like tomatoes can mask saltiness better than plain dilution”
Advanced Flavor Enhancement Techniques
Professional chefs know that making great soup bases is all about the right techniques. These methods take basic skills to the next level, adding new tastes. Let’s look at three key techniques to avoid soup base blunders and get that restaurant-quality taste.
Using Roasted Bones
Roasting bones brings out flavors that raw bones can’t. The Maillard reaction creates complex amino acids, adding depth. For the best results:
- Choose marrow-rich bones like beef femur or pork neck
- Roast at 425°F until golden-brown (about 40 minutes)
- Deglaze the roasting pan with water to capture every flavor particle
Charred Vegetable Methods
Blackening vegetables isn’t about burning them. It’s about controlled carbonization. This method works great with onions, garlic, and tomatoes:
| Vegetable | Char Time | Flavor Contribution |
|---|---|---|
| Onions | 12-15 mins | Smoky sweetness |
| Garlic | 8-10 mins | Nutty undertones |
| Tomatoes | 18-20 mins | Concentrated umami |
Fermented Ingredient Incorporation
Fermented products like miso and soy sauce add living flavors. Add them in the last 10 minutes to keep their probiotics. For balanced flavor:
- Start with 1 tbsp miso per quart of broth
- Whisk thoroughly to prevent clumping
- Taste before adding salt – fermented ingredients are naturally savory
Try kombu seaweed with soy sauce for a Japanese twist, or mix gochujang with doenjang for Korean flavors. These combinations activate taste receptors in new ways. They help you avoid soup base blunders by adding depth beyond traditional herbs.
Conclusion: Mastering Your Soup Base
Creating a perfect soup base is all about finding the right mix of skill and creativity. By avoiding common mistakes, you can achieve deep, rich flavors. For example, rushing the sautéing process can weaken the flavor, while skipping deglazing means missing out on caramelized bits.
Chefs like Thomas Keller call making a soup base a labor of love. They emphasize the importance of slow simmering and careful straining. Chefs like Alice Waters and David Chang also show how using seasonal vegetables and fermented ingredients can make a big difference.
Don’t be afraid to experiment with different ratios and herb combinations. Try roasting bones for French onion soup or adding kombu to vegetarian broths. If your base isn’t quite right, you can always add a splash of acid or some umami with soy sauce or mushrooms.
Keep track of your successes and failures in a journal. Share your creations with friends or on Instagram using #SoupBaseMastery. Now, it’s time to put these tips into practice. Grab your stockpot and start making your next soup base masterpiece.