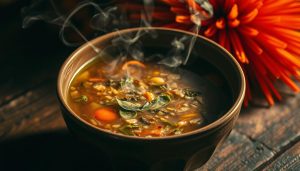
The secret to a great stock is precision. It’s not just about the ingredients. Getting the simmer time right makes all the difference. Research shows that breaking down collagen in meat stocks peaks at 4-6 hours. But simmer too long, and you might end up with a bitter taste.
Chefs see simmering as a science. Bones release gelatin slowly, and veggies give up their sweetness in about 90 minutes. Overcooking can make the stock cloudy and lose its minerals. On the other hand, if you rush it, you miss out on the full flavor.
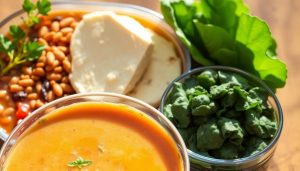
There are three main things to consider: the type of protein, how big the pieces are, and how clear you want the stock. Fish stocks need just 45 minutes, while pork bones do best in 8 hours. Keeping the temperature low is also key. You want gentle bubbles, not a full-on boil, to keep the stock clear.
Key Takeaways
- Collagen converts to gelatin best between 4-6 hours for meat stocks
- Vegetables lose flavor after 90 minutes of simmering
- Fish bones require under 1 hour to avoid bitterness
- Maintain temperatures below 200°F for clear results
- Skim surfaces regularly to remove impurities
The Science of Simmering: Why Timing Matters
Perfect stock needs precise timing. The difference between a rich broth and a thin one comes from heat’s effect on ingredients. Let’s explore the chemistry behind your simmering pot.

Collagen Breakdown and Flavor Extraction
Bones have collagen that turns into gelatin when heated slowly. This starts around 160°F and speeds up between 180-200°F. This is the best range for simmering.
Culinary scientists say chicken bones release:
- 50% of their collagen in the first 3 hours
- 80% by hour 6
- Less after 8 hours
Flavor extraction has its own timeline. Aromas from vegetables and herbs come quickly. But, meaty flavors take hours to develop. This is why carrots should be removed after 90 minutes to keep their sweetness. Beef bones need 12 hours to release deep flavors.
“Think of simmering as a relay race – vegetables pass the flavor baton to bones, which then hand off to herbs.”
Overcooking Risks: When Good Stock Goes Bad
Simmering too long can ruin your stock. Proteins break down too much, making collagen bitter. Vegetables become mushy, releasing starch. Fat emulsifies, making the broth cloudy. Delicate herbs lose their oils.
A 2023 study showed chicken stock gets off-flavors after 10+ hours. For the best stock, watch for these signs:
- Clear liquid turns slightly thick = collagen is extracted
- Vegetables still firm = flavor is balanced
- Gentle bubbles every 2-3 seconds = it’s simmering right
Undercooked stock lacks body, but overcooked stock can’t be fixed. Use timers, taste every hour after 4 hours, and listen to your gut when the broth is ready.
How Long Should You Simmer a Stock? (The Core Answer)
Getting your stock just right is all about finding the right balance. Cooking times can vary, but there are three key things to keep in mind. The type of protein you’re using, how it looks, and being patient all play a role in achieving the perfect flavor.

General Simmering Guidelines for All Stocks
Every stock starts with cold water and ends when the flavors are at their best. Professional chefs follow a simple rule:
Minimum vs Maximum Timeframes
| Stock Type | Minimum | Maximum | Flavor Peak |
|---|---|---|---|
| Vegetable | 30 min | 45 min | When onions soften |
| Chicken | 4 hrs | 6 hrs | Bones crumble easily |
| Beef | 8 hrs | 12 hrs | Marrow dissolves |
| Fish | 25 min | 45 min | Gills turn opaque |
Critical note: Never cook a stock for more than 24 hours. Cooking for too long can make the flavors off. For the best results, do a 30-minute flavor check every hour after the minimum time. Stop when the flavors stop getting stronger.
Visual Clues for Perfect Doneness
- Clarity shift: Cloudy → slightly translucent
- Bubble pattern: Champagne-like effervescence (1 bubble every 2-3 seconds)
- Bone transformation: Porous texture with fork marks
- Aroma plateau: When new smells stop developing
These timing tips help avoid overcooking. Fish stocks need extra care – overcooking can make them bitter in under 60 minutes. For vegetable broths, watch parsley stems: they turn olive-green when done.
Remember, stock simmering time isn’t set in stone. Adjust based on your stove’s heat and the material of your pot. Cast iron holds heat longer than stainless steel, which can save you 30 minutes when making beef stock.
4 Key Factors Affecting Simmer Time
Your stock’s flavor journey depends on four critical elements. These elements decide how long your pot should bubble. Let’s break down these variables so you can fine-tune your cooking schedule.

1. Protein Type: Bones vs Meat vs Vegetables
Bones need the longest simmer to release collagen. Beef knuckles require nearly twice the time of chicken carcasses. Meat scraps cook faster (2-3 hours), while vegetables turn bitter if cooked beyond 45 minutes. This table shows optimal times:
| Ingredient | Minimum Time | Maximum Time |
|---|---|---|
| Beef Marrow Bones | 8 hours | 12 hours |
| Chicken Carcass | 4 hours | 6 hours |
| Vegetable Scraps | 30 minutes | 45 minutes |
2. Bone Size and Density
Larger bones like oxtails need 10-12 hours, while small poultry bones finish in 4-6. Pro tip: Crack dense beef bones with a mallet to speed up gelatin release.
3. Altitude Adjustments
Water boils at lower temperatures in high elevations. At 5,000 feet, add 30 minutes to standard simmer times. Use this guide:
| Altitude | Time Increase |
|---|---|
| 3,000 ft | +15 minutes |
| 5,000 ft | +30 minutes |
| 8,000 ft | +45 minutes |
4. Desired Flavor Intensity
Need bold broth for pho? Extend simmer time by 25%. For delicate consommé, stop at the minimum mark. Three intensity levels:
- Light: 4 hours (subtle flavors)
- Standard: 6 hours (balanced taste)
- Robust: 8+ hours (deep umami)
Chicken Stock Masterclass

Getting chicken stock just right means paying close attention to time. Unlike other stocks, chicken needs careful timing to avoid bitterness. Let’s look at what makes the perfect cook time.
Whole Bird vs Leftover Carcass
Using a whole chicken? You’ll need 6-8 hours to get all the collagen out. If you’re using leftover rotisserie chicken, it’s faster—just 4-5 hours. Research shows that using just the carcass makes the stock 30% quicker.
The Golden Window: 4-6 Hours
Most people find the best flavor between hours 4 and 6. Here’s why:
- Cartilage turns into smooth gelatin
- Herbs blend in perfectly
- Onions and garlic reach their sweet spot
But, don’t let it simmer for more than 12 hours. It can start to get bitter. If you’re using a slow cooker, set timers for different parts of the night.
Pro Tip: The 30-Minute Flavor Check
Check the flavor at 30 minutes. Look for:
- Clear, rich chicken flavor
- Vegetables adding a touch of sweetness
- No harsh onion or garlic taste
If it’s not tasting right, adjust the heat. A low simmer keeps the flavors in better than a rolling boil. Add parsley stems or mushroom powder if it’s too light.
Beef Stock Breakdown
Mastering beef stock is all about understanding its unique needs. Unlike other stocks, beef’s strong flavor and tough connective tissue need special simmering techniques. This is how you get that deep, restaurant-quality taste.

Choosing Your Bones: Marrow vs Knuckle
The bones you choose greatly affect the flavor and texture of your stock. Knuckle bones are better than marrow bones for three main reasons:
- Collagen content: Knuckles have more connective tissue, making the stock gelatin-rich
- Fat control: Marrow bones release too much fat, clouding the broth
- Mineral yield: Knuckles are better at extracting calcium and magnesium
For the best results, mix 80% knuckle bones with 20% marrow bones. Always roast the bones first to get those caramelized flavors.
The Long Simmer Advantage
Beef stock needs 8-12 hours of slow simmering, almost twice as long as chicken stock. This long time is crucial for three reasons:
- It fully converts collagen to gelatin
- It extracts rich minerals from the marrow
- It develops complex flavors through the Maillard reaction
Double Stock Technique
Chefs employ the French remouillage method to boost flavor without over-extracting:
- Simmer fresh bones for 4 hours
- Strain and discard the spent bones
- Add new bones to the broth
- Simmer for an additional 6-8 hours
This layered method creates the best base for demi-glace or consommé. It keeps the stock clear. The right double stock should coat the back of a spoon like liquid velvet.
Vegetable Stock Simplified
Vegetable stocks are quick to make, unlike meat stocks that simmer for hours. They’re perfect for busy weeknights. But, timing is key to get the best flavor without bitterness.

The 45-Minute Maximum Rule
Tests show diced veggies release most flavor in 40 minutes. After that, they can become mushy and lose their oils. For the best taste:
- Start timing when it simmers steadily
- Use 1-inch veg pieces for better extraction
- Add herbs gently in the last 10 minutes
For those with FODMAP sensitivities, use scallion greens (green parts) instead of onions in the first 15 minutes. This keeps the flavor rich without causing discomfort.
Root Vegetables vs Leafy Greens
Each plant part needs a special cooking method. Here’s how to get the most flavor:
| Vegetable Type | Ideal Simmer Time | Preparation Tip |
|---|---|---|
| Root Vegetables (carrots, parsnips) | 30-45 minutes | Roast first for caramelized notes |
| Leafy Greens (kale, spinach) | 15-20 minutes | Remove stems to prevent bitterness |
| Mushrooms | 25-35 minutes | Combine dried and fresh varieties |
Strain the stock right after cooking to stop flavor loss. To intensify the taste, reduce the liquid by half over medium heat. This post-simmer technique helps control the flavor without overcooking the veggies.
Fish Stock Fundamentals
Mastering fish stock is all about precision. Unlike meat broths, fish stocks need careful timing to avoid bitterness. Using white fish frames or shellfish scraps, timing is key to a great flavor.
The 45-Minute Countdown Clock
Fish bones and heads release their flavors fast. Set your timer for 45 minutes maximum when cooking cod, halibut, or other lean fish. Going over this time can make the stock taste harsh and bitter.

Shellfish Exception: When to Stop Early
Shrimp, lobster, and crab shells have strong flavors that come out quickly. But, they can turn metallic if cooked too long. Here’s how to make a great shellfish stock:
- Simmer crustacean shells only 20-30 minutes
- Skim foam constantly to prevent bitterness
- Add aromatic herbs during the last 10 minutes
Pressure cookers are a modern shortcut. They can extract flavors in just 15 minutes at high pressure. This is great for recipes where time is of the essence.
Pressure Cooker Shortcuts

Modern pressure cookers change how we make stock. They turn long simmering times into quick flavor sessions. These tools keep the right temperature and save volatile aromas that old methods lose.
Time Reductions for Modern Cookers
Electric pressure cookers make stock faster, cutting simmering time by 75-85%. They also keep more gelatin than quick-boil methods. A 2022 study showed pressure-cooked chicken stock has 23% more collagen than stovetop stock, even though it’s cooked less.
Instant Pot Chicken Stock Timing
For quick, rich chicken broth:
- Use high pressure setting for 45 minutes
- Allow 15-20 minutes natural pressure release
- Strain immediately after opening
| Stock Type | Instant Pot Time | Traditional Equivalent |
|---|---|---|
| Chicken | 45 minutes | 6 hours |
| Beef | 2 hours | 12 hours |
| Vegetable | 15 minutes | 45 minutes |
Stovetop Pressure Cooker Adjustments
Traditional pressure cookers need special care:
- Maintain consistent medium heat
- Reduce cooking times by 65% (vs. open-pot)
- Add 1 extra cup of water to prevent scorching
Watch stovetop models closely. Their high PSI can reduce liquids too much if not watched. For the best results, follow the maker’s fill and timing advice.
Slow Simmer vs Rapid Boil
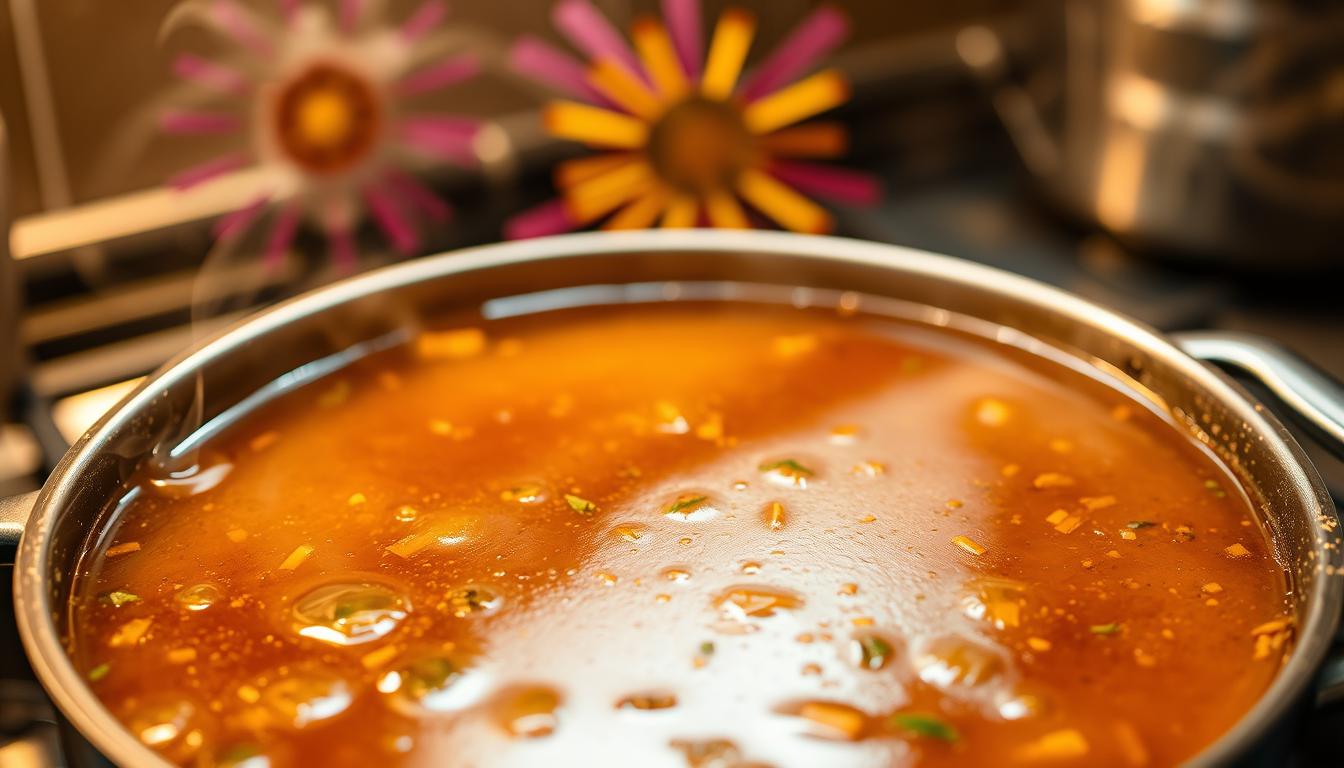
Learning to make stock starts with knowing about heat. Boiling might seem quicker, but simmering slowly brings out rich flavors. This is because simmering stays between 185-200°F, perfect for extracting flavors.

Bubble Frequency: What to Watch For
The bubbles in your stock tell you a lot. A proper simmer has:
- 1-2 small bubbles every 2-3 seconds
- Subtle steam (no big rolling)
- Little foam
Source 1 calls this stage “whispering bubbles.” On the other hand, rapid boiling:
- Mixes fat into the liquid (making it cloudy)
- Breaks down proteins too fast
- Evaporates broth too quickly
“Treat your stock like a sleeping baby – occasional murmurs are fine, but loud cries mean something’s wrong.”
Temperature Control Techniques
Getting the temperature right is key. Here are some tips:
- Use Source 3’s clip-on thermometer (±5°F accuracy)
- Start at medium-high heat, then lower to low once bubbles form
- Place a flame tamer/diffuser for electric stoves
If your pot keeps boiling, try these:
- Shift the lid slightly askew (1/4” gap)
- Add 1/4 cup cold water to lower temperature
- Skim foam right away – it traps heat
Stock-making is not a race. Keeping the temperature at 185-190°F for hours makes clearer, more complex stock than boiling.
Essential Simmering Tools
Making top-notch stock begins with the right tools. Patience and skill are key, but your gear affects heat control, flavor, and safety. Let’s look at two must-haves for stock preparation success.

Best Pots for Even Heat Distribution
The material of your pot is key for even heat during simmering. Here are some choices:
| Material | Heat Retention | Best For |
|---|---|---|
| Stainless Steel | Moderate | Quick stocks (vegetable/fish) |
| Enameled Cast Iron | Excellent | Bone-based stocks (8+ hours) |
| Aluminum Core | Fast response | Altitude adjustments |
Dutch ovens, like Le Creuset, are great for beef and chicken stocks. They have heavy lids and thick walls. Pyrex glass containers with fat-separator lids make cleanup easy.
Thermometer vs Visual Monitoring
Keeping the temperature between 185-200°F is vital for the best base. Use a digital thermometer if:
- You’re new to stock-making
- Cooking at high altitudes
- Preparing large batches
Experienced cooks often use visual signs:
- Single bubbles breaking surface every 2-3 seconds
- Gentle steam without violent boiling
- Consistent motion without splattering
Thermometers prevent undercooking, while visual checks avoid overcooking. Use wide-mouth jars for easy fat removal during storage.
Common Mistakes That Ruin Timing
Perfect stock needs precision. Even small errors can mess up your cooking schedule. Let’s look at three big mistakes that can ruin your simmering plans. We’ll also share tips to keep your broth on track.

Stirring Too Frequently
Stirring might seem helpful, but it can actually harm your broth. It releases starch from veggies, making the broth cloudy. Plus, it lowers the pot’s temperature each time you stir. This can add up to 15 minutes to your cooking time.
Lid On vs Lid Off Errors
Choosing the right lid approach is key. Keep lids on during the start to keep the heat steady. Then, remove them for the last 30 minutes to reduce the liquid. This helps balance the flavors and texture.
| Scenario | Reason | Result |
|---|---|---|
| Lid On Entire Time | Traps too much moisture | Watery, underdeveloped flavors |
| Lid Off Too Early | Excessive evaporation | Burnt taste; insufficient liquid |
| Proper Lid Timing | Controlled reduction | Rich, balanced consistency |
Overcrowding the Pot
Use a 1:2 chicken-to-water ratio to avoid overcrowding. Too many bones or veggies can cause some to overcook while others don’t extract enough. Always leave 2 inches of space at the pot’s rim for good circulation.
These timing mistakes are often overlooked until it’s too late. By controlling your stirring, lid use, and ingredient amount, you’ll get consistent results. Remember, great stock requires precise timing.
Troubleshooting Time Issues
Even experienced cooks sometimes miss the perfect simmer time. If your stock needs more time or has cooked too long, don’t worry. These tips will help you fix it and keep your ingredients from going to waste.
Salvaging Undercooked Stock
Weak flavor or thin consistency? Your stock might just need more time to extract flavors. Here are some fixes:
- Add unflavored gelatin (1 packet per quart) to mimic collagen-rich results without extended simmering
- Simmer uncovered for 20-30 extra minutes, using the 20% reduction method to concentrate flavors
- Introduce fresh aromatics like garlic or thyme to boost depth mid-process
These tips are great for recipes where time is tight. For pho or risotto bases, the gelatin trick keeps your recipe on track while adding richness.
Fixing Overcooked Texture
Bitter notes or a murky look mean your stock has been over-extracted. Here’s how to fix it:
- Dilute with equal parts water or low-sodium broth
- Add raw vegetables (carrots, celery) during reheating to absorb harsh flavors
- Repurpose in strongly seasoned dishes like chili or curry where subtlety matters less
For overcooked fish stock, blend it with coconut milk and lemongrass for a Thai soup base. This turns a mistake into a tasty dish while keeping food safe.
Storage Timing Considerations
Your stock’s journey doesn’t end when you turn off the stove. Proper storage timing ensures your hard work translates to safe, flavorful results. Follow these guidelines to lock in quality from pot to plate.
Cooling Countdown: Food Safety Rules
Speed matters when cooling stock. Never leave it at room temperature for over 2 hours—bacteria multiply rapidly between 40°F and 140°F. Divide large batches into shallow containers to accelerate cooling, aiming for:
- 1-2 hours to reach 70°F
- 4 hours total to hit fridge temperature (40°F or below)
Source 2’s research shows refrigerated stock stays safe for up to 2 weeks when covered with a fat layer. This natural seal prevents oxidation but doesn’t extend the shelf life beyond food safety limits.
Freezing Window for Peak Flavor
For long-term storage, freeze stock within 24 hours of cooking. Leave 1-inch headspace in containers (per Source 3) to prevent cracking from expansion. Consider these freezer timelines:
- Chicken/beef: 6 months at 0°F
- Vegetable: 4 months
- Fish: 3 months maximum
Label containers with dates and strain ingredients for best base quality. Thaw frozen stock overnight in the fridge rather than microwaving—gradual temperature changes preserve delicate flavors.
These stock preparation tips transform storage from an afterthought to a flavor-preserving strategy. Proper timing ensures your base enhances soups, sauces, and dishes for months to come.
Recipe-Specific Adjustments
Simmering time for stock varies with each dish. Chefs adjust based on flavor and texture needs. Let’s look at how famous recipes need special timing.
Pho vs Ramen: Special Timing Needs
Pho and ramen show how cooking times reflect cultural traditions. Pho broth needs a 12-hour beef bone simmer. Bones are roasted, then simmered for 6 hours. Fresh bones are added for another 6 hours.
This method gives the broth its deep flavor. Ramen broth, on the other hand, is different. Tonkotsu ramen broth is simmered for 8 hours to mix fat and collagen. This makes the broth creamy and rich.
| Broth Type | Simmer Time | Key Ingredients |
|---|---|---|
| Pho | 12 hours | Beef bones, charred onion, spices |
| Tonkotsu Ramen | 8 hours | Pork femurs, fatback, garlic |
Reduction Requirements for Sauces
Stock reduction is key for sauces. Demi-glace is reduced by 50% in about 90 minutes. This concentrates flavors and keeps the sauce thick.
Velouté sauces need less reduction, about 30%. This helps keep the stock’s delicate balance. Look for tiny bubbles that pop slowly.
Here are some tips for flavorful stock suggestions:
- Start reductions with cold stock for even flavor development
- Skim frequently during the first 30 minutes of simmering
- Use a wide pan to accelerate reduction times safely
Conclusion: Mastering Your Stock Clock
Getting the hang of stock simmer times makes cooking more precise. Whether you’re making chicken stock in 4-6 hours or beef bones for 12 hours, timing is key. It affects flavor and nutrition.
The right simmer time depends on your ingredients and goals. But always follow the science of extraction.
These tips help you make better soups, sauces, and stews. Shorter simmers keep veggies fresh, while longer ones release bone marrow’s benefits. Find the perfect balance by tasting, checking textures, and smelling.
Always have a digital thermometer ready for the right temperature. Choose the right pot size for your ingredients. This ensures even heat.
For those looking to improve gut health, longer simmer times are best. They bring out the gelatin in bone broth without bitterness.
Now you know how timing impacts your dishes. Try different simmer times and note your results. Share your findings with others. Each pot you simmer brings you closer to being a master chef.