Creating amazing soups begins with foundational skills. These skills turn simple ingredients into rich flavors. Whether you’re making chowders, broths, or stews, knowing these techniques helps you use seasonal produce, meet dietary needs, and explore global cuisines.
This guide teaches universal principles over strict recipes. You’ll discover how caramelizing onions enhances French onion soup. You’ll also learn why kombu makes miso broth better and how roasted bones make ramen stocks creamy. These methods work for vegetarian phở or dairy-free chowders too.
Mastering these basics lets you:
- Reduce food waste by using vegetable scraps
- Adjust sodium levels without losing flavor
- Make freezer-friendly starters for fast meals
Key Takeaways
- Flavor foundations adapt to dietary needs like gluten-free or vegan diets
- Proper simmering techniques extract maximum nutrition from ingredients
- Aromatic vegetables form the backbone of most global soup traditions
- Storing bases in portioned containers saves cooking time
- Layering umami-rich ingredients creates restaurant-quality depth
Why Soup Bases Matter in Culinary Fundamentals
Learning to make soup bases can take your cooking to the next level. These liquid bases do more than add moisture. They bring flavors, nutrients, and cultural traditions to every spoonful.

The Science Behind Flavor Extraction
Great soup bases unlock hidden flavors through special cooking techniques. When you cook vegetables slowly, their natural sugars come out without burning. Bone broths show this perfectly:
- Collagen turns to gelatin in 12+ hour simmers
- Marrow releases iron and amino acids
- Herb oils infuse slowly below boiling point
This method creates layers of taste, known as “flavor architecture”. A study by the Culinary Institute of America found homemade bases have 40% more glutamates. Glutamates are what make food taste rich and savory.
Homemade vs Store-Bought: What You Gain
Commercial soup bases often lose quality for longer shelf life. Here’s what you gain with homemade:
Nutritional Powerhouse
Homemade bases are packed with vitamins and minerals. Store-bought stocks have 480mg sodium per cup, which is too much. Making your own lets you control salt and keep nutrients like vitamin C safe.
Flavor Customization
Want more thyme in your chicken broth? Prefer smoked paprika in vegetable stock? You’re the flavor architect. You can customize flavors and more:
| Factor | Homemade | Store-Bought |
|---|---|---|
| Sodium per cup | Adjustable (0-200mg) | 300-600mg |
| Preservatives | None | 3-5 common additives |
| Vitamin B12 | 18% DV* | 2% DV |
| Flavor Depth | 8-12 compounds | 3-5 compounds |
*Daily Value based on 8oz serving
“Controlling your base ingredients lets you amplify specific health benefits while avoiding unnecessary additives.”
Mastering soup base ingredients lets you create many dishes. That pot of simmering bones or vegetables can become pho broth, risotto liquid, or sauce foundation. You keep your meals healthy and low in processed ingredients.
Essential Equipment for Base Preparation
Creating great soup bases begins with the right tools. Creativity is key in cooking, but reliable equipment makes easy soup base techniques accessible to all. Let’s look at the essential gear for smooth prep and flavor development.

Must-Have Pots and Utensils
A heavy-bottomed 6-quart stainless steel pot is your go-to. Its thick base prevents scorching during long simmering. This is key for getting flavors from bones or veggies.
Use a flat-edged wooden spoon for scraping fond without scratching. It’s perfect for scraping the bottom of pots.
Sharp 8-inch chef’s knives and paring knives are essential. They help with everything from chopping mirepoix to crushing garlic. Proper knife skills can cut prep time by 40% for veggies.
Keep a spider skimmer handy for removing impurities. It’s great for clarifying broths.
Specialty Tools for Advanced Techniques
Take your easy soup base techniques to the next level with these tools:
- Immersion blenders make velvety textures right in the pot
- Food mills create smooth purees, straining out seeds and skins
- Fine-mesh chinois strainers make crystal-clear consommés
For deep flavor, try a pressure cooker. It cuts simmering time by 70%. Use cheesecloth alternatives like nut milk bags for bouquet garni sachets.
Professional kitchens often use brunoise cutters for uniform veggie pieces. This ensures even cooking.
10 Soup Bases Every Home Cook Should Master
Start your journey to becoming a soup master with these ten essential recipes. They are perfect for quick weeknight meals or when you’re hosting guests. Learning these bases makes it easy to adapt to any meal or dietary need.

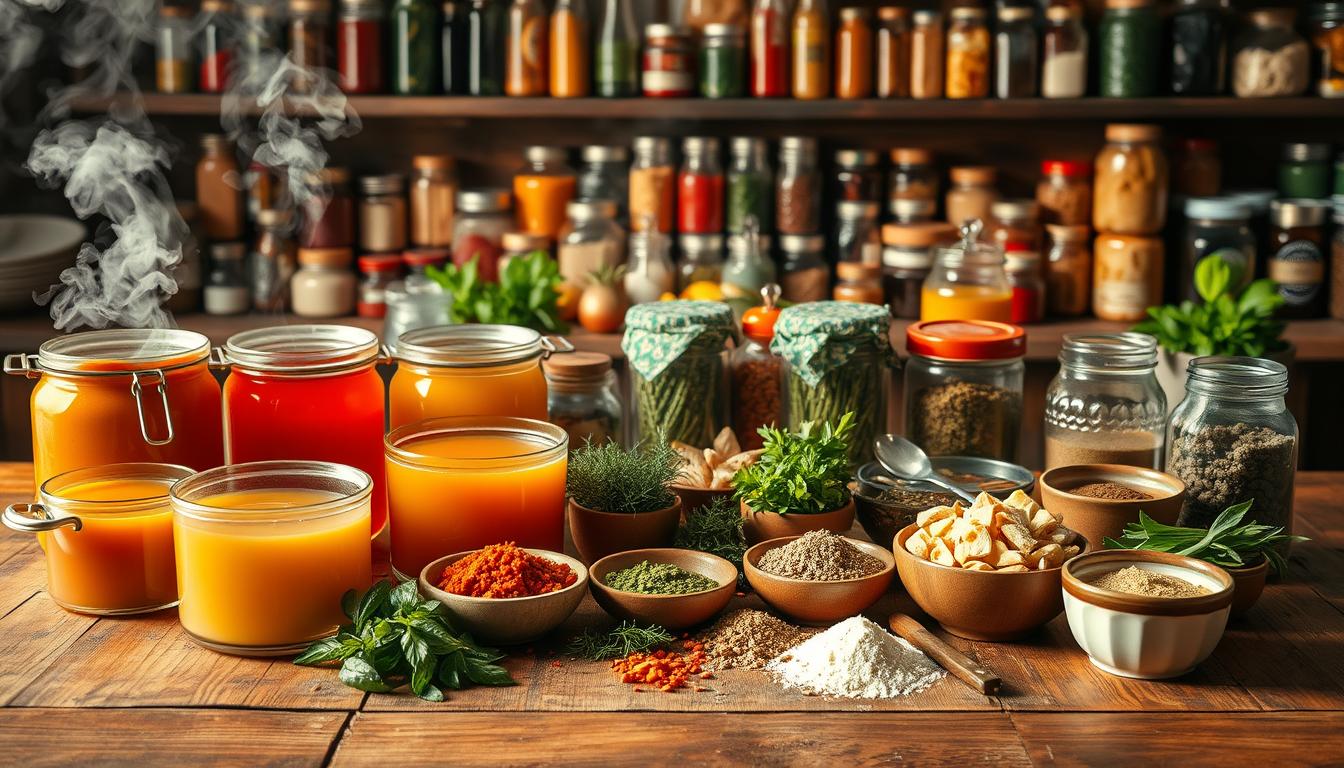
Building Your Flavor Arsenal
Successful soup bases rely on strategic ingredient partnerships. Leek + thyme make French-inspired stocks, while ginger + scallion are great for Asian broths. Here are some key ingredients to remember:
- Umami boosters: Dried mushrooms, tomato paste, or fish sauce
- Herb pairings: Bay leaves with beef, dill with fish, sage with poultry
- Texture enhancers: Roasted bones for collagen, seaweed for viscosity
Source 1’s three-base system helps layer flavors effectively:
| Base Type | Key Components | Best Uses |
|---|---|---|
| Light | Chicken, leeks, parsley | Consommés, delicate sauces |
| Medium | Beef, onions, carrots | Stews, chili foundations |
| Rich | Pork, garlic, rosemary | Ramen broths, hearty soups |
Adaptation Tips for Dietary Needs
Modern soup bases need to be flexible without losing flavor. Here are tips for common dietary needs:
- Vegan swaps: Use kombu instead of bonito in dashi, or agar-agar as gelatin substitute
- Low-sodium solutions: Double roasted mushrooms + Source 3’s recommended thyme-rosemary blend
- Gluten-free thickeners: Arrowroot powder or blended cauliflower
For dairy-free creaminess, blend soaked cashews into vegetable bases. Always taste-test after substitutions. Sometimes, a splash of citrus can fill flavor gaps better than salt.
1. Classic Chicken Bone Broth

Learning to make chicken bone broth can elevate your soups. It adds richness to dishes like ramen and risotto. But, it all starts with the right ingredients, careful cooking, and proper storage.
Choosing Your Foundation
Bone quality is key for flavor and nutrition. Bones from pastured chickens make a more flavorful broth. Use a mix of knuckles, carcasses, and feet for the best gelatin.
Butcher Recommendations
- Ask for “soup bones” for better extraction
- Freeze leftover rotisserie chicken carcasses for broth
- Avoid pre-roasted bones for clear consommé
The Simmering Science
Keeping the right temperature is crucial. Use a thermometer to keep it between 185-195°F. Skim off foam every 20 minutes in the first hour to avoid cloudiness.
Temperature Control Timeline
- First Hour: 200°F to extract proteins (skim constantly)
- Hours 2-4: 190°F for collagen breakdown
- Final Hour: 180°F to preserve flavors
Preserving Your Liquid Gold
Strain through a nut milk bag for a smooth texture. Cool it quickly by placing the pot in an ice bath. Stir every 5 minutes. Remove solidified fat with a slotted spoon before portioning.
- Freezer-friendly: Ice cubes for single servings, quart bags for soups
- Fridge storage: Keep up to 5 days in mason jars
- Fat reuse: Save schmaltz for roasting vegetables
2. Robust Beef Stock
Mastering beef stock brings deep flavors to stews and sauces. It’s all about bold techniques that add richness without losing balance. Let’s explore how chefs create stock with unmatched complexity.

Roasting Techniques for Depth
Oven positioning directly impacts flavor development. Bones should be on the upper rack for even browning. Roast at 425°F for 40 minutes, flipping halfway. This caramelizes proteins without drying the marrow.
Add tomato paste during the last 10 minutes of roasting. High heat concentrates its sugars, adding a savory-sweet flavor. Use stainless steel pans for better heat distribution.
Vegetable Pairing Principles
Carrots and celery are the classic pair, but the ratio is key. Research shows a 2:1 carrot-to-celery ratio balances sweetness and prevents bitterness. Add onions after the first hour to keep their aroma.
Root vegetable ratios
For balanced earthiness, use the 3:2:1 formula:
- 3 parts chopped carrots
- 2 parts parsnips
- 1 part turnips
Roast vegetables separately from bones if using grass-fed beef. Their lower fat content needs shorter cooking times. Deglaze both pans with red wine before adding to your stockpot for layered complexity.
3. Vegetarian Mirepoix Foundation

Learning mirepoix can make vegetarian food exciting. It’s a mix of carrots, celery, and onions that adds depth to dishes. Chefs use special techniques to bring out its best.
Perfecting the 2:1:1 Ratio
The traditional mirepoix mix is 2 parts onion, 1 part carrot, and 1 part celery. Onions add sweetness, carrots bring earthiness, and celery adds herbal notes. For the best taste:
- Use yellow onions for consistent flavor
- Choose mature carrots with tapered ends
- Opt for leaf celery over stalks when available
Carrot-Celery-Onion Balance
Dicing vegetables evenly is key for even cooking. Cut them into ¼-inch pieces. Pro tip: Use celery leaves to add a burst of flavor to soups and stews.
Sweating vs Caramelizing
How you cook mirepoix changes its taste. Here’s a comparison:
| Technique | Temperature | Time | Outcome |
|---|---|---|---|
| Sweating | Low-Medium | 15-20 mins | Soft texture, subtle sweetness |
| Caramelizing | Medium-High | 30-45 mins | Rich color, intense flavor |
Sweating is good for light dishes like soups or risottos. Cook them covered over low heat to release moisture. For richer dishes like vegetarian chili, caramelizing is better. It creates deep flavors. Just deglaze the pan with wine or broth to get all the flavors.
4. Seafood Bisque Base
Learning to make seafood bisque starts with two key steps: handling shellfish right and making the roux just right. This rich base turns crustacean shells into a smooth, creamy delight. But, it takes skill to get it right. Let’s explore the basics for making top-notch bisque at home.

Shellfish Preparation Methods
Maximize flavor extraction by choosing the right method for each shellfish. Lobster needs careful separation of its head and tail. Shrimp shells must be cleaned well to avoid bitterness. Always simmer shells right after cracking to keep their fresh taste.
Lobster vs Shrimp Techniques
| Shellfish | Key Parts Used | Simmer Time | Flavor Profile |
|---|---|---|---|
| Lobster | Cephalothorax, legs, tail | 45-60 minutes | Rich, oceanic depth |
| Shrimp | Shells, tail tips | 25-35 minutes | Bright, saline sweetness |
For lobster bisque, crush the cephalothorax to release its tomalley (green liver) – this adds creaminess without dairy. Shrimp shells benefit from a quick roast at 400°F before simmering to intensify their natural sugars.
Roux Mastery for Texture
The perfect bisque texture comes from mastering your roux. Blond roux (cooked 3-5 minutes) gives a light thickening. Brown roux (6-8 minutes) adds a nutty flavor. Always whisk constantly in a figure-eight pattern to prevent burning.
| Roux Type | Flour:Fat Ratio | Cook Time | Best For |
|---|---|---|---|
| Blond | 1:1 | 3-5 min | Delicate shellfish bisques |
| Brown | 1:1 | 6-8 min | Robust lobster/crab bases |
Pro tip: Add cooled roux to simmering stock in three stages, whisking vigorously after each addition. This prevents clumping and creates the signature bisque silkiness. For dairy-free versions, substitute clarified butter with avocado oil in your roux.
5. Asian-Style Dashi
Starting your journey to Japanese flavors means learning about dashi. This clear broth is key in miso soup and many Asian dishes. Unlike Western stocks, dashi is made quickly with the right ingredients and timing.

Kombu and Bonito Balance
The secret of dashi is the mix of kombu seaweed and katsuobushi (bonito flakes). Start with cold water and a piece of kombu. Let it warm up slowly to get the best flavor without bitterness.
Take out the kombu just before it boils. Then, add smoky bonito flakes to the liquid.
Umami Extraction Timing
Timing is everything for flavor:
- Kombu: Soak for 30 minutes in cold water or steep for 10 minutes at 140°F.
- Bonito: Infuse for 15 seconds for a light flavor or 2 minutes for a stronger taste.
Bigger bonito flakes take longer to release flavor, like beans in other broths. For deeper flavor, use multiple steepings like French chefs do with thyme.
Instant vs Traditional Methods
Modern shortcuts are quick but less complex:
- Instant dashi packets: Have MSG and powdered ingredients (less umami than homemade).
- Hybrid approach: Mix kombu soak with katsuobushi tea bags for quick, 80% traditional flavor.
- Cold-brew method: Refrigerate kombu and bonito in water overnight for clear broth.
Instant dashi is good for quick meals, but traditional methods are better for delicate dishes like chawanmushi. Keep both for flexible cooking.
6. Mexican Caldo de Res Base
Turn simple beef soup into a lively Mexican dish by learning two key skills: making chili and adding spices in the right order. This rich base mixes smoky flavors with fresh scents, making it a true Caldo de Res.

Chili Roasting Techniques
Dry pan roasting brings out the natural sweetness. Oil-based methods soften the bitter taste. For Ancho chilies, keep 30% of the seeds for a bit of heat. Guajillo chilies should be completely seedless to show off their sweet taste.
Ancho vs Guajillo Uses
| Chili Type | Heat Level | Best For |
|---|---|---|
| Ancho | Mild (1,500 SHU) | Base flavors, earthy undertones |
| Guajillo | Medium (4,500 SHU) | Bright acidity, texture enhancement |
Layering Spices Effectively
Build your spice mix in three steps:
- First toast: Whole cumin seeds (2 minutes)
- Second layer: Ground coriander + Mexican oregano (1 minute)
- Final bloom: Garlic paste (30 seconds)
This method avoids burning and boosts the flavor. For a veggie version, use roasted veggie stock instead of beef. But, use more guajillo chilies to keep it rich.
7. French Onion Soup Foundation
Learning to make French onion soup begins with two key steps. First, you need to caramelize onions perfectly. Then, you must deglaze them well. These steps turn simple ingredients into a rich, complex base that’s the heart of the dish.
Caramelization Timelines
Onions go through three stages when caramelizing. First, they lose moisture on medium heat (15-20 minutes). Then, their natural sugars start to brown (30-45 minutes). Finally, maillard reactions deepen the flavors (50-60 minutes total).
Preventing Burning
Yellow onions are the best choice for consistent caramelization because of their 9% sugar content. To prevent burning, follow these tips:
- Stir every 8-10 minutes
- Keep the heat even
- Add a splash of water if edges get too dark
Deglazing Liquid Choices
The liquid you use for deglazing greatly affects the soup’s flavor. Here are some options:
| Liquid | Flavor Profile | Evaporation Rate |
|---|---|---|
| Dry White Wine | Bright acidity | Fast (3-4 mins) |
| Beef Broth | Umami depth | Slow |
| Sherry Vinegar | Tangy sweetness | Medium |
Vermouth adds a herbal twist but takes 25% longer to reduce than sherry. For a non-alcoholic version, use mushroom broth with a teaspoon of apple cider vinegar to get that wine-like acidity.
8. Thai Coconut Curry Base

Mastering Thai coconut curry starts with two key elements: aromatic paste and quality coconut milk. These elements decide if your dish tastes like a Bangkok street market or just an imitation. Let’s explore how to get both right.
Paste Preparation Essentials
Authentic curry paste needs fresh herbs and spices. Galangal, lemongrass, and makrut lime leaves lose a lot of flavor in just 48 hours. Use a mortar and pestle for the best texture. This method releases oils better than food processors.
Fresh vs Store-Bought Pastes
Homemade paste offers vibrant flavors, but store-bought saves time. Choose brands without preservatives or artificial colors. Test quality by mixing 1 tsp paste with oil – real versions mix smoothly.
| Factor | Fresh Paste | Store-Bought |
|---|---|---|
| Preparation Time | 25-40 mins | Instant |
| Flavor Depth | Layered complexity | Standardized taste |
| Texture | Coarse, rustic | Uniform consistency |
| Shelf Life | 3-5 days | 6-12 months |
Coconut Milk Selection
Not all coconut milk is the same. First-press varieties (labeled “extra rich”) have 18-22% fat, which is key for creaminess. Avoid products with guar gum by shaking the can: pure coconut milk separates naturally.
- Check ingredients: Only coconut extract and water
- Opt for BPA-free cans
- Thai brands like Aroy-D often outperform generic options
For intense flavor, simmer coconut milk until oil separates (about 12 minutes). This method makes the sweetness more intense and reduces watery notes. Stir constantly to avoid burning.
9. Italian Wedding Soup Starter

Learning to make Italian Wedding Soup Starter turns it into a simple weeknight meal. It’s all about mixing tender meatballs with fresh greens. This mix of textures needs careful attention.
Creating Perfectly Bound Meatballs
Egg whites are better for binding than whole eggs. Use 1 tablespoon per pound of meat to avoid sogginess. Adding cooked grains like couscous makes meatballs juicy.
Breadcrumb Alternatives That Shine
- Finely ground couscous (absorbs 30% more broth than breadcrumbs)
- Cooked quinoa (adds protein while binding)
- Crushed rice crackers (for gluten-free crunch)
Preparing Greens Like a Pro
Young kale leaves only need 15 seconds of blanching. But mature leaves take 45 seconds. Always cool greens in ice water after blanching to keep their color and taste.
Don’t throw away kale stems. Julienne them for extra texture in your soup.
“The stem contains 40% of a kale plant’s nutrients – wasting it is like throwing away free flavor boosters.”
For bitter greens like escarole, massage them with olive oil before adding to broth. This makes them silky without overcooking.
10. Russian Borscht Foundation
Mastering authentic borscht starts with beet preparation and balanced dairy integration. This Eastern European dish mixes earthy sweetness with tangy creaminess. It’s as beautiful as it is delicious.
Unlocking Beet Potential
Your borscht’s color and texture come from how you handle beets. Acidulation timing is key – vinegar or lemon juice during cooking keeps the color bright. For the best flavor, try these tips:
Roasting vs Boiling
Roasting beets in parchment paper (not foil) boosts their natural sugars and avoids metallic tastes. This method gives you:
- Deeper caramelized notes
- Firmer texture for chunkier soups
- Reduced water content for intense flavor
- Faster cooking time
- Smoother puree integration
- Brighter color distribution
Cream Integration Techniques
Authentic borscht gets its velvety texture from temperature-tempered sour cream. Always use room-temperature dairy to avoid curdling. Here are some tips:
- Cultured sour cream adds tangier complexity than ultra-pasteurized versions
- Fold in cream just before serving to maintain texture
- Offer extra at the table for customizable richness
Finish with fresh dill or chive sprinkles to balance the earthiness. The cool cream and hot broth mix creates a unique taste experience.
Advanced Flavor Layering Techniques
Creating complex flavors needs careful ingredient pairing and timing. These expert methods turn simple stocks into top-notch bases. They focus on two key areas: boosting umami and balancing acids.
Umami Boosting Methods
Savory depth makes soups unforgettable. Traditional stocks use bones and veggies, but modern chefs add depth with special ingredients. Mushroom powder is a great choice, but not all types are equal.
Mushroom Powder Uses
Porcini powder adds a deep earthy flavor to beef stocks. Shiitake powder is better for chicken or veggie broths. Here’s how to use them:
- Steep 1 tsp in hot broth for 15 minutes before straining
- Mix directly into simmering liquids for fuller integration
- Combine with tomato powder for layered savoriness
| Mushroom Type | Flavor Intensity | Best Pairings |
|---|---|---|
| Porcini | High (earthy) | Red meat stocks, root vegetables |
| Shiitake | Medium (woody) | Poultry, Asian-style broths |
Acid Balancing Principles
Acidity keeps bases from feeling heavy. The trick is knowing when and how to add acidic elements:
| Acid Source | Add During | Effect |
|---|---|---|
| Lemon zest | Last 5 minutes | Subtle aroma |
| Apple cider vinegar | After straining | Clean tang |
| White wine | Sauté phase | Caramelized notes |
- Start with ½ tsp acid per quart of broth
- Taste before serving – heat mellows sharpness
- Adjust using citrus juice for instant brightness
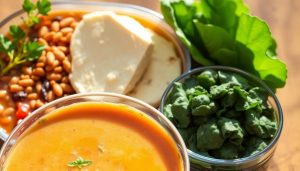
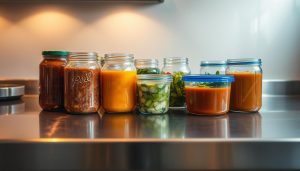
Proper Storage and Freezing
Storing soup bases right keeps the taste and nutrients in. You can refrigerate for quick use or freeze for later. This way, your bases stay fresh and flavorful for weeks.
Container Selection Guide
Choose freezer-safe materials to avoid flavor loss and cracking. Silicone molds are great for portioned bases. Glass jars with wide mouths make defrosting easy. Always leave 1-inch space for expansion during freezing.
Here are some good choices:
- 4-ounce silicone cubes for single servings
- 32-ounce glass jars for family-sized portions
- BPA-free plastic bags laid flat for space efficiency
Defrosting Best Practices
Thaw frozen bases in the fridge overnight to avoid ice damage. For faster thawing, submerge sealed containers in cold water. Change the water every 30 minutes. Never thaw stock in the microwave to keep it clear and smooth.
Whisk gently to mix fats back together when reheating. If bases are grainy after freezing, strain them through cheesecloth. Label containers with dates and types to keep your freezer organized.
Troubleshooting Common Issues
Even the most skilled cooks face issues when making soup bases. Two common problems have easy fixes that save your effort and ingredients.
Rescuing Over-Salted Bases
Dilution is your first defense against too much salt. Start by adding unsalted broth or water a little at a time. Taste after each addition. For cream-based soups, adding plain dairy or plant-based milk can help balance the flavor.
Starchy ingredients can also help:
- Peeled potato wedges absorb salt in 20 minutes of simmering
- Cooked rice acts faster, neutralizing salt in 10-15 minutes
To counteract too much salt, add natural sweetness. For chicken broths, try diced apples. For vegetable bases, grated carrots work well. A teaspoon of honey or maple syrup can also save tomato-based soups without changing their taste.
Fat Separation Solutions
To avoid oily surfaces, skim during cooking. For bases with fat layers after finishing:
- Chill the broth until fat solidifies
- Scoop off congealed fat with a slotted spoon
- Reheat gently before use
Lecithin-rich ingredients help keep emulsions stable. Add these while the base is still warm:
- Egg yolks (140°F maximum temperature)
- Mustard powder or prepared mustard
- Sunflower lecithin powder
Immersion blenders can fix texture issues quickly. Blend at medium speed, keeping the temperature between 160-180°F. This method is great for cream-based bisques and coconut curries.
Conclusion
Learning to make great soup bases can turn simple meals into something special. Starting with chicken bone broth and moving to Thai curry paste shows how basic skills can open up a world of flavors. Each step helps you get better at mixing tastes and textures, making your dishes unforgettable.
Trying new things is key to getting better at soup bases. Mix French onion soup’s sweet flavors with dashi’s deep umami for a unique taste. Use Caldo de Res techniques with fresh veggies to enjoy them all year. Using the best ingredients, like Japanese kombu or local beets, makes a big difference.
Having frozen beef stock or veggie mirepoix on hand makes weeknights easier. Kenji López-Alt says, “Flavor foundations reward patience.” Adjust the spice in Mexican soups or change the protein in Italian soups to fit your taste without losing flavor.
Real kitchen power comes from seeing recipes as guides, not strict rules. The best soup bases come from practicing and being creative. Keep tasting, tweaking, and improving. Every time you cook, you get closer to making dishes that warm the soul.