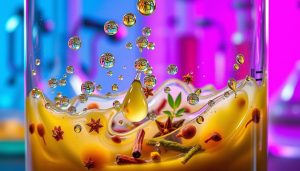
Creating homemade rock candy isn’t just about satisfying your sweet tooth—it’s a hands-on lesson in molecular behavior. This classic activity blends kitchen creativity with foundational chemistry, letting you observe how supersaturated solutions form intricate crystal structures over time. Best of all, you only need basic supplies like sugar, water, and wooden sticks to start.
The process reveals how temperature and humidity influence crystal growth, turning ordinary ingredients into geometric marvels. Families love this project because it sparks curiosity about everyday science while delivering tasty results. Though it requires patience (crystals take 5–10 days to form), the wait rewards you with shimmering treats and lasting memories.
What makes this experiment timeless? For centuries, people have used similar methods to study crystallization and produce confections. Today, it’s a gateway to discussing concepts like solubility and nucleation—all through a snackable lens. Whether you’re teaching young learners or exploring food science yourself, this activity makes complex ideas deliciously simple.
Key Takeaways
- Combines edible results with lessons in chemistry and physics
- Requires only household items like sugar, jars, and wooden sticks
- Teaches how temperature affects molecular bonding and crystal shapes
- Develops patience through a 7–10 day observation period
- Connects modern kitchen science to historical candy-making traditions
Introduction to Your Sweet Science Experiment
Transforming ordinary kitchen ingredients into sparkling geometric treasures reveals the magic of everyday chemistry. This project turns sugar’s natural properties into a visible demonstration of molecular organization, perfect for curious minds of all ages.

Overview of the Rock Candy Process
The journey begins with heat. Boiling water dissolves up to three times more sugar than cold liquid can hold. When this supercharged solution cools, excess sugar molecules cling to rough surfaces like notched wooden sticks, building intricate structures atom by atom.
Temperature shifts drive the entire process. As the mixture returns to room conditions, it reaches thermodynamic equilibrium—nature’s way of balancing dissolved and solid sugar. The result? Glittering formations that make abstract concepts tactile.
Benefits of a Hands-On Learning Experience
Tracking daily growth teaches more than solubility charts ever could. Young scientists practice forming hypotheses: Will crystals grow faster near the window? Adults rediscover wonder while discussing how humidity affects crystal shapes.
This activity strengthens observation skills through measurable changes. Participants learn that science isn’t just equations—it’s the art of asking questions and interpreting results. Best of all, the reward isn’t a grade but a shimmering treat you helped create.
Essential Materials and Ingredients
Every successful experiment starts with precise preparation. To grow your edible geometric structures, you’ll need common household items paired with strategic ratios. Let’s break down why each component matters and how they work together.

Gathering Your Kitchen Tools and Supplies
Start with a 3-quart pot—smaller containers risk boiling over as sugar solutions expand. Wide-mouth mason jars (quart or pint size) allow sticks to hang freely without touching glass walls. Clothespins act as adjustable anchors, keeping wooden sticks centered during the 7-day process.
| Material | Purpose | Pro Tip |
|---|---|---|
| Granulated sugar | Forms crystal lattice | Use extra-fine grains for faster dissolving |
| Wooden sticks | Crystal growth surface | Roughen with a knife for better adhesion |
| Mason jars | Solution containment | Clean with vinegar to prevent residue |
Understanding the Role of Sugar and Water
The 3:1 sugar-to-water ratio isn’t arbitrary—it’s the minimum required for supersaturation. “Patience reveals science’s sweetest secrets,” as one food chemist notes. Warm water dissolves sugar efficiently, but environmental humidity can demand adjustments. Add ¼ cup increments if crystals form slowly.
Food coloring introduces flair without disrupting molecular bonds. Add it after cooling the solution to 150°F—high heat breaks down dyes. This timing preserves both vibrancy and crystallization potential.
Step-by-Step Guide to Making DIY Crystal Candy Sticks: Sweet Science!
Building shimmering sugar structures begins with strategic preparation and scientific principles. Follow this precise method to transform simple ingredients into geometric marvels through controlled crystallization.
Preparing and Seeding the Growth Surfaces
Start by soaking wooden sticks in water for 30 seconds. Roll them in granulated sugar while damp—this creates nucleation points where crystals will form. Let them dry completely on wax paper for at least 30 minutes.
| Step | Time | Key Detail |
|---|---|---|
| Soaking | 30 sec | Creates moisture for sugar adhesion |
| Coating | 2 min | Roll twice for better coverage |
| Drying | 30+ min | Prevents seed crystal dissolution |

Crafting the Optimal Growth Medium
Bring two cups of water to a rolling boil in a deep saucepan. Gradually add six cups of sugar, stirring continuously until dissolved. Use a candy thermometer to confirm the mixture reaches 250°F—the ideal temperature for maximum saturation.
Let the syrup cool for 20 minutes before pouring. “Thermal shock destroys seed crystals,” explains confectionery expert Maria Torres. This waiting period ensures your prepared sticks remain intact when submerged.
Strategic Container Configuration
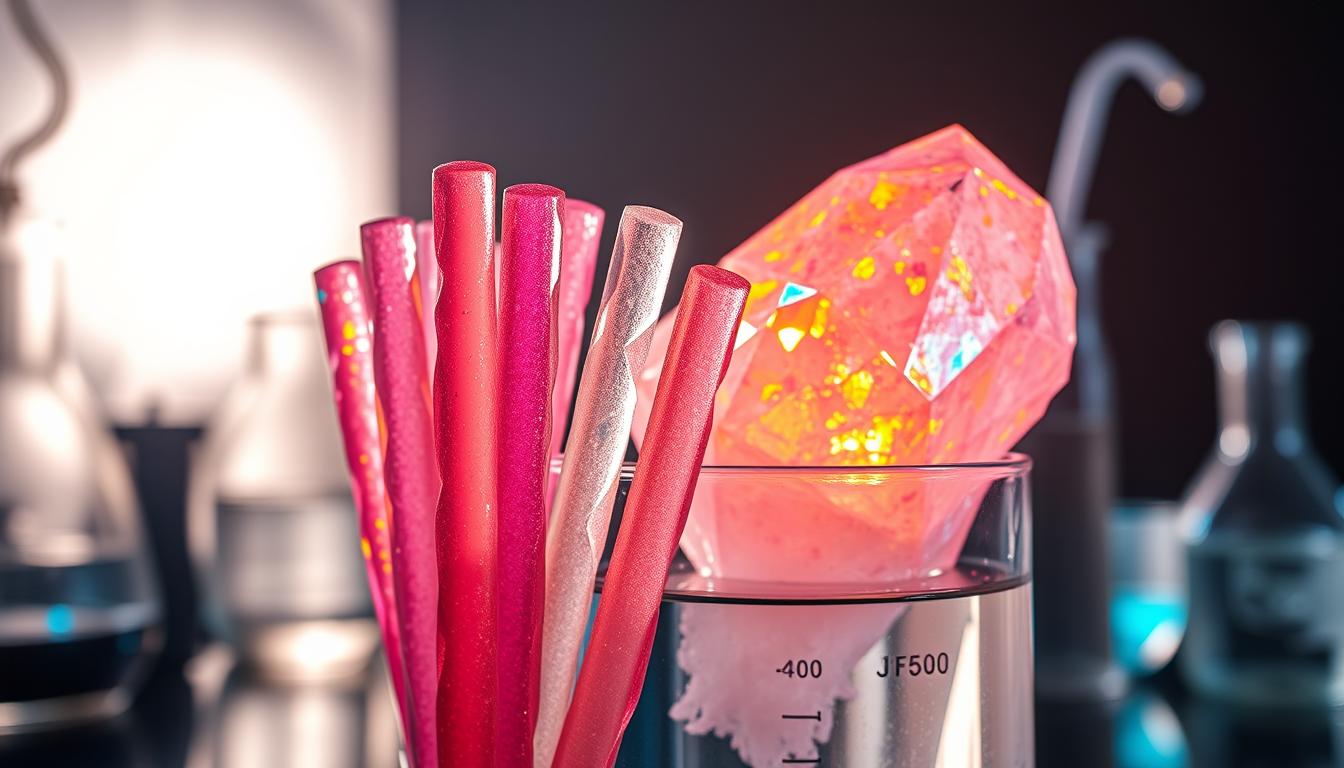
Pour the cooled liquid into clean mason jars, leaving one inch of headspace. Secure your sugar-coated sticks with clothespins across jar openings. Position them ½ inch from the bottom and sides to prevent unwanted crystal bridges.
Store jars in a vibration-free area with stable temperatures. Crystals begin forming within 24 hours, reaching full size in 7-10 days. Rotate sticks daily for even growth distribution without disturbing the developing structures.
The Science Behind Rock Candy and Crystal Formation
What transforms simple syrup into geometric wonders? The answer lies in nature’s balancing act between molecular chaos and orderly structure. By manipulating basic chemical principles, you create conditions where sugar organizes itself into dazzling patterns.

Explaining Saturation and Crystal Lattice Formation
Room-temperature water holds 67% sugar—a stable state called thermodynamic equilibrium. Heating lets water absorb 75% sugar, creating a supersaturated solution. As it cools, excess sugar molecules seek stability by locking into rigid positions.
In liquid form, these molecules bounce wildly. But when attaching to your prepared sticks, they snap into low-energy arrangements. “Each crystal grows as molecules find their perfect neighbors,” notes food chemist Dr. Ellen Park. This organized stacking builds the visible structures you eventually harvest.
How Temperature and Humidity Affect Growth
Warmer environments (70-80°F) speed molecular movement, accelerating initial growth. Cooler spaces (60-70°F) slow the process but often yield larger, clearer formations. Humidity impacts evaporation rates—dry air pulls moisture from the solution faster, concentrating sugar and prompting rapid crystallization.
| Factor | Effect on Growth | Ideal Condition |
|---|---|---|
| Temperature | Warmer = faster initial growth | 70-75°F |
| Humidity | Lower = quicker evaporation | 40-50% RH |
| Solution Depth | Deeper = longer growth period | 6-8 inches |
Your experiment ends when the solution reaches 67% sugar concentration—usually within 7 days. Check progress daily without disturbing the jars. If crystals form on jar walls, gently rotate the stick to redirect growth.
Tips, Variations, and Troubleshooting Your Rock Candy Experiment
Perfecting your edible crystal creations requires both creativity and precision. Whether adding vibrant hues or adapting to available containers, small adjustments can elevate results while avoiding common setbacks.
Creative Additions: Food Coloring and Flavors
Enhance visual appeal by mixing 2-3 drops of food coloring into cooled syrup. More drops create deeper shades, but exceeding five may cloud crystals. Pair colors with flavor extracts—mint complements green, while orange zest pairs with yellow.
Add ¼ teaspoon of flavoring after cooling the solution to 150°F. High-quality extracts maintain potency without disrupting sugar bonds. “Layered flavors work best,” suggests pastry chef Lila Monroe. Try vanilla-raspberry combos for multidimensional treats.
Adjustments for Different Jar Sizes and Stick Types
Match stick length to container height. Leave 1″ space above the solution and ½” clearance at the bottom. Use this guide for common jar sizes:
| Jar Size | Stick Length | Solution Volume | Notes |
|---|---|---|---|
| 8 oz | 5″ | 1.5 cups | Rotate sticks daily |
| 16 oz | 7″ | 3 cups | Use skewers, not popsicle sticks |
| 32 oz | 10″ | 5 cups | Check solution clarity weekly |
Common Pitfalls and How to Avoid Them
Grainy texture often means undissolved sugar. Stir continuously while boiling until mixture clears. If crystals form on jar sides, gently loosen them with a toothpick.
High humidity? Place jars in oven with light on (off) for steady airflow. For slow growth, add ½ cup sugar to existing solution. Harvest when crystals reach desired size—typically 7-10 days.
Conclusion
Mastering homemade rock candy bridges culinary art with scientific discovery. You’ve transformed basic ingredients into edible crystals while observing saturation and crystallization firsthand. This project makes abstract concepts like thermodynamic equilibrium tangible through visible, gradual growth.
The week-long process teaches patience—a core scientific skill. Just as researchers track data over months, you’ve monitored daily changes to understand environmental impacts. Store your creations in airtight containers for year-long enjoyment, using warm water to dissolve leftover sugar in jars during cleanup.
Each batch becomes a new experiment. Try adjusting temperatures or flavors while noting how variables affect crystal clarity and size. Imperfect results still offer insights, proving science thrives through trial and observation.
Families and educators value this activity for merging education with engagement. It demonstrates how everyday materials reveal universal principles, sparking curiosity that extends beyond the kitchen. Your shimmering results aren’t just treats—they’re proof that learning tastes delicious.