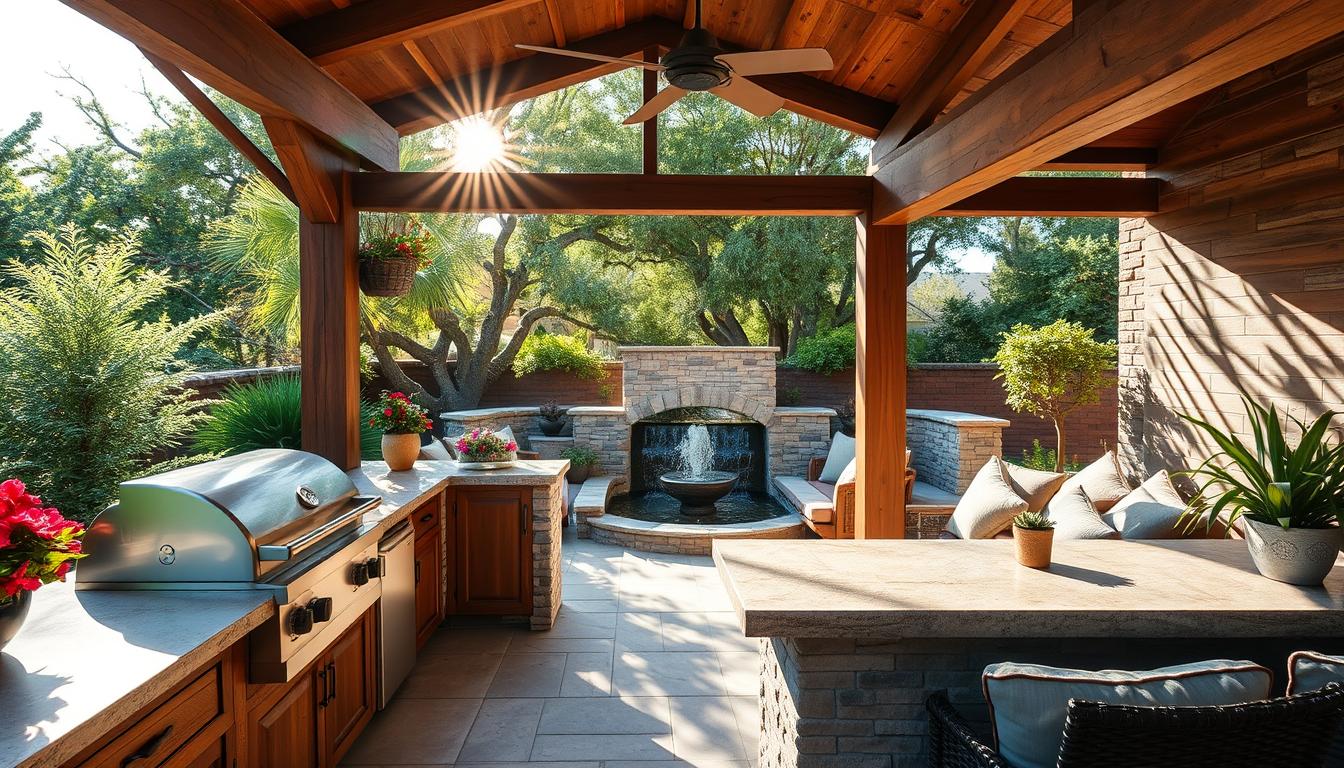
Did you know 63% of homeowners avoid upgrading their backyard spaces because they assume luxury comes with a five-figure price tag? Traditional setups can cost from $6,127 to over $26,000. But, modern solutions let you create a stunning, functional cooking area for much less.
Today, you don’t need high-end appliances and custom stonework to have a great outdoor kitchen. Clever material swaps, smart layouts, and strategic upgrades are key. Think about using portable pizza ovens or weather-resistant cabinets made from upcycled pallets. With smart planning, your space can look amazing without breaking the bank.
Seasonal sales at home improvement stores and online marketplaces have great deals. Repurposing furniture or using modular components saves money. Even small touches like string lights or thrifted decor can make a big difference. The main thing is to focus on what you’ll use most—like a compact grill station or a cozy dining nook.
Key Takeaways
- Modern solutions reduce costs by 40-60% compared to traditional builds
- Repurposed materials and modular designs maximize value
- Focus on high-impact elements like functional layouts and weatherproofing
- Retailer clearance sections and end-of-season sales offer major savings
- Mix DIY projects with professional help for complex installations
1. Start With Smart Planning
Creating an effective outdoor kitchen starts with careful planning. First, evaluate your space and set a budget. This helps avoid overspending and ensures your money is well spent.

Assess Your Existing Space
Begin by measuring your patio or deck. Use a laser distance measurer or tape measure. Also, note any obstacles like trees or slopes that might affect your design.
For example, Harmonia Living’s Vino bar cart is ideal for spaces under 80 square feet.
Measuring Patio/Deck Dimensions
Create a detailed sketch of your space. Include:
- Walking paths (minimum 36″ wide)
- Cooking zones (allow 42″ depth for grills)
- Seating areas (18-24″ per person)
Identifying Utility Access Points
Find the nearest gas lines, electrical outlets, and water sources. They should be within 25 feet of your kitchen. Here’s a table showing common utility needs:
| Appliance | Gas Line | Electrical Need |
|---|---|---|
| 3-Burner Grill | Yes | No |
| Outdoor Fridge | No | 120V |
| Pizza Oven | Optional | 240V |
Set a Realistic Budget
Use the 60/30/10 rule to plan your budget. Allocate 60% for essentials, 30% for utilities, and 10% for luxuries.
Allocating Funds for Essentials vs. Luxuries
Focus on durable items like stainless steel grill stations. For example, the Char-Broil Classic 3-Burner uses 45% less propane than older models. This saves you $90 each year on fuel costs.
“Invest in quality burners and storage first – accessories can wait for seasonal sales.”
Prioritizing Durable Investments
Consider the lifespan of different materials:
- Powder-coated steel cabinets: 8-12 years
- Concrete countertops: 15+ years
- Plastic storage units: 3-5 years
2. Affordable Outdoor Kitchen Ideas That Don’t Break the Bank
Creating a functional outdoor cooking space doesn’t need to be expensive. With smart planning and resourcefulness, you can make a high-value kitchen that fits your lifestyle and budget. Let’s explore two key ways to save money without losing quality.

Core Budget Principles
Start by thinking about what you already have. Using materials you already own can save a lot of money and add a unique touch to your space.
Repurpose Before Buying New
That old dresser collecting dust? Take out the drawers, add weatherproof sealant, and turn it into storage-friendly cabinetry. Farmers are turning grain silos into pizza ovens, showing that creativity can beat high prices. The WWOO modular concrete system also shows how prefab elements can cut installation costs by 40% compared to custom builds.
Focus on Multi-Functional Elements
- Choose fold-down countertops for prep and dining
- Use cinder blocks for both support and rustic shelving
- Install magnetic knife strips on pergola posts to save space
Seasonal Cost-Saving Strategies
Buying at the right time can lead to big savings on essential items.
End-of-Season Appliance Sales
Grill prices drop 30-50% in late August as stores clear out. Last year, Black Friday saw Char-Broil’s premium 4-burner model discounted to $299 at Home Depot. Portable pizza ovens often go on sale in September, perfect for fall cooking.
Winter Project Planning Discounts
Contractors offer 10-15% off design services in January to book early. Lowe’s has “Beat the Heat” promotions in February on outdoor cabinetry kits. Stock up on pavers during March Madness sales for DIY flooring projects in spring.
| Strategy | Best Months | Potential Savings | Retailer Examples |
|---|---|---|---|
| Appliance Clearance | August-September | Up to 60% | Home Depot, Ace Hardware |
| Black Friday Deals | November | 35-50% | Lowe’s, Amazon |
| Winter Planning Promos | January-February | 10-25% | Local contractors, Wayfair |
3. DIY Concrete Countertops
Turn your outdoor kitchen into a rugged space with concrete countertops. They cost less than high-end materials. This DIY project lets you make custom surfaces for under $20 per square foot. It’s great for inexpensive outdoor kitchen solutions.

Essential Materials & Smart Tool Choices
First, pick between two concrete types:
- Quikrete Countertop Mix ($25/bag): It’s pre-mixed with fiber for strength
- Traditional Concrete ($18/bag): You need to buy rebar or wire mesh separately
Quikrete vs Traditional Concrete: Cost Comparison
| Feature | Quikrete | Traditional |
|---|---|---|
| Cure Time | 24 hours | 72 hours |
| Finish Quality | Professional | Needs sealing |
| 10 sq.ft Cost | $75 | $54 |
Budget-Friendly Forming Tools
Use these affordable items to make molds:
- 2×4 lumber ($2.50/ft)
- Melamine boards ($12/sheet)
- Concrete vibrator ($35 rental)
Crafting Your Countertop: Step-by-Step Guide
Stone designer Michelle Derviss advises:
“Always account for 3% material waste during pouring – it saves last-minute store runs.”
Building Wooden Forms
Make your mold in 3 steps:
- Cut melamine to your counter’s dimensions
- Secure edges with 2×4 braces
- Apply form release oil ($8/bottle)
Mixing & Pouring Techniques
Get professional results with these tips:
- Mix small batches for even texture
- Use a vibrating tool to remove air pockets
- Cover with plastic for 48-hour cure
Seal the surface with food-grade epoxy ($22/gallon) for stain resistance. This budget-friendly method makes durable food prep areas. They stand up to outdoor elements while keeping your kitchen inexpensive.
4. Repurposed Material Cabinets
Turning old materials into outdoor kitchen cabinets is smart and stylish. You don’t need to spend a lot to get great storage. With a little creativity and basic tools, you can make durable cabinets from salvaged wood or old furniture.

Pallet Wood Solutions
Free wooden pallets are perfect for DIY cabinets. The trick is to prepare them well to last outside.
Treating Wood for Outdoor Use
First, sand the pallet wood to get rid of splinters. Then, use Thompson’s WaterSeal with a roller for two coats. This keeps the wood from warping or rotting while keeping its natural look.
Assembly With Corrosion-Resistant Hardware
Build your cabinet frame with stainless steel screws and galvanized brackets. These won’t rust, even in damp places. Add cross-braces to the back for extra strength with 2-inch deck screws.
Upcycled Furniture Conversions
Old dressers and office cabinets can be great storage with a few tweaks. Look for solid wood pieces at thrift stores or online for under $50.
Using Old Dressers as Base Cabinets
Take out the drawers and put in marine-grade plywood shelves. Cover it all with outdoor polyurethane. Then, add doors from pallet wood for a unified look.
Retrofitting File Cabinets for Storage
Metal filing cabinets are perfect for keeping grilling tools dry. Line the drawers with vinyl flooring for easy cleaning. As shown on HGTV’s Rasberry Family Makeover, you can turn a cabinet into a cute ice cream bar with a tractor seat stool.
“A fresh coat of rust-resistant spray paint gives old file cabinets new life as industrial-chic outdoor storage.”
5. Budget Grill Stations
Your outdoor kitchen needs a reliable grilling spot without spending too much. We’ll look at two ways to make affordable outdoor BBQ designs. You can choose between semi-permanent built-in stations and portable setups. Both are budget-friendly and let you grill like a pro.

Char-Broil Classic 3-Burner Setup
Turn this $299 grill into a permanent feature with built-in conversion kits. These kits cost $50-$80 and include:
- Ventilated side panels for heat management
- Stainless steel trim kits
- Mounting hardware for countertop integration
It’s cheaper than Weber’s $499 Spirit model, saving you $200. For a rustic vibe, build a DIY surround using cinder blocks:
- Lay blocks in U-shape, leaving 2″ clearance around the grill
- Secure with heat-resistant mortar (rated for 2000°F+)
- Top with concrete slab or tile for food prep space
Portable Grill Integration
Coleman’s $179 RoadTrip LXE is great for small spaces. To avoid tipping, follow these steps:
Securing Coleman RoadTrip models
Attach anti-tip brackets ($15) to your patio’s concrete using masonry anchors. The grill fits perfectly but is easy to remove for outdoor events.
Creating removable counter surfaces
Cut 3/4″ plywood to fit your grill. Add folding legs from old TV trays, then seal with outdoor-grade polyurethane.
“I use clip-on bamboo boards that store flat when not grilling.” – DIYer @PatioChefLife
Whether you prefer built-in or portable grills, these affordable outdoor BBQ designs show you can grill well without spending a lot. Focus on managing heat and creating a comfortable layout to get the most value.
6. Affordable Appliance Solutions
Upgrading your outdoor kitchen doesn’t mean you have to spend a lot. Smart, budget-friendly choices offer great value without the high cost. Let’s look at two options that save money without sacrificing quality.

Igloo Marine Ultra Cooler
This cooler is tough and keeps ice for up to 5 days. It’s made of rotomolded construction and costs under $200. You can turn it into a chilled storage station with a few upgrades:
Creating a Chilled Storage Station
- Install PVC drainage pipes through pre-drilled holes for easy meltwater management
- Add sliding cedar shelves ($15 at hardware stores) for organized ingredient storage
- Use weatherproof velcro strips to secure cutting boards on the lid
“Integrating coolers as permanent fixtures can reduce refrigeration costs by 40% in outdoor kitchens.”
Blackstone Tabletop Griddle
This griddle weighs just 17 lbs and costs $127. It’s perfect for searing like a pro. Here’s how to protect it:
Building a Weatherproof Housing
| Material | Cost | Installation Time |
|---|---|---|
| Corrugated metal panels | $22/sheet | 1.5 hours |
| Pressure-treated wood frame | $15/8-ft board | 45 minutes |
| Acrylic sliding doors | $35/panel | 30 minutes |
For under $75, you can build a strong enclosure. It will handle rain, snow, and UV rays. Add removable silicone mats ($9) for easy cleaning.
7. Creative Storage Hacks
Make your outdoor cooking area better with smart storage ideas. These hacks keep tools handy without making a mess. They use vertical space and old materials, so you don’t have to spend a lot.
Magnetic Knife Strips
Stainless steel and PVC magnetic strips are great for holding knives. They save counter space. Here’s what you need to know:
- Kobalt Stainless Steel ($22): It’s rust-resistant and holds heavy knives well
- Everbilt PVC ($15): It’s light and good for smaller knives in damp places
Put these strips near where you prep food. Stainless steel is better near grills. PVC is better for covered areas.
Stainless Steel vs. PVC Options
Go for stainless steel for tough use. PVC is cheaper and works well too. Both keep your drawers tidy and safe.
Hanging Pot Rack Systems
Use empty space above for storage with these easy DIY projects:
Repurposing Ladder Frames
Old wooden ladders can become pot racks. Just hang them flat and add S-hooks. This costs less than $20 if you have a ladder.
Galvanized Pipe Installations
Make your own racks with plumbing pipes. These systems are strong and can be adjusted. A 4-foot setup costs about $35.
For more storage, try vertical herb gardens. Use old gutters or pallets to grow herbs like basil and rosemary. This idea is from New Eco Landscape Designs.
8. Budget-Friendly Flooring
Your outdoor kitchen’s flooring is key. It handles foot traffic, spills, and weather. Affordable options like gravel ($1.50/sqft) add rustic charm without breaking the bank. Concrete pavers ($4/sqft) are durable and come in patterns that match your style.
Recycled rubber tiles from Pure Style Home are slip-resistant and easy to clean. They install quickly over existing surfaces. Composite decking, like Trex, resists warping and fading. It only needs soap-and-water cleaning once a year.
Think about the long-term when choosing flooring. Gravel needs occasional raking but stops puddles. Concrete pavers need joint sand every two years. Pair these with DIY countertops and repurposed cabinets for a cohesive look.
Your flooring choice affects safety and workflow. Place heat-resistant materials near grills. The Char-Broil Classic 3-Burner grill works well with concrete or stone. Use textured surfaces near prep zones for a good look with Blackstone tabletop griddle stations.
Measure your space before buying materials. Many stores, like Lowe’s, offer free design tools. Start small, focusing on high-traffic areas first, and expand as your budget grows.