Making your own soup bases can turn simple meals into something special. Unlike store-bought options, crafting your own foundations lets you pick the ingredients. This way, you get freshness and flavor that’s unmatched.
Professional chefs focus on three key things: quality components, the right cooking methods, and balanced seasoning. You’ll learn to get deep flavors from bones and sweeten vegetables. Also, you’ll see how to use bay leaves or thyme for extra flavor.
Homemade soup bases taste better and are healthier than store-bought ones. This guide will show you how to store them in the freezer and fix any mistakes. You’ll see how small changes can make a big difference in your cooking.
Key Takeaways
- Homemade bases offer superior flavor control compared to store-bought alternatives
- Proper equipment selection impacts broth clarity and texture
- Roasting bones or vegetables enhances depth and complexity
- Herb timing during cooking affects final taste profiles
- Portion freezing preserves freshness for future meals
Why Homemade Soup Bases Elevate Your Cooking
Making your own broth is more than a tradition; it’s a kitchen game-changer. Unlike store-bought options, homemade bases let you control flavor, nutrition, and save money. This simple switch turns everyday cooking into an art.

The Flavor Difference: Store-Bought vs Homemade
Commercial broths often lack flavor because they focus on shelf life. By simmering bones or roasting veggies yourself, you get rich flavors. Caramelized sugars from onions and carrots add depth no factory can match.
Store-bought broths are too salty, with 800mg sodium per cup. You can control salt levels, from 150-400mg, by salting in stages.
Health Benefits of Controlling Ingredients
Homemade broth means no MSG, artificial colors, or preservatives. You choose:
- Organic vs conventional produce
- Grass-fed bones versus factory-farmed scraps
- Herb varieties (try thyme for antioxidants)
A 2023 study found DIY broths have 2-3x more collagen than store-bought ones.
Cost Effectiveness Over Time
Initial costs are $8-$12, but one batch makes 12-16 cups. That’s 73% less expensive than premium brands. Save scraps and bones in freezer bags for future batches.
Over six months, cooks save $90+ by making their own broth instead of buying it.
Here’s a comparison for a typical 12-cup batch:
| Cost Factor | Homemade | Store-Bought |
|---|---|---|
| Base Ingredients | $3.50 (scraps + herbs) | $9.60 (organic brand) |
| Energy Use | $0.80 (slow cooker) | $0 (already processed) |
| Total | $4.30 | $9.60 |
Essential Equipment for Soup Base Preparation
Great soup bases start with the right tools. Whether you’re simmering bones for hours or crafting a quick vegetable broth, having reliable equipment ensures consistent results. Let’s break down the essentials that’ll transform your soup base recipes from good to exceptional.

Stock Pots and Slow Cookers
Your pot is the foundation of every broth. Professionals recommend heavy-bottomed stock pots (6 quarts or larger) for even heat distribution. Larger pots prevent overcrowding, especially when working with meat bones or bulky vegetables. Slow cookers offer a “set-and-forget” alternative for busy cooks—perfect for low-and-slow simmering.
Choosing the Right Size Pot
Always leave 2-3 inches of space at the top when filling your pot. A 6-quart model handles most family-sized batches, while 8-quart pots accommodate meal-prep quantities. Look for pots with tight-fitting lids to lock in moisture during long cooking sessions.
Straining Tools and Storage Containers
Clear broth requires effective straining. A fine-mesh strainer removes even tiny particles, ideal for silky consommés. For chunkier vegetable bases, a colander gets the job done faster. After straining, pour your broth into glass Mason jars with fat-separating lids—these let you skim excess grease effortlessly before storing.
Fine Mesh vs Colander Straining
Fine mesh excels at clarifying broths but requires patience. Line it with cheesecloth for crystal-clear results. Colanders work better when you want to retain some texture, like in rustic minestrone bases. Always press solids gently with a spoon to extract every drop of flavor.
Core Ingredients for All Soup Bases
Every great soup starts with top-notch ingredients. These elements add layers of flavor, turning simple dishes into unforgettable meals. Let’s look at the must-haves for every home cook when cooking soups from scratch.

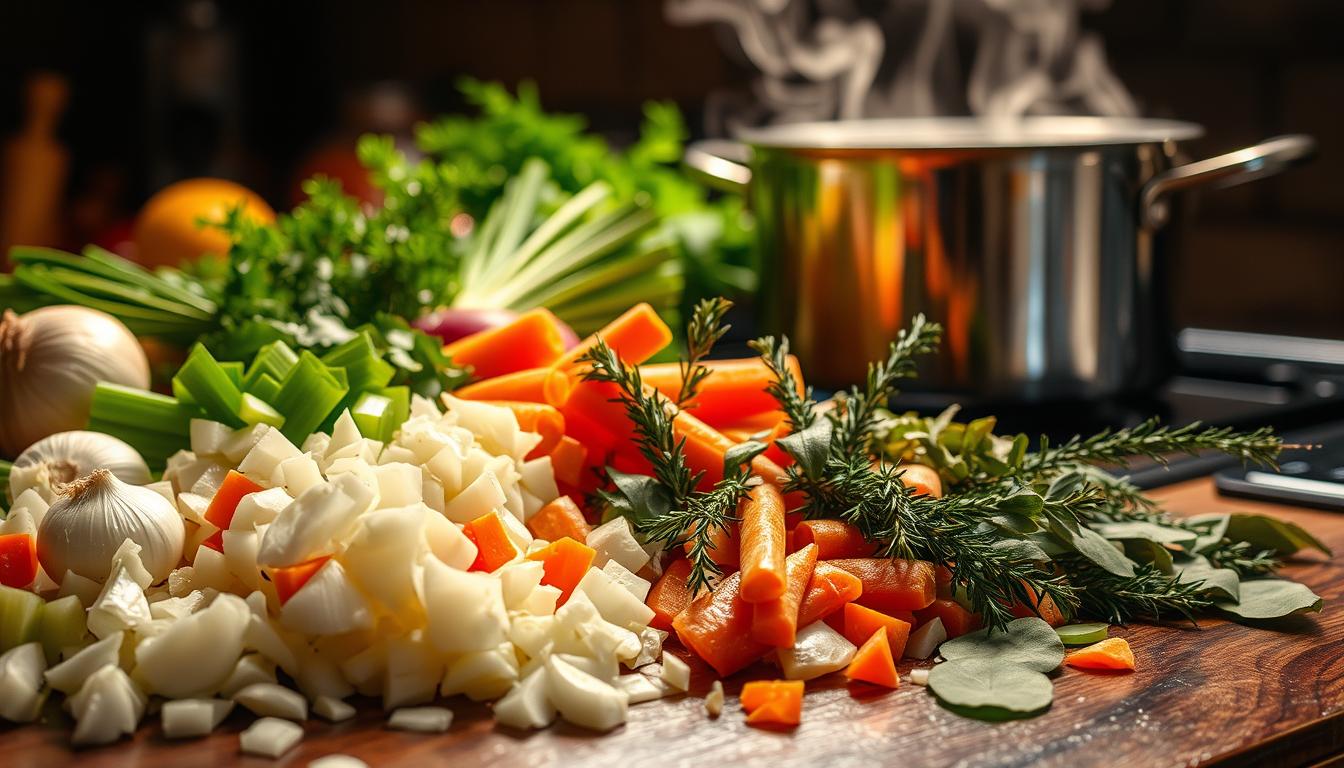
The Vegetable Trinity: Carrots, Celery, Onions
Carrots, celery, and onions are key for most soups. They caramelize, adding depth without hiding other flavors. For the best taste:
- Chop veggies the same size for even cooking
- Cook them slowly in oil to bring out flavors
- Add garlic last to avoid burning
Herbs and Spices Fundamentals
Fresh or dried herbs make broths pop. Bay leaves, thyme, and peppercorns are staples. Spices like cumin or turmeric add a unique touch. Keep dried herbs in airtight containers to keep them fresh.
Fresh vs Dried Herb Conversions
Here’s a simple swap ratio:
- 1 tablespoon fresh herbs = 1 teaspoon dried
- Put dried herbs in early for flavor
- Add fresh herbs in the last 10 minutes
Protein Components: Bones vs Meat Scraps
Proteins like bones or meat scraps make broths rich and nutritious. Beef bones add collagen for a silky texture. Chicken parts like backs and feet are quicker, great for quick weeknight soups.
| Ingredient | Cook Time | Collagen Yield |
|---|---|---|
| Beef Marrow Bones | 12-24 hours | High |
| Chicken Carcasses | 4-6 hours | Medium |
| Pork Neck Bones | 8-10 hours | Medium-High |
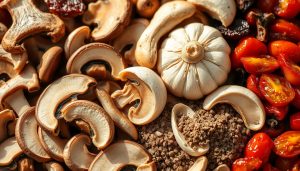
Meat scraps like turkey wings or bacon add smoky flavor but need fat skimming. For veggie options, soak beans for 90 minutes and add seaweed for umami.
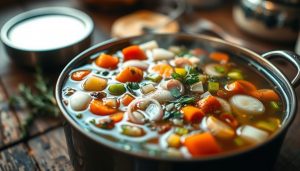
Mastering Vegetable Soup Bases
Vegetable soup bases open up a world of easy soup recipes. They let you control the flavor and keep meals healthy. You can choose from caramelized richness to fresh flavors, all while saving time.

Roasted Vegetable Base Technique
Roasting turns regular veggies into a flavor explosion. Heat your oven to 425°F for the best caramelization of carrots, parsnips, and onions. This heat brings out their natural sweetness and keeps their earthy taste.
Optimal Roasting Temperatures
Here’s a simple guide for perfect roasting:
- 425°F: Ideal for dense vegetables (carrots, potatoes)
- 400°F: Best for quicker-cooking veggies (zucchini, mushrooms)
- 375°F: Use for delicate items (cherry tomatoes, garlic cloves)
Place chopped veggies in a single layer on a baking sheet. Drizzle with olive oil and roast until they’re golden brown, about 25-35 minutes. This process creates deep flavors that make even simple easy soup recipes taste amazing.
Quick Simmered Vegetable Broth
This pressure cooker method makes top-notch broth in just 30 minutes. Mix classic aromatics with roasted vegetable scraps. Save onion skins, celery leaves, and carrot tops in your freezer for this.
30-Minute Pressure Cooker Method
- Sauté garlic and ginger in olive oil for 1 minute
- Add 4 cups vegetable scraps and 6 cups water
- Pressure cook on high for 15 minutes
- Natural release for 10 minutes before straining
For creamy soups without dairy, blend the broth with cooked potatoes or cauliflower. This trick adds body and keeps recipes vegan. Store leftover broth in containers for up to 3 months.
Building Rich Meat-Based Broths
Meat-based broths turn simple soups into rich, flavorful dishes. They offer deep tastes that plant-based broths can’t match. Whether you’re using beef bones or chicken carcasses, these methods help you achieve restaurant-quality soups at home. Let’s dive into how to get the most collagen and umami for flavorful soup starters that make every spoonful special.

Beef Bone Broth Breakdown
Beef broth gets its depth from roasting bones like knuckles or oxtail. Preheat your oven to 425°F. Coat 4 lbs of bones with olive oil and roast for 45 minutes. This Maillard reaction gives the broth its savory flavor.
Marrow Extraction Methods
After roasting, put bones in a stockpot and cover with cold water. Add:
- 2 chopped onions (skin-on for color)
- 3 garlic cloves, smashed
- 1 tbsp black peppercorns
Simmer for 24 hours on low heat, skimming foam often. For extra umami, add a Parmesan rind in the last 2 hours. Strain through cheesecloth to get every bit of liquid.
Chicken Stock Perfection
Chicken stock gets its balance from ingredient ratios. Choosing between whole birds and leftover carcasses affects flavor and cost:
| Whole Chicken | Rotisserie Carcass | |
|---|---|---|
| Flavor Depth | Rich, balanced collagen | Smokier notes |
| Prep Time | 4-6 hours | 3-4 hours |
| Best Use | Clear consommés | Hearty stews |
Whole Bird vs Carcass Approach
For whole chickens: Simmer with mirepoix (carrots, celery, onions) and bay leaves. Remove meat after 90 minutes for salads or Source 1’s couscous meatballs. This adds protein to your soups.
With carcasses: Break bones to expose marrow before boiling. Add 1 tbsp apple cider vinegar per quart of water to draw out minerals. Both methods benefit from finishing with fresh parsley for brightness.
Creating Seafood Foundations

Seafood bases add deep, oceanic flavors to dishes like chowders and stews. Making your own bases lets you control the taste and use kitchen scraps wisely. Here, we’ll show you how to make top-notch seafood bases at home.
Shrimp Shell Stock Essentials
Don’t toss those shells! Shrimp shells are packed with umami that’s key for étouffées and gumbo. First, freeze the shells in airtight containers to prevent freezer burn. Then, follow these steps:
- Roast shells at 400°F for 10 minutes to deepen flavor
- Simmer with onion, garlic, and bay leaf for 45 minutes
- Strain through cheesecloth for crystal-clear broth
Shell Storage and Prep Tips
Here’s how to keep your shells flavorful:
- Freeze shells within 2 hours of peeling
- Combine different shellfish types for complex profiles
- Remove black veins to prevent bitterness
Fish Fumet from Scraps
Make velvety bases for paella or bouillabaisse from fish heads and bones. White fish like cod make delicate fumets, while salmon heads give bold broths for miso soup. Always:
- Rinse bones thoroughly
- Skim foam during the first simmer
- Add lemon peel for brightness
White vs Brown Fish Variations
| White Fish Fumet | Brown Fish Fumet | |
|---|---|---|
| Best For | Bisques, delicate sauces | Hearty stews, ramen broth |
| Cook Time | 30 minutes | 1 hour+ |
| Key Additions | Fennel, white wine | Ginger, star anise |
Source 3 suggests pureeing salmon broths for smooth bisques and keeping crab stock chunky for cioppino. With these tips, you can turn simple seafood into amazing meals.
Seasoning Strategies for Balanced Bases
The secret to making soups taste like they’re from a restaurant is in how you season them. Ingredients are the base, but salt integration and acid balance are what make the broth pop. We’ll look at how to improve your soup seasoning without losing the natural taste.
Mastering Salt Integration
Professional chefs have a three-step plan for salting:
- Base seasoning: Add a little salt at the start
- Mid-cook adjustment: Check the taste after 45 minutes
- Final polish: Add flaky salt just before serving
When to Add During Cooking
Adding salt early helps bring out flavors from bones and veggies. Adding it later makes the broth taste brighter. Pro tip: If you add too much salt, try simmering raw potato slices for 10 minutes. They’ll soak up the extra salt.
The Acidity Balancing Act
Adding a bit of acidity can cut through the richness of meat-based stocks. Here are some options:
| Acid Type | Best For | Flavor Impact | Pro Tip |
|---|---|---|---|
| White Wine | Chicken/Vegetable | Subtle complexity | Deglaze pan first |
| Citrus Zest | Seafood/Beef | Fresh brightness | Add last 5 minutes |
Using Wine vs Citrus
Wine adds depth with caramelized notes when it’s reduced. Citrus zest brings instant freshness. For creamy soups, a splash of sherry vinegar is better. It adds a touch of acidity without curdling the dairy.
Proper Storage and Preservation
Keeping your homemade soup bases fresh is key to their taste and safety. Cool them down and store in airtight containers like Ball Mason Jars or OXO Good Grips. Vegetable broths last up to 5 days, while meat-based ones last 3-4 days.
For longer storage, freeze them in Souper Cubes trays or Ziploc Freezer Bags. Chicken stock can be frozen for 6 months, beef broth for 4 months, and seafood bases for 3 months.
Prevent freezer burn by leaving 1 inch of space in containers. For meat broths, add a thin layer of cooled fat on top before freezing. Label each container with dates and types to keep track of freshness.
Thaw frozen bases in the fridge overnight or quickly in Breville Joule Ovens. Reheat gently to keep the texture right. Simmer refrigerated broths in All-Clad Sauciers on medium-low heat.
Avoid boiling frozen stocks directly. Thaw first or use a double boiler. Stir often to mix fats and proteins. Check seasoning after reheating, as flavors get stronger.