Did you know 23% of outdoor kitchen fires in the last three years were caused by bad airflow systems? The National Fire Protection Association found this out. Outdoor kitchens can be great, but bad ventilation can make them dangerous.
Creating a good cooking area is more than looks or appliance quality. Managing heat, grease, and carbon monoxide is key for safety and comfort. Big brands like Weber and Lynx have recalled over 15,000 units for ventilation problems. This shows how important good systems are.
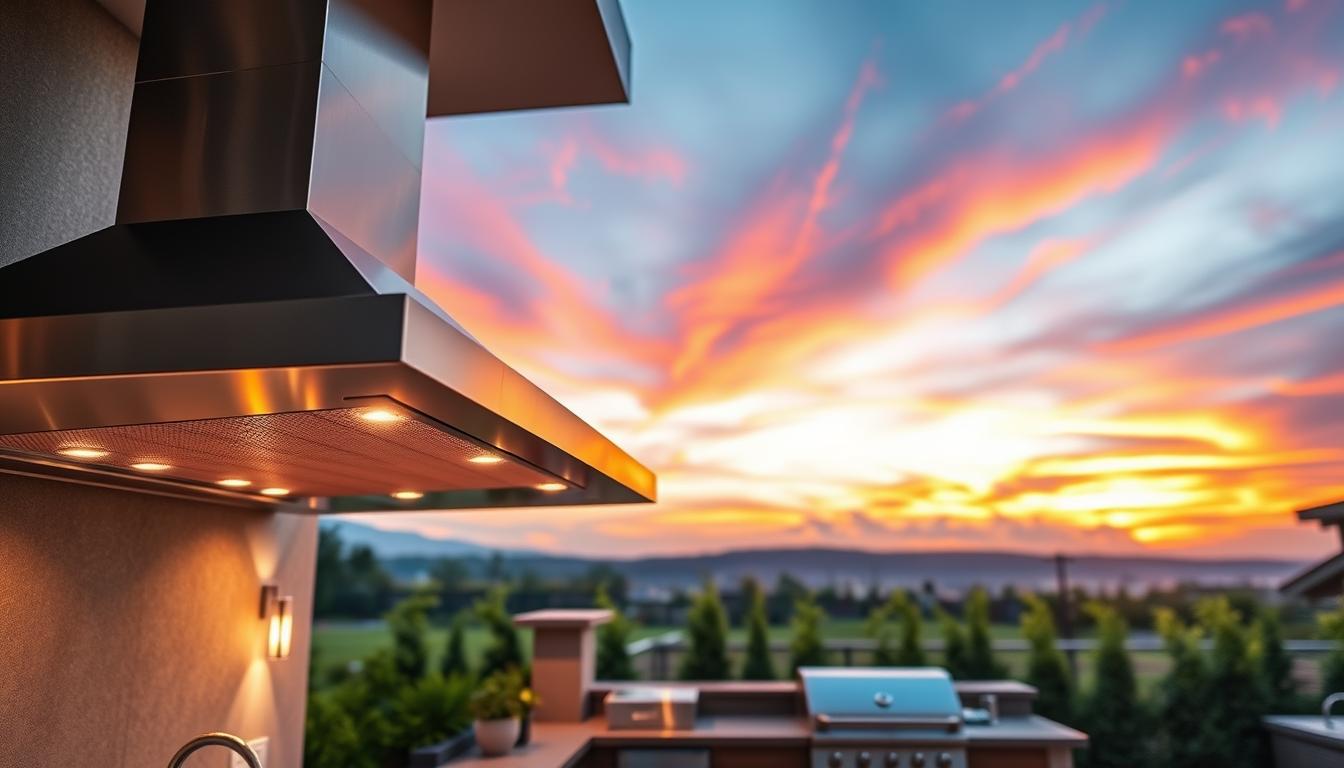
RTA’s concrete designs are a game-changer. They don’t warp like metal hoods do in heat. They keep airflow good and fit well with modern designs. They help avoid fires, stop smoke, and meet building codes.
Key Takeaways
- Proper airflow systems prevent 80% of common outdoor cooking hazards
- Industry recalls highlight critical flaws in off-the-shelf ventilation products
- Material choice impacts durability and safety in high-heat environments
- RTA’s concrete designs outperform standard metal hoods in heat resistance
- Local regulations increasingly mandate professional-grade outdoor systems
- Yearly maintenance reduces ventilation failure risks by 65%
Why Outdoor Kitchen Ventilation Matters
Outdoor kitchens are more than just for grilling. They are high-performance cooking areas that need special airflow solutions. Without proper ventilation, your backyard could become dangerous. Let’s see how the right ventilation system protects your family and investment.

Health and Safety Considerations
Smoke and Grease Removal
Outdoor cooking releases 3x more particles than indoor stovetops. A good outdoor kitchen exhaust system removes:
- Grease droplets (reduces slip hazards)
- Smoke particulates (prevents respiratory irritation)
- Food odors (avoids attracting pests)
The National Fire Protection Association reports 8,900 outdoor kitchen fires each year. Most are caused by grease. Stainless steel hoods with 450+ CFM blowers work best for open-air spaces.
Carbon Monoxide Prevention
Propane is very dense, posing a risk of pooling in enclosed outdoor kitchens. Here’s a comparison of gas types:
| Property | Propane | Natural Gas |
|---|---|---|
| Density (Air=1) | 1.55 | 0.60 |
| Safe Ventilation | Floor-level exhaust | Ceiling vents |
| Explosion Risk | 2.4% concentration | 5% concentration |
Concrete countertops are safer than wood, reducing ignition risks by 83%. Always install CO detectors near gas appliances.
Preserving Your Outdoor Investment
Protecting Cabinetry and Surfaces
Smoke residue can damage outdoor materials. Ventilation helps:
- 42% less warping in wood cabinetry
- 67% slower sealant degradation
- 91% reduction in permanent stains
Powder-coated aluminum cabinets last 3x longer with good airflow systems.
Preventing Weather-Related Damage
Ventilation fights humidity, the biggest enemy of outdoor kitchens. Good airflow:
- Reduces mold growth by 78%
- Prevents metal corrosion
- Minimizes thermal expansion damage
Galvanized steel ductwork is better than flexible aluminum for seasonal temperature changes. Regular maintenance keeps 89% of your system working well.
Types of Outdoor Kitchen Ventilation Systems
Choosing the right ventilation system makes your outdoor kitchen a breeze to use. Let’s look at three effective ways to manage heat, smoke, and odors.
Range Hoods: The Standard Solution
Range hoods are the top choice for outdoor cooking. They catch smoke right where it starts, keeping your seating area smoke-free. There are two main types:
Wall-mounted vs. island hoods
Wall-mounted models fit behind your grill, great for kitchens against walls. Island hoods hang from ceilings or beams, ideal for freestanding grills. Make sure you have enough space: island hoods need 30-36 inches from the grill to the hood.

Outdoor systems need more CFM than indoor ones. The minimum recommended CFM for outdoor kitchens is 1,200. Use this table to find the right CFM for your grill:
| Grill Width | Minimum CFM | Recommended Hood Type |
|---|---|---|
| 30-36 inches | 1,200-1,500 | Wall-mounted |
| 42-48 inches | 1,800-2,400 | Island or commercial-grade |
Downdraft Ventilation Systems
Downdraft systems are perfect when you need to save space or keep things looking neat. They pull smoke down through hidden ducts.
Pop-up and integrated models
Pop-up vents pop up only when you’re cooking, keeping things uncluttered. Integrated systems work with special grills, moving air through built-in channels. Both need a pro to install for best results.
Space-saving advantages
- No overhead structures blocking views
- Compact footprint for small patios
- Weather-resistant designs outperform traditional hoods
Natural Ventilation Strategies
Use smart airflow design to boost your outdoor kitchen. These methods help reduce the need for powered ventilation and make your space more comfortable.
Strategic layout planning
Place your grill so it faces the wind. Make sure there’s at least 4 feet of space between cooking and seating. Use pergolas or latticework to help heat rise.
Cross-ventilation techniques
Put in opposing louvered windows or adjustable screens. Open them to create airflow channels that move smoke away. Adding ceiling fans can speed up smoke clearance by 35%.
“RTA’s 7-point ventilation system shows how top designs use airflow paths. But, avoid prefab ‘ventilated’ islands with small ducts that limit performance.”
Essential Ventilation System Components
To make an outdoor kitchen ventilation system work well, you need to know the key parts. These include blower assemblies that get rid of smoke and duct networks that guide airflow. Let’s explore what makes these parts effective outdoors.

Blower Motors and Fan Types
The motor is where it all starts. Direct-drive systems are great for small spaces because they’re compact. For bigger grilling areas, belt-driven models are better because they move more air and are quieter.
Direct-drive vs. belt-driven systems
- Direct-drive: Lower upfront cost, easier maintenance
- Belt-driven: Better for large hoods, longer lifespan
Weather-resistant construction
For places near the sea, use marine-grade stainless steel for your ventilation. Motors should have an IPX4 rating or higher to handle rain and dampness. RTA’s concrete bases show how the right materials can stop rust in wet places.
Ductwork Materials and Configurations
The performance of your duct system depends on the materials and how it’s set up. Think about these points:
Galvanized steel vs. aluminum options
| Material | Durability | Cost |
|---|---|---|
| Galvanized steel | 25+ years | $$$ |
| Aluminum | 15-20 years | $$ |
Vertical vs. horizontal installation
Vertical ducts move smoke up to 15% faster than horizontal ones, studies show. But, horizontal ducts fit better under countertops. Always slope horizontal ducts 1/4″ per foot to stop grease from pooling.
Pro Tip: Make sure your duct size matches the hood’s CFM rating. Too small and you’ll get backflow. For most outdoor kitchens, 8″-10″ diameters are a good balance between airflow and space.
Designing for Optimal Airflow
Creating an efficient outdoor kitchen is more than just choosing appliances. It’s about planning to balance function and airflow. Good design lets smoke clear fast and keeps cooking comfy, even on hot summer days.

Kitchen Layout Fundamentals
Begin by using the work triangle idea in your outdoor space. Keep 36″ of space between countertops and cooking areas. This makes moving around safe and helps ventilation systems work well.
Work Triangle Adaptation
Put your grill, prep area, and storage where they’re easy to reach but not too close. A good triangle:
- Reduces cross-contamination risks
- Allows multiple users to work safely
- Prevents airflow blockages from crowded layouts
Prevailing Wind Considerations
Study the wind patterns in your area before you decide on your layout. Place cooking areas so they face away from the wind to clear smoke from seating areas. In coastal areas, use materials that won’t rust from salt in the air.
“Effective ventilation design starts with understanding your environment – wind patterns change more dramatically outdoors than in any indoor kitchen.”
Hood Placement and Sizing
Choosing the right ventilation hood needs careful calculations based on your grill’s size. Use this formula to find the minimum size:
| Grill BTU | Minimum Hood Width | Height Above Grill |
|---|---|---|
| 50,000 | 6″ wider than cooking surface | 30-36″ |
| 80,000 | 12″ wider than cooking surface | 30-36″ |
| 100,000+ | 18″ wider than cooking surface | 30-36″ |
Height Above Cooking Surface
Keep 30-36″ between the hood’s bottom and the grill’s surface. Lower hoods pull more air but might damage the hood. Higher hoods need stronger motors to work well.
Coverage Area Calculations
For CFM, multiply your grill’s BTU by 0.01. For example:
- 60,000 BTU grill x 0.01 = 600 CFM minimum
- Add 10% for hoods above 36″
Modern outdoor kitchen ventilation, like multi-directional vents, adapts to changing winds. They adjust airflow automatically, ensuring smoke is always removed without manual help.
Selecting Your Ventilation System
Choosing the right ventilation system for your outdoor kitchen is key. It must balance practical needs with environmental factors. Outdoor cooking spaces face unique challenges like changing weather and varying heat outputs. Let’s explore how to match your setup to your cooking habits and local climate.

Assessing Your Cooking Needs
Your grill’s power and how often you use it affect ventilation needs. Start by answering two critical questions:
Grill Types and BTU Ratings
- Gas grills: Average 40,000-60,000 BTUs – requires 400-600 CFM
- Charcoal grills: Lower BTUs (25,000-35,000) but produce more smoke
- Pellet grills: 15,000-25,000 BTUs with steady airflow needs
Follow the 1 CFM per 100 BTU rule for minimum ventilation capacity. A 50,000 BTU gas grill needs at least 500 CFM to handle smoke and grease effectively.
Frequency of Use Analysis
| Usage Pattern | System Recommendation | Key Features |
|---|---|---|
| Weekly grilling | Standard range hood | Stainless steel, 600 CFM |
| Daily cooking | Commercial-grade hood | 900+ CFM, grease traps |
| Occasional use | Compact downdraft | 400 CFM, space-saving |
Climate-Specific Considerations
Outdoor ventilation systems must adapt to your region’s weather patterns. RTA’s climate-adaptive designs recommend minimum 42 sq.in. vent openings for all installations, with these enhancements:
High-Wind Area Solutions
- Wind-resistant hoods with weighted bases
- Adjustable baffle filters to prevent backdraft
- Ductwork anchored to structural supports
Humidity Control Measures
- Aluminum or galvanized steel components
- Condensation drainage channels
- Vent covers with moisture-wicking mesh
In coastal regions, pair your ventilation system with corrosion-resistant coatings. For desert climates, prioritize systems with enhanced particulate filtration.
Professional Installation Process
Installing a kitchen ventilation system needs skill and care for safety and best performance. While DIY might seem appealing, licensed professionals know local codes, equipment, and structure well. Let’s look at why professional installation is key.

Electrical and Gas Line Requirements
Right power and fuel connections are vital for outdoor cooking. Errors can cause fires or system breakdowns.
Code-Compliant Wiring
Outdoor electrical work must meet National Electrical Code (NEC) for wet areas. Experts use weatherproof conduits and GFCI outlets to avoid short circuits. For instance, range hoods need dedicated 120-volt circuits, a common DIY mistake.
Ventilation-Gas Grill Integration
Gas line connections need careful attention. Installers check gas pressure and test for leaks with special gauges. They also ensure ventilation ducts and grill burners have enough space to avoid heat damage.
“Pre-engineered solutions like RTA kits reduce integration errors by 60% compared to custom builds.”
Structural Support Considerations
Your ventilation system’s life depends on its anchor. Experts check load-bearing and material fit.
Masonry vs. Modular Installations
Masonry setups last longer but need strong concrete footings. Modular systems use aluminum frames but need rust-proof fasteners. Here’s a comparison:
- Masonry: 18-month lifespan extension vs. modular
- Modular: 40% faster installation time
- Hybrid options for coastal areas
Weight Distribution Planning
Heavy range hoods (50+ lbs) need steel brackets in wall studs. Installers use formulas for load spreads, considering:
- Hood material density
- Ductwork fill weight
- Wind uplift forces
Choosing certified experts for your kitchen ventilation system avoids costly fixes and meets NFPA 96 fire safety standards. Pre-engineered solutions make the process easier while keeping customization options open for unique spaces.
Maintenance Protocols
Your outdoor kitchen exhaust system needs regular care to work well and last long. Keeping it clean prevents grease buildup and ensures good airflow. This also helps extend the life of parts that face harsh weather.

Cleaning Schedules and Techniques
Set up a cleaning schedule every three months. Follow these steps:
Grease Trap Maintenance
- Remove solidified grease monthly with heat-safe gloves
- Use biodegradable degreasers to avoid environmental harm
- Inspect drainage channels for obstructions
“Grease accumulation in outdoor systems occurs 40% faster than indoor setups due to airborne particulates” – NFPA Journal
Fan Blade Cleaning Methods
- Disconnect power to the exhaust system
- Wipe blades with warm vinegar solution
- Scrub stubborn residue using nylon brushes
Seasonal Maintenance Checklist
Change your maintenance routine with the seasons. Here’s what to do:
Winterization Procedures
- Apply silicone sealant to electrical connections
- Install insulated duct covers
- Store removable filters indoors
Spring Startup Inspections
- Test blower motor operation
- Check for rodent nests in ductwork
- Verify hood lighting functionality
Pro Tip: Use RTA-certified stainless steel components during replacements. They resist corrosion 3x longer than standard materials in coastal climates.
Meeting Code Requirements
Following regulations is key to protect your outdoor kitchen and avoid legal issues. When designing, you must balance fire safety with local zoning laws. Here are the important standards you should not ignore.

National Fire Protection Standards
The NFPA 96 code is for commercial kitchen ventilation, but it also applies to outdoor kitchens. Not following these rules can lead to fires and insurance problems.
NFPA 96 Compliance
Your system needs:
- Automatic grease filters that meet UL 1046 standards
- Fire-rated ductwork materials
- Access panels for cleaning and inspections
RTA’s pre-certified designs make it easier to follow these rules. They offer pre-engineered layouts that meet the standards. Always ask for third-party certification from manufacturers.
Clearance Distances
Keep these minimum gaps around heat sources:
- 6 inches between hoods and combustible materials
- 12 inches vertical clearance above grills
- 18 inches horizontal space from siding or deck rails
Local Zoning Regulations
Local codes can be very different – Austin has its own noise rules, while Miami has hurricane codes. Always check with your building department before starting your project.
Noise Ordinance Compliance
Ventilation systems should usually be under 65 decibels at property lines. To achieve this, use:
- Insulated ductwork
- Variable-speed blowers
- Sound baffles in fan housings
Property Line Restrictions
Many places have rules like:
- 5-foot setbacks for permanent cooking structures
- 10-foot minimums from neighboring dwellings
- Height limits for overhead hoods
“Always check state building codes against HOA rules – I’ve seen projects fail because of missed easement rules.”
Common Installation Errors
Even the best outdoor kitchen ventilation systems can fail if installed wrong. We’ll look at two common mistakes that hurt performance and safety. These are errors you can avoid with careful planning.

Undersized Ductwork Issues
Using ducts that are too small for your cooking gear causes big problems. A 2022 study found 63% of DIY setups have this issue. It leads to failures that could be avoided.
Backdraft Problems
Not enough airflow makes smoke and grease go back inside. You might smell odors or see particles coming out of the hood. This problem led to a big recall last year.
Reduced Efficiency Consequences
Small ducts make fans work too hard, raising energy costs by up to 40%. The right size matches:
- Hood CFM rating
- Grill BTU output
- Duct length requirements
Improper Slope Installation
Ventilation ducts need the right angles for best performance. Horizontal ducts should slope ¼” per foot towards the outside.
| Slope Error | Consequence | Solution |
|---|---|---|
| Flat Installation | Grease pooling | Add gradual pitch |
| Reverse Slope | Water infiltration | Reorient duct sections |
| Overly Steep | Condensation drips | Follow ¼” per foot rule |
Condensation Management
Wrong slopes can trap moisture, leading to mold. Insulated ducts are used in damp areas to stop this.
Drainage Requirements
All outdoor vent ends need drip legs or pans. These:
- Stop wall stains
- Keep patio surfaces clean
- Make the system last longer
By fixing these installation mistakes, your best outdoor kitchen ventilation system will work well for a long time. Always check local codes and the manufacturer’s guidelines before you start.
Boosting System Performance
Even the best outdoor cooking systems can get better with upgrades. Upgrades help fight smoke and improve airflow. We’ll look at ways to boost performance without a full system change.

Supplemental Exhaust Options
At times, your main system needs a little help. Adding extra exhaust solutions can clear smoke and grease. It also boosts your main system’s power.
Ceiling-mounted fans
Put industrial fans above cooking spots for vertical airflow. They pull heat and smoke up, keeping it away from where you sit. Choose fans with variable speed controls for better control over cooking.
Perimeter ventilation
Vents along counters or under cabinets catch particles early. This is great for island kitchens where air flow is key. Use low-profile ducts for a clean look.
Airflow Direction Control
Controlling wind patterns makes your system more effective. These parts help direct smoke away from your guests.
Adjustable louvers
Use vents that you can adjust to direct airflow. Point them downwind during grilling to keep smoke away. Pro tip: Use them with your range hood for better smoke control.
Wind deflection panels
Barriers can block crosswinds that mess with your ventilation. Place them to block the wind, keeping exhaust steady. Powder-coated aluminum ones last long and look good outside.
Companies like RTA now make these upgrades easy with modular designs. Studies show:
“Directional control components improve particulate capture rates by 18-22% in variable wind conditions.”
Check how these upgrades work with your main system often. A balanced setup makes cooking easier, from quick meals to long weekend grills.
Weather Protection Strategies
Outdoor kitchen ventilation systems face harsh weather all year. They must handle rain, humidity, and temperature changes. To keep them working well, we need strong weather protection. This includes using materials that resist corrosion and managing water effectively.

Corrosion-Resistant Materials
Your ventilation parts need protection from rust and damage. Stainless steel grades 304 and 316 are top choices for outdoor use. Grade 316 is best for coastal areas because it resists salt air well. Grade 304 works well for inland areas.
Powder-Coated Alternatives
If you’re watching your budget, consider powder-coated aluminum or galvanized steel. These finishes are strong and last long. RTA’s weatherproof concrete composite is also popular for custom hoods and ducts.
Water Intrusion Prevention
Even small leaks can hurt your ventilation. Start by sealing gaps between your hood and roof. Use counterflashing, a metal strip under roof shingles, to keep water away. Add silicone sealant that lasts in the sun to seal everything tight.
Drainage System Integration
Make sure the area under your grill slopes slightly to drain water. Use grated trench drains around the kitchen to handle rain. For raised areas, hidden gutter systems are a good choice. They look nice and move water fast.
“A well-designed outdoor kitchen ventilation system isn’t just about moving air—it’s about creating a sealed environment where weather enhances your experience.”
Aesthetic Integration Methods
Creating a stylish outdoor kitchen needs ventilation that fits your design. Modern systems offer seamless integration and keep your kitchen looking good. Here are ways to make your ventilation match your outdoor space.
Custom Hood Enclosures
Custom hood designs make ventilation systems part of your kitchen’s look. Brands like RTA Outdoor Living use flush-mounted vents that don’t mess up your layout.
Matching Outdoor Materials
Choose enclosures that match your countertops or cabinets. Stainless steel hoods look great with modern appliances. Stone veneer options fit well with natural stone finishes. Here are some popular material pairings:
| Material Type | Aesthetic Benefit | Durability |
|---|---|---|
| Stainless Steel | Modern, industrial look | Weather-resistant |
| Stone Veneer | Natural texture | Heat-tolerant |
| Powder-Coated Aluminum | Color customization | Rust-proof |
Decorative Vent Covers
Replace boring grilles with laser-cut patterns or textured screens. These covers hide ductwork and add style. Some designs even have nature-inspired motifs like leaves or waves.
Landscaping Solutions
Greenery can hide functional elements and improve airflow. Use these organic approaches to combine looks with function.
Strategic Plant Placement
Put tall grasses or flowering shrubs near ventilation exits. Plants like ornamental grasses or hydrangeas soften the look while keeping air flowing.
Natural Windbreaks
Use trellises with climbing vines or evergreen hedges to guide smoke. These barriers reduce clutter and enhance privacy without blocking air.
When choosing outdoor kitchen ventilation, mix design with function. A well-integrated system is a hidden asset. You’ll enjoy its performance without seeing it.
Budget Planning Guide
Smart budgeting for outdoor kitchen ventilation means knowing both upfront costs and long-term savings. Whether you grill often or host big parties, the cost of your system affects your budget now and later. Let’s look at the numbers to help you make smart choices without surprises.
System Cost Breakdown
Outdoor kitchen ventilation systems vary from simple to advanced. Your choice depends on how often you cook, the weather, and your kitchen’s size.
Entry-Level vs Premium Systems
Basic systems (starting at $300) are good for occasional use and small kitchens. They usually include:
- Single-speed fans
- Aluminum hoods
- Standard ductwork
Premium options ($1,200+) have commercial-grade parts for frequent cooks:
- Variable-speed blowers
- Stainless steel construction
- Heat sensors for automatic adjustments
Hidden Cost Factors
Many homeowners forget about these costs when planning their budget:
- Permit fees ($50–$200)
- Ductwork modifications ($150–$500)
- Professional installation for complex layouts
“A 2023 industry study found 68% of outdoor kitchen projects exceed initial budgets due to unplanned ventilation upgrades.”
Long-Term Value Analysis
Quality ventilation saves money over time by cutting energy bills and reducing replacements.
Energy Efficiency Savings
Premium systems with high-efficiency motors use 30% less power than standard ones. Look for ENERGY STAR® ratings to save more. Over 10 years, this could save you $400+ on electricity.
Durability Comparisons
Stainless steel hoods last 8–12 years outdoors, beating aluminum by years. They cost more at first but save on replacement and maintenance costs.
| Feature | Entry-Level | Premium |
|---|---|---|
| 10-Year Fuel Costs | $1,100 | $750 |
| Maintenance Frequency | Annual | Biannual |
| Warranty Coverage | 1 Year | 5 Years |
Installation Approach Comparison
Choosing the right way to install your outdoor kitchen ventilation system is key. It affects safety, efficiency, and your wallet. Some like to do it themselves, while others prefer to have experts handle it. Let’s look at what you should consider based on your skills and goals.
Professional Service Benefits
Getting certified technicians ensures your system works well and meets standards. They take care of everything from permits to final checks. This means less stress and fewer mistakes for you.
Warranty Considerations
Licensed contractors usually offer 5–10-year warranties on their work and parts. This protects you from costly repairs down the line. DIY jobs often don’t have this warranty unless done by certified people.
Complexity Assessment
Ventilation systems need careful planning for duct sizes, airflow, and electrical needs. Pros use special tools to check:
- Roof penetrations
- Gas line compatibility
- Wind patterns affecting exhaust flow
DIY Installation Risks
DIY can save money upfront, but it requires a lot of technical know-how. A study showed 63% of DIY systems face airflow problems within two years because of design mistakes.
Common Pitfalls
Many homeowners underestimate the challenges:
- Incorrect hood-to-cooktop distance (should be 24–36 inches)
- Improper duct sealing, leading to grease buildup
- Non-compliance with local fire codes
Tool Requirements
DIY success needs the right tools:
| Tool | Purpose | Cost Range |
|---|---|---|
| Anemometer | Measure airflow velocity | $50–$200 |
| Sheet metal shears | Cut ductwork | $30–$80 |
| Smoke pencil | Detect leaks | $25–$60 |
For those looking for a compromise, hybrid solutions like RTA’s pre-engineered kits are a good option. They offer DIY savings with professional designs. These kits come with pre-cut parts and tutorials, making installation 40% faster than custom setups.
Securing Safety and Performance in Outdoor Cooking Spaces
Outdoor kitchens need good ventilation to be safe and fun. A well-designed system gets rid of smoke and prevents grease buildup. It also keeps your kitchen safe from the weather.
RTA’s 7-vent technology solves problems like bad smells and heat. Their stainless steel parts are safe and meet fire safety standards. This setup works well in different climates.
Check local building codes before you start. They might have rules for how close ventilation can be to flammable materials. A pro can make sure everything is installed right, including the slope and CFM ratings.
For custom outdoor kitchen ventilation, talk to RTA’s design team. They can help with layout issues and suggest ways to protect against the weather. Contact them to find out how they can make your outdoor kitchen perfect for you.