Did you know 68% of homeowners who upgraded their outdoor living spaces regretted their initial flooring choice within two years? Your patio’s foundation isn’t just about looks—it’s the unsung hero that withstands sizzling grills, spilled sauces, and Midwest winters alike.
Choosing surfaces for cooking and entertaining areas requires balancing style with practical resilience. Unlike indoor spaces, these materials face UV rays, grease stains, and temperature swings that can warp or fade cheaper alternatives. The right pick elevates your home’s curb appeal while surviving decades of summer BBQs and holiday gatherings.
Concrete pavers, for example, handle heavy foot traffic without cracking, while natural stone adds rustic charm that ages gracefully. Porcelain tiles mimic high-end marble but resist scratches better. Every option has trade-offs—your climate, design vision, and budget will steer the decision.
Key Takeaways
- Prioritize slip-resistant textures for safety near grills and sinks
- Sealed surfaces prevent stains from oils and marinades
- Frost-proof materials are essential for colder regions
- Darker tones hide wear better in high-traffic zones
- Modular designs simplify repairs without redoing entire sections
- Heat-tolerant options protect against falling embers or hot pans
Key Factors When Choosing Outdoor Kitchen Flooring
Your outdoor kitchen’s flooring is more than a design choice. It affects safety, durability, and costs over time. Focus on these five key criteria to ensure your flooring lasts season after season.

Climate Resistance and Weatherproofing
Outdoor flooring must withstand harsh weather. In northern states, freeze-thaw cycles can damage materials that absorb water, like untreated concrete. Southern climates need UV-resistant options to prevent fading and warping.
Freeze-Thaw Cycle Considerations
- Choose non-porous materials like porcelain tile or sealed pavers
- Avoid natural stone without proper sealing
- Ensure proper slope for water runoff (1/4″ per foot minimum)
UV Protection Needs
- Composite decking with UV inhibitors lasts 25+ years
- Dark-colored stones show fading less than light hues
- Polymer-modified concrete resists solar degradation
Slip Resistance and Safety Standards
Wet surfaces near grills or sinks need textures that meet ASTM C1028 standards for slip resistance. Look for:
- Riven-finish slate (coefficient of friction >0.6)
- Stamped concrete with aggregate exposure
- Anti-slip ceramic tiles (R10-R11 rating)
Maintenance Requirements Over Time
Compare annual upkeep efforts:
- Low maintenance: Composite decking (soap-and-water cleaning)
- Moderate care: Stained concrete (reseal every 3 years)
- High upkeep: Natural wood (seasonal sanding/oiling)
Aesthetic Coordination With Outdoor Design
Your flooring should match your outdoor design. For modern looks, use large-format tiles. Rustic designs work well with tumbled pavers or reclaimed brick. Always test color samples in natural light.
Budgeting for Installation and Lifespan
Think about both initial costs and replacement needs:
- Budget-friendly: Gravel ($3-$10/sq.ft) lasts 5-8 years
- Mid-range: Concrete pavers ($10-$30/sq.ft) last 15-25 years
- Premium: Stainless steel ($25-$50/sq.ft) lasts 30+ years
Natural Stone Flooring: Timeless Luxury
Homeowners looking for beauty and longevity find it in natural stone. These materials are both elegant and durable. They fit well with outdoor spaces and provide weather-resistant flooring. Let’s look at three top choices that boost both style and function.

Granite: The Ultimate Durable Choice
Granite is the top pick for outdoor kitchens. Its strong structure fights off scratches, stains, and extreme heat.
Sealing Requirements
Seal granite once a year to stop oil from soaking in. Unlike other materials, granite stays in great shape with just a little care.
Heat Resistance Benefits
Granite can handle hot pans without getting damaged. It can even take temperatures up to 1,200°F, perfect for grills or pizza ovens.
Slate: Natural Texture and Slip Resistance
Slate’s layered look adds grip when it’s wet. Its colors, from charcoal gray to muted greens, match many design styles.
Limestone: Sophisticated Softness
Limestone has a smooth feel with beautiful veining. Though it’s a bit more absorbent than granite, new sealants keep it safe from moisture and UV rays.
Cost Comparison: $15-$30/sq.ft Installed
| Stone Type | Price Range | Maintenance Level |
|---|---|---|
| Granite | $25-$30 | Low |
| Slate | $18-$25 | Moderate |
| Limestone | $15-$22 | High |
Granite’s higher cost upfront is worth it for its long life. Limestone needs more sealing. Slate is a good middle ground, balancing price and slip resistance.
Stamped Concrete: Versatile Value

Stamped concrete is a top choice for outdoor kitchens. It’s affordable yet looks like expensive materials like stone or brick. Homeowners love it for custom outdoor flooring ideas that don’t break the bank. The latest techniques make it look so real, even experts might think it’s the real deal.
Custom Pattern Options
Stamped concrete can be anything from rustic cobblestone to modern geometric designs. Architectural Digest recently highlighted these trends:
Popular design trends
- Weathered wood plank effects
- European cobblestone replicas
- Ashlar slate patterns
- Terrazzo-inspired mixes
Reinforcement for Heavy Appliances
When you have big appliances like grills or pizza ovens, you need strong concrete. Contractors use:
- Steel rebar grids
- Fibermesh additives
- 6″ gravel base layers
Sealing Schedule for Longevity
| Climate Type | First Seal | Re-Seal Interval |
|---|---|---|
| Arid | 45 days post-install | 3 years |
| Humid | 30 days post-install | 2 years |
| Freeze-Thaw Zones | 21 days post-install | 18 months |
Price Range: $8-$18/sq.ft
Basic stamped concrete starts at $8. But, if you want fancy designs with lots of colors and textures, it can cost up to $18. Here’s a breakdown of what affects the price:
| Feature | Cost Impact | Value Added |
|---|---|---|
| Color Hardener | +$2-$3/sq.ft | Deeper hue retention |
| Anti-Slip Additives | +$1.50/sq.ft | Wet surface safety |
| Custom Stencils | +$4-$6/sq.ft | Unique patterns |
Porcelain Tile: Modern Durability
Looking for the best flooring for outdoor kitchen spaces? Porcelain tile is a top choice. It’s made with high-pressure techniques, making it durable against fading, scratching, and extreme temperatures. It’s perfect for all seasons and comes in many designs, from wood to stone.

Frost-Proof Technology Explained
Porcelain’s secret is its low water absorption. Tiles are fired at 2,500°F, making them strong against freezing and thawing. Look for PEI Class IV or V ratings for tiles that can handle heavy use and icy winters.
Grout Selection and Maintenance
Epoxy grout is better than cement in wet areas, fighting stains and mildew. Choose grout colors that hide dirt and reseal every 2-3 years. Wide grout lines help with drainage and make cleaning easier.
Anti-Slip Surface Treatments
Textured finishes, like tumbled edges or grit-enhanced coatings, are used to prevent slipping. For poolside kitchens, choose tiles with R10-R11 ratings. Matte finishes are safer than glossy ones, reducing the risk of accidents near grills or sinks.
Cost Analysis: $10-$25/sq.ft
Basic 12”x24” tiles start at $10/sq.ft, but larger or more detailed designs can cost up to $25. Thicker tiles (3/4”) are 15% more expensive but support heavy islands better. Add $5-$8/sq.ft for professional installation, which is important for outdoor appliances.
Brick Flooring: Classic Charm

Brick flooring adds rustic elegance to outdoor kitchens. It’s century-proven durable. New installation methods and materials make it more versatile than ever. We’ll look at how to mix old-world charm with modern needs.
Full-Size vs. Thin Brick Systems
Traditional 2¼” thick clay bricks offer authentic colonial charm. They need strong foundations. Thin brick veneers (½”-1″ thick) have 50% less weight but look similar. Here are the main differences:
| Feature | Full-Size Brick | Thin Brick |
|---|---|---|
| Installation Time | 3-5 days | 1-2 days |
| Weight Capacity | Supports heavy islands | Needs concrete base |
| Cost Range | $12-$18/sq.ft | $10-$15/sq.ft |
Controlling Efflorescence & Stains
White mineral deposits (efflorescence) often show up on brick. To prevent it, use:
- Pre-sealed bricks
- Polymeric sand joints
- Annual pH-neutral cleaner applications
For grease stains, mix baking soda and water for a poultice. Don’t use pressure washing, as it pushes stains deeper.
DIY Installation Considerations
Thin brick systems let homeowners achieve professional looks. Key steps include:
- Compact 4″ gravel base
- 1″ sand leveling bed
- Spacers for consistent joints
Leave ⅛” gaps for expansion and use frost-proof mortar in cold climates. Full-size brick projects usually need professional masons.
Cost Expectations
Brick flooring costs $10-$20/sq.ft installed. Material prices vary:
- Reclaimed bricks: $3-$7/sq.ft
- New clay bricks: $5-$10/sq.ft
- Thin brick kits: $8-$12/sq.ft
Wood Decking: Warm Natural Appeal
Wood decking brings natural beauty and strength to outdoor cooking areas. It makes spaces inviting and blends well with nature. It also offers practical benefits. Let’s see how wood choices mix looks and function in outdoor kitchen design.

Ipe Wood: Premium Durability
Ipe, or “ironwood,” is known for its high density and weather resistance. This tropical hardwood can handle a lot without warping. It’s pricey at first, but lasts over 50 years, making it a long-term investment for outdoor kitchen design.
Redwood: Natural Rot Resistance
Redwood has tannins and oils that keep insects away and prevent decay. Its straight grain and rich colors add rustic charm. But, it needs regular sealing. It works best in covered areas to avoid rain damage.
Maintaining Wood in Wet Areas
To keep wood decking safe near sinks or grills, follow these steps:
- Apply penetrating oil sealant every 12-18 months
- Use non-abrasive cleaners to prevent surface damage
- Immediately wipe spills to prevent staining
Cost Comparison: $20-$45/sq.ft
| Material | Initial Cost | Maintenance Cost/Year |
|---|---|---|
| Ipe | $35-$45 | $1.20 |
| Redwood | $20-$30 | $2.50 |
Ipe might cost more at first, but its low upkeep can save money over time.
Composite Decking: Low-Maintenance Alternative
Homeowners looking for durable outdoor flooring that lasts through harsh weather will love composite decking. It’s made from wood and plastic, giving it a natural look and lasting strength. This material is perfect for outdoor kitchens because it’s easy to care for.
Cap-Stock Technology Benefits
Composite decking’s long life is thanks to its protective outer layer. This layer fights off fading, mold, and scratches better than other materials. It also keeps moisture out, which is great near grills or sinks. Most brands offer warranties of 25+ years against color loss.
Heat Reflection Solutions
Older composite decks were known for trapping heat. But new ones have changed that. Light-colored boards with reflectivity additives stay cooler than dark wood. Some even have cooling minerals in the core.
| Feature | Benefit | Maintenance Tip |
|---|---|---|
| Cap-Stock Surface | Resists fading/scratches | Annual soap-and-water wash |
| Heat-Reflective Colors | Reduces surface temperature | Choose pearl gray or sand tones |
| Textured Finish | Improves slip resistance | Monthly broom sweep |
Cleaning and Scratch Prevention
Composite decks are easy to care for compared to wood. Just hose off spills daily. For tough stains, use a soft-bristle brush, not pressure washers. To avoid scratches:
- Place felt pads under grill legs
- Use composite-specific cleaners
- Rotate rugs to avoid indentations
Pricing: $12-$22/sq.ft
Composite decking costs more than basic wood but saves money in the long run. Prices start at $12/sq.ft for basic boards and go up to $22 for premium ones. Add 10-15% for special cuts or patterns.
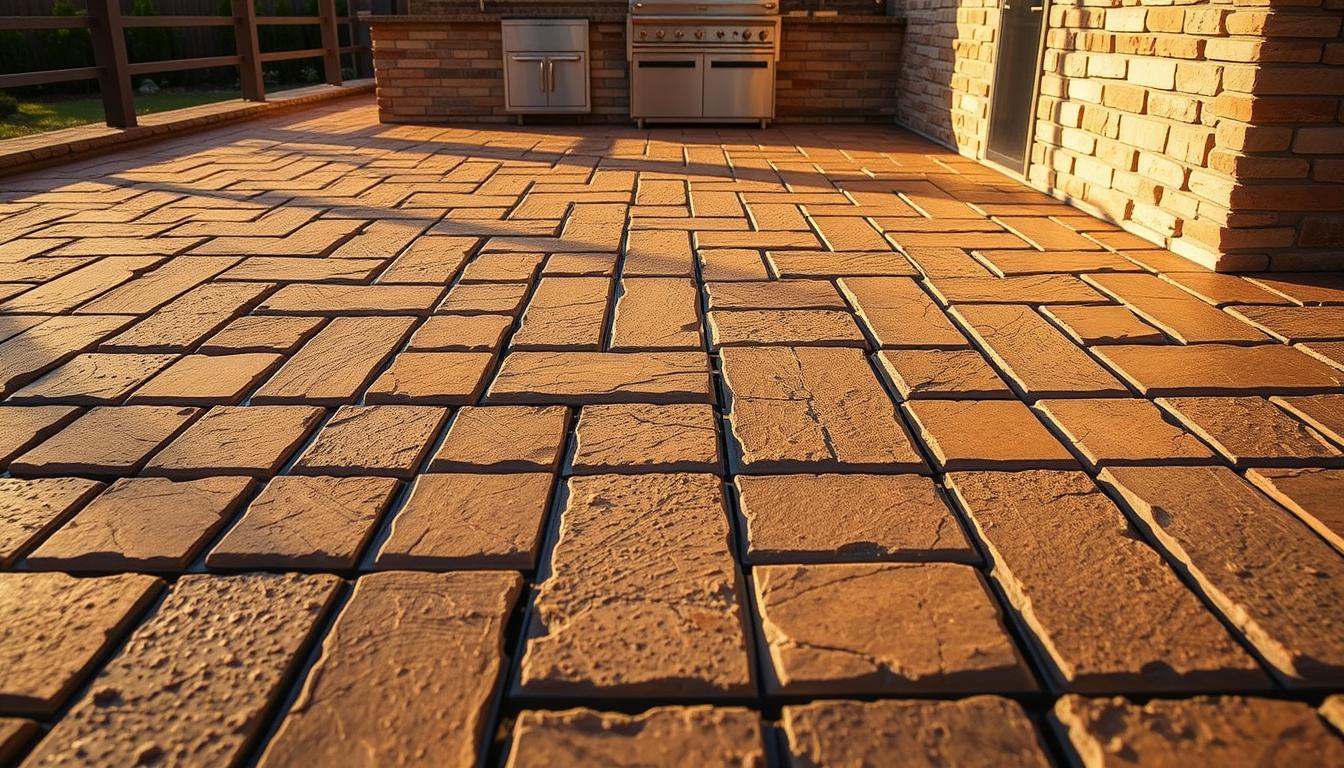
Concrete Pavers: Interlocking Flexibility
Concrete pavers are great for outdoor kitchens, even where the ground shifts with the seasons. Their design lets the ground move without cracking. This makes them perfect for weather-resistant flooring in cold climates.
Unlike solid slabs, you can replace just the damaged pavers. This is a big plus for keeping your outdoor kitchen looking good.

Permeable Paver Systems
Today’s paver installations have gaps filled with gravel or sand. This helps water drain away from grills and fridges. It also stops puddles from forming.
Some systems even filter rainwater through crushed stone below. This reduces runoff better than regular concrete.
Weight Capacity for Appliances
Concrete pavers can handle up to 12,000 PSI. This is strong enough for pizza ovens and built-in islands. Contractors suggest:
- 6-inch compacted gravel base
- 1-inch bedding sand layer
- Edge restraints for stability
Weed Prevention Strategies
Polymeric sand acts as a barrier when it hardens. For tough weeds:
- Apply pre-emergent herbicide every year
- Use root-blocking geotextile fabric under pavers
- Keep nearby plants trimmed
Cost Range: $10-$30/sq.ft
Basic 4×8 pavers start at $10/sq.ft. Textured designs with color blends can cost up to $30. Thicker pavers (2.5-3.5 inches) are 15% more but last longer.
DIY installation can save 40% on labor costs for those who are handy.
Maintenance is easy: pressure wash once a year and re-sand joints every 3-5 years. This interlocking design is better than wood or composite at handling spills and hot charcoal. It’s a top choice for weather-resistant flooring.
Stainless Steel: Commercial-Grade Option
Commercial kitchens love stainless steel for its toughness. Now, it’s a top pick for outdoor kitchens too. It’s great because it doesn’t stain, can handle heat and moisture, and looks modern.
Its surface is smooth, making it easy to clean. This makes it perfect for outdoor kitchens that need to stay clean and easy to look after.

Built-In Germ Defense
Stainless steel stops germs from growing, which is key in kitchens. Spills are easy to clean up, stopping mold from growing. It’s great for people with allergies or who want a clean kitchen.
Quiet Performance Solutions
Metal floors can be noisy, but there are ways to make them quiet:
- Rubberized underlayment
- Textured surface finishes
- Sound-dampening subfloor grids
Expert Installation Matters
Installing stainless steel needs skill. It must be welded right and have special joints for temperature changes. Experts use tools to make sure it’s level and water drains well.
Long-Term Investment Costs
Stainless steel costs more at first ($25-$50/sq.ft). But it lasts longer than cheaper options. Here’s how it compares:
| Feature | Stainless Steel | Natural Stone | Porcelain Tile |
|---|---|---|---|
| Hygiene Rating | Non-porous | Porous (requires sealing) | Low absorption |
| Lifespan | 40+ years | 25-30 years | 20-25 years |
| Maintenance Cost | $50/year | $150/year | $100/year |
Rubber Tile: Comfort-Focused Safety
Rubber tiles are a great choice for outdoor kitchens that focus on safety and comfort. They are soft and flexible, making them shock-absorbing. They also resist weather, making them durable and safe from slips and falls.

Shock Absorption Benefits
Rubber tiles reduce joint strain by absorbing impacts from dropped utensils or shifting appliances. This cushioning effect helps prevent broken dishes and minimizes fatigue during long cooking sessions. Unlike rigid materials, they provide a slight bounce that makes standing more comfortable.
UV-Stable Formulations
Modern rubber flooring uses advanced polymers that resist fading and cracking in direct sunlight. High-quality options maintain their color for 10+ years without becoming brittle, even in southern climates. Look for tiles with UV inhibitors listed in their technical specifications.
Odor Control Solutions
Non-porous rubber surfaces prevent bacterial growth and food spills from causing lingering smells. Many manufacturers add antimicrobial agents during production, creating hygienic spaces for food preparation. Regular hosing keeps these tiles fresh without chemical cleaners.
Budget-Friendly: $5-$15/sq.ft
Rubber flooring costs 60% less than premium natural stone while being just as durable. Interlocking tile systems let you install sections yourself over weekends. Replacement tiles cost $8-$12 each if damage occurs, making repairs affordable and localized.
Gravel: Quick-Drain Budget Option

Gravel is great for outdoor kitchens because it drains water well and is affordable. It lets rainwater pass through quickly, preventing puddles. Gravel also adds a rustic touch that fits well with gardens.
Crushed Granite vs. Pea Gravel
Crushed granite becomes stable when compacted, perfect for grill areas. Its sharp edges keep it in place but can be rough. Pea gravel is softer underfoot but needs more raking to stay even.
Stabilization Grid Systems
Plastic or metal grids help keep gravel in place, ideal for busy spots. These structures:
- Keep stones from moving into grass
- Support heavy items like pizza ovens
- Lower maintenance by 60% compared to loose gravel
Comfort and Practical Limitations
Gravel isn’t good for moving heavy items like coolers or carts. Bar stools might wobble without pavers. Mixing gravel with flagstone paths can make walkways more stable.
Cost: $3-$10/sq.ft
| Gravel Type | Price Range | Best For | Maintenance Level |
|---|---|---|---|
| Crushed Granite | $5-$10 | High-traffic zones | Low |
| Pea Gravel | $3-$7 | Decorative borders | Moderate |
| Stabilized Grid System | $8-$12 | Appliance areas | Minimal |
Material Cost Comparison Guide
Choosing the right flooring for your outdoor kitchen is more than just looking at prices. You need to consider material costs, installation surprises, and long-term value. Let’s look at the numbers to help you make a smart choice.

Price Per Square Foot Chart
This table shows prices for all major outdoor kitchen flooring options. Prices include typical installation costs in the United States:
| Material | Price Range (per sq.ft) | Hidden Costs | Lifespan |
|---|---|---|---|
| Natural Stone | $15-$30 | Sealing, uneven surface prep | 25+ years |
| Stamped Concrete | $8-$18 | Reinforcement, crack repairs | 15-20 years |
| Porcelain Tile | $10-$25 | Specialized grout, frostproofing | 20+ years |
| Brick | $10-$20 | Efflorescence treatment | 30+ years |
| Composite Decking | $12-$22 | Substructure upgrades | 15-25 years |
Hidden Installation Costs Revealed
Three expenses often surprise homeowners:
- Subbase preparation: Gravel or sand layers add $2-$4/sq.ft
- Professional sealing: Critical for porous materials ($1.50-$3/sq.ft)
- Edge restraints: Necessary for loose materials like gravel
Plan to spend 15-30% more than the material cost for these extras. For example, stamped concrete’s $18/sq.ft could go up to $23 with the right prep and sealing.
Lifespan Value Analysis
A material’s true cost shows over time. Let’s compare two extremes:
- Gravel ($3/sq.ft): Lasts 5-8 years before needing replacement
- Stainless Steel ($50/sq.ft): 40+ year lifespan with zero rot
Stainless steel costs 16x more upfront but is cheaper per year after decade 8. Think about this when planning your outdoor kitchen flooring budget for years to come.
Professional vs DIY Installation
Choosing between professional installation and DIY for your outdoor kitchen flooring affects both functionality and budget. Some materials are perfect for weekend projects, while others need expert handling to avoid mistakes. Knowing your project’s complexity and your skill level is key to making the right choice.
When to Hire Contractors
Complex installations like poured concrete or natural stone slabs need contractors. These materials require precise leveling and structural reinforcement, which most homeowners can’t do. Professionals also handle permits and ensure your outdoor kitchen meets local building codes.
Contractors are great at solving drainage problems. As one landscape architect says:
“Improper slope causes 80% of outdoor flooring failures. We laser-level surfaces to create a 1-2% grade away from your home.”
They also offer warranties on their work, giving you peace of mind for your investment.
DIY-Friendly Materials
Three options are good for DIY enthusiasts:
- Snap-tile systems: Interlocking porcelain or composite tiles require no mortar
- Gravel with stabilization grids: Easy to spread and adjust
- Thin brick veneers: Lightweight alternative to full bricks
These materials need basic tools like rubber mallets and levels. Start with small areas, like a 10×10 ft space, to test your techniques before expanding.
Common Installation Mistakes
Avoid these common errors:
- Ignoring expansion gaps: Materials like composite decking need 1/4″ spacing
- Using indoor adhesives outdoors: Always choose UV-resistant bonding agents
- Rushing the base preparation: Compacted gravel or sand prevents shifting
Improper drainage is a big problem. Test your slope by spraying water – it should flow completely away within 30 seconds. For mixed-material designs, consult an engineer if combining heavy stone counters with lightweight flooring.
Maintenance Master Guide
Keeping your outdoor kitchen looking great and lasting long needs more than just sweeping. Different materials need special care to fight off weather, spills, and daily wear. This guide will show you the key steps and fixes to keep your floors in top shape all year.
Seasonal Cleaning Protocols
Spring and fall are the times for deep cleaning to get rid of dirt and stop stains. Use a pressure washer at 1,200 PSI to clean concrete pavers in the winter. But, don’t use it too hard on natural stone, as it can damage it. For composite decking, use oxygen bleach to kill mildew without changing the color.
In the summer, you need to clean your outdoor kitchen every week. Sweep wood decking to keep it clean, and rinse porcelain tiles with cool water to keep them cool. In the winter, quickly remove snow from stamped concrete to avoid damage from freezing and thawing. Always dry stainless steel after using de-icer to avoid water spots.
Repair Techniques for Common Issues
Got cracks in concrete? Use epoxy filler for small gaps. For bigger cracks, it’s best to get a pro. To fix loose brick pavers, lift them, add sand, and tamp down. For oil stains on granite, mix baking soda and water, let it sit overnight, then scrub it off.
If your wood deck boards are rotting, replace them right away to stop it from spreading. For scratches on composite, use the right repair sticks. For dents in rubber tiles, use a heat gun to reshape them. Always test cleaners on a small area first.
Re-Sealing Timelines by Material
| Material | Sealant Type | Frequency |
|---|---|---|
| Natural Stone | Penetrating Sealer | Every 2 Years |
| Stamped Concrete | Acrylic Resin | Annual |
| Wood Decking | UV-Blocking Oil | 18-24 Months |
| Brick Pavers | Siloxane Sealer | 3-5 Years |
Apply sealants when it’s dry and mild outside for best results. Check the maker’s instructions—some new composites don’t need sealing. With the right care, your outdoor kitchen will stay beautiful and last for years.
Design Trends for 2024
Outdoor kitchen design is getting a bold refresh this year. It blends creativity with practical solutions for modern lifestyles. Whether you’re renovating or building new, these trends offer fresh outdoor flooring ideas that balance style and durability. Let’s explore what’s shaping backyard spaces in 2024.
Mixed Material Combinations
Designers are pairing natural stone with sleek composites for visual contrast. Imagine slate tiles framed by weather-resistant aluminum edges or porcelain tiles mixed with reclaimed wood accents. These combinations add depth while letting you match different zones – like grilling areas and dining spaces – seamlessly.
Bold Geometric Patterns
Hexagonal concrete pavers and chevron-patterned decking are replacing traditional layouts. Stamped concrete with angular designs mimics high-end tile work at half the cost. For a playful twist, try alternating two-toned bricks in diamond formations. These patterns make floors the star of your outdoor kitchen.
Eco-Conscious Material Choices
Sustainability takes center stage with recycled rubber tiles and bamboo composite decking. New UV-stable polymers made from ocean plastics offer vibrant colors without environmental guilt. Local stone suppliers now provide carbon-neutral shipping options, making natural materials greener than ever.
Conclusion: Building Your Perfect Foundation
Choosing the right outdoor kitchen flooring is all about finding a balance. It should look good and last long. The right choice affects safety, cleaning, and how well it fits with your home.
Natural stone brings timeless beauty, while stamped concrete is budget-friendly. Porcelain tile is modern and durable. Composite decking is easy to care for and looks great.
Think about mixing materials for a unique look. You could pair rustic brick with sleek steel or wood with frost-proof pavers. Brands like Trex and Belgard make it easier to mix materials.
Don’t forget about your local weather, appliance weights, and how you’ll care for it. Your outdoor kitchen’s foundation is key for many happy meals and gatherings.
Use the tips and trends from 2024 to make a space that’s weather-ready and reflects your style. Share your finished project or ask questions. Your experience can help others choose their outdoor flooring.
FAQ
How does climate affect my outdoor kitchen flooring choice?
What’s the most durable natural stone for high-traffic outdoor kitchens?
Can stamped concrete support heavy outdoor kitchen appliances?
How do I prevent slippery surfaces near poolside outdoor kitchens?
What’s the true cost difference between brick and concrete pavers?
FAQ
How does climate affect my outdoor kitchen flooring choice?
In cold areas, choose frost-proof materials like porcelain tile or concrete pavers. For hot climates, pick UV-resistant options. For example, composite decking or granite stone can handle intense sun without fading.
What’s the most durable natural stone for high-traffic outdoor kitchens?
Granite is the strongest, with 19,000 PSI compressive strength. It can handle grill heat up to 1,200°F. Slate is good for wet areas but needs sealing every two years.
Limestone is not good near grease because it stains easily.
Can stamped concrete support heavy outdoor kitchen appliances?
Yes, with the right reinforcement. Use 6” thick concrete and #4 rebar grids for grills or pizza ovens. Polymeric-based stamping systems are durable and cost-effective.
How do I prevent slippery surfaces near poolside outdoor kitchens?
Use porcelain tiles with R10+ ratings and abrasive coatings. For wood decks, choose ipe with groove patterns. Rubber tiles are also good but need UV-stabilized formulations.
What’s the true cost difference between brick and concrete pavers?
Clay brick costs -/sq.ft installed. Concrete pavers are cheaper at -. Thin brick veneers are even more affordable at -.
Don’t forget to add
FAQ
How does climate affect my outdoor kitchen flooring choice?
In cold areas, choose frost-proof materials like porcelain tile or concrete pavers. For hot climates, pick UV-resistant options. For example, composite decking or granite stone can handle intense sun without fading.
What’s the most durable natural stone for high-traffic outdoor kitchens?
Granite is the strongest, with 19,000 PSI compressive strength. It can handle grill heat up to 1,200°F. Slate is good for wet areas but needs sealing every two years.
Limestone is not good near grease because it stains easily.
Can stamped concrete support heavy outdoor kitchen appliances?
Yes, with the right reinforcement. Use 6” thick concrete and #4 rebar grids for grills or pizza ovens. Polymeric-based stamping systems are durable and cost-effective.
How do I prevent slippery surfaces near poolside outdoor kitchens?
Use porcelain tiles with R10+ ratings and abrasive coatings. For wood decks, choose ipe with groove patterns. Rubber tiles are also good but need UV-stabilized formulations.
What’s the true cost difference between brick and concrete pavers?
Clay brick costs $18-$22/sq.ft installed. Concrete pavers are cheaper at $12-$16. Thin brick veneers are even more affordable at $9-$14.
Don’t forget to add $1.50/sq.ft for efflorescence prevention.
How often should I reseal composite decking around outdoor kitchens?
High-quality composites like Trex Transcend don’t need sealing. But, clean grease-prone areas annually with Restore 420 cleaner. Budget composites need sealing every three years to reduce heat retention.
Can stainless steel flooring handle residential outdoor kitchen use?
Yes, commercial-grade 304 stainless steel works. Use 3mm diamond-textured panels for slip resistance. Rubber underlayment helps dampen noise.
Stainless steel is more expensive but keeps your kitchen clean.
What’s the best budget flooring for temporary outdoor kitchen setups?
Interlocking rubber tiles are affordable at $8/sq.ft. They’re good for impact absorption and meet ADA standards. Crushed granite is another option but avoid it near appliances.
How do I integrate lighting into outdoor kitchen flooring safely?
Use In-lite Linear LED systems for wet locations. Install them during paver/base preparation. For wood decks, recessed step lights need UL Wet Listing.
Avoid glass aggregates in concrete near cooking areas to prevent glare.
What sustainable flooring options meet luxury outdoor kitchen standards?
Crossville’s EcoCycle porcelain contains 40% recycled content. Thermally-modified ash decking offers FSC-certified hardwood looks without chemicals. New bamboo composites achieve Class A fire ratings for grill areas.
.50/sq.ft for efflorescence prevention.
How often should I reseal composite decking around outdoor kitchens?
High-quality composites like Trex Transcend don’t need sealing. But, clean grease-prone areas annually with Restore 420 cleaner. Budget composites need sealing every three years to reduce heat retention.
Can stainless steel flooring handle residential outdoor kitchen use?
Yes, commercial-grade 304 stainless steel works. Use 3mm diamond-textured panels for slip resistance. Rubber underlayment helps dampen noise.
Stainless steel is more expensive but keeps your kitchen clean.
What’s the best budget flooring for temporary outdoor kitchen setups?
Interlocking rubber tiles are affordable at /sq.ft. They’re good for impact absorption and meet ADA standards. Crushed granite is another option but avoid it near appliances.
How do I integrate lighting into outdoor kitchen flooring safely?
Use In-lite Linear LED systems for wet locations. Install them during paver/base preparation. For wood decks, recessed step lights need UL Wet Listing.
Avoid glass aggregates in concrete near cooking areas to prevent glare.
What sustainable flooring options meet luxury outdoor kitchen standards?
Crossville’s EcoCycle porcelain contains 40% recycled content. Thermally-modified ash decking offers FSC-certified hardwood looks without chemicals. New bamboo composites achieve Class A fire ratings for grill areas.