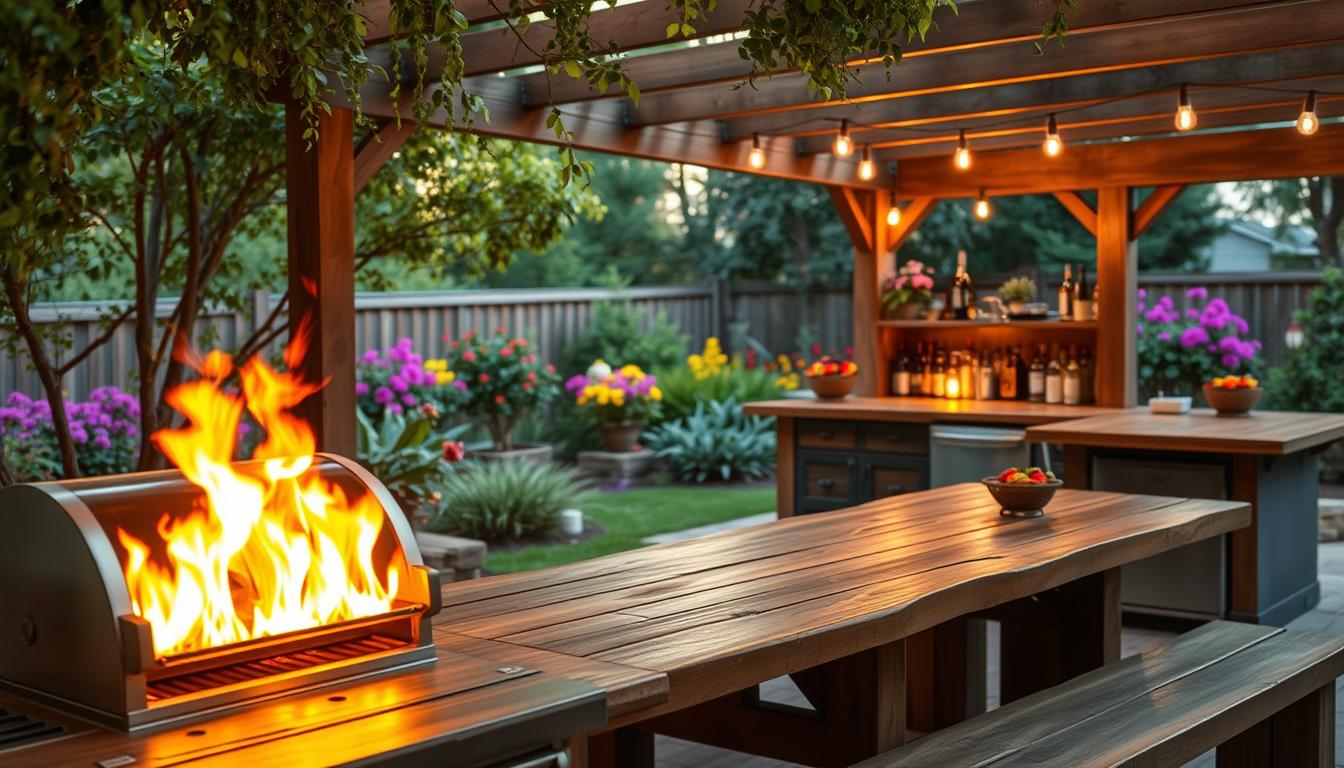
Did you know homes with functional outdoor cooking areas sell 22% faster than those without? A well-designed outdoor space is more than just for grilling. It’s a lifestyle upgrade that adds entertainment, convenience, and value to your property. Whether you’re hosting parties or having family dinners, the right setup makes your yard a year-round favorite spot.
Creating your own cooking zone starts with smart planning. Begin by measuring your available space. Even small areas can fit a compact grill station with storage for utensils and spices. For bigger yards, think about adding a pizza oven or bar counter to take your hosting to the next level.
Choosing the right appliances is key. Stainless steel options resist rust, and portable carts are great for smaller budgets. Look for multi-functional pieces—like a side burner that doubles as a workstation. Built-in ice chests keep drinks cold without needing to go back inside.
Layout is important. Place your grill downwind from seating to avoid smoke problems. Use weather-resistant materials like concrete or granite for countertops. And don’t forget task lighting for evening use. With careful planning, you can create a space that rivals indoor kitchens in both style and function.
Key Takeaways
- Proper space measurement ensures efficient use of your yard’s footprint
- Weather-resistant materials extend your setup’s lifespan
- Multi-functional appliances maximize utility in compact areas
- Strategic layout planning prevents common issues like smoke drift
- Budget-friendly upgrades can boost home resale value significantly
Planning Your DIY Outdoor Kitchen Setup
Getting ready for your outdoor kitchen is key. Before you start, understand your space and set a budget. This step is vital to avoid stress and save money.

Evaluating Your Outdoor Space
Think of your yard as a puzzle. Every detail matters. Use graph paper or digital tools to plan your kitchen.
Conducting Site Measurements and Zoning Checks
Local rules say you must be 5-10 feet from property lines. Measure carefully to avoid legal issues. Permit costs are $220-$500 on average, according to Angi’s 2023 data. Ignoring these rules can lead to fines or worse.
- Mark underground utility lines (call 811)
- Note overhead obstructions like tree branches
- Verify HOA restrictions
Analyzing Sun Patterns and Wind Direction
Place cooking areas west of seating to avoid smoke. Use apps like Sun Seeker to plan for shade. Remember, winter sun patterns are different.
Budgeting Essentials
Managing your budget is essential. Use this formula to plan:
| Category | Percentage | Sample ($10k Budget) |
|---|---|---|
| Materials | 60% | $6,000 |
| Appliances | 25% | $2,500 |
| Utilities | 15% | $1,500 |
Comparing Prefab Kits vs Custom Builds
Prefab kits save time but limit design options. Custom builds offer more freedom but take longer. Here’s a comparison:
| Feature | Prefab Kit | Custom Build |
|---|---|---|
| Cost | $5k-$15k | $8k-$30k+ |
| Install Time | 2-4 days | 2-6 weeks |
| Resale Value | Standard | Premium |
DIY projects can save 20-40% on labor. But, always hire pros for gas and electrical work. Safety is more important than saving money.
Choosing the Optimal Location
Your outdoor kitchen’s success starts with the right spot. It’s all about finding a balance between being convenient and safe. We’ll look at three key factors: smart placement, smoke control, and access to utilities. Let’s dive into these to help you avoid mistakes.

Proximity Factors
Place your outdoor kitchen 10-25 feet from your indoor kitchen. This distance is close enough for easy food transfers but far enough to keep smoke out. The National Kitchen & Bath Association suggests putting cooking areas near decks or patios for better entertainment.
Ideal Distance From Indoor Kitchen
Measure from your back door to where you’ll put the grill. This spot:
- Reduces trips through your house
- Maintains comfortable separation
- Works with most property sizes
Smoke Management From Grilling Areas
Position your grill to block wind using these methods:
- Install a ventilation hood for stationary grills
- Create natural cross-breezes with open layouts
- Use windbreaks like lattice screens
Utility Accessibility
Proper utility planning is key, says licensed contractor Mark Sullivan. “Gas and electrical connections are essential for outdoor kitchens. Always check local codes before starting.”
Gas Line Routing Requirements
NFPA 58 rules state:
- Keep lines 3 feet away from ignition sources
- Buried lines should be 12-18 inches deep
- Use flexible connectors in earthquake zones
Electrical Service Panel Capacity
NEC Article 210.8 requires GFCI protection for all outlets. Before adding appliances:
- Calculate total wattage needs
- Check if the panel can handle it
- Add dedicated circuits for big devices
Always get help from licensed pros for utility work. Proper planning now avoids dangers and code issues later.
Designing Your Cooking Zone Layout
Creating an efficient outdoor kitchen is more than just placing appliances. The layout affects how you move between tasks while entertaining. Let’s explore the key elements for a chef-ready workspace.

Workflow Optimization
The golden triangle rule is key for a functional kitchen. Put your grill, sink, and storage in a triangle shape. This layout cuts down on steps between cooking, cleaning, and getting ingredients.
Implementing the Golden Triangle Rule
Start with the grill as the center. Place the sink on one side and storage on the other. Use vertical storage for outdoor kitchen essentials like utensils and spices near the grill.
Creating Dedicated Prep and Serving Stations
Make separate zones for food prep and plating. Use different countertops to show these areas. A granite prep station is stain-resistant, while a teak serving bar adds warmth.
Popular Configuration Options
Your space and how you entertain will guide your layout choice. Think about traffic flow and how many cooks will use the space at once.
L-Shaped vs Galley Layouts Comparison
| Feature | L-Shaped | Galley |
|---|---|---|
| Storage Capacity | 15% more cabinets | Efficient vertical storage |
| Space Requirements | Min. 10’x10′ area | Works in 8′ wide spaces |
| Best For | Corner installations | Linear backyard spaces |
Incorporating Bar Seating (42″ Counter Height)
The standard bar height is 42″. This height separates cooking from social areas. Make sure there’s 24″ of knee space per stool and 36″ clearance behind them. For ADA rules, include a 34″-high section with 27″ knee clearance.
Remember, your DIY outdoor kitchen design tips should look good and work well. Test your layout by moving like you’re cooking. A well-planned cooking zone makes weekend BBQs seamless.
Selecting Weatherproof Materials
Your outdoor kitchen must stand up to rain, snow, and UV rays. Unlike indoor spaces, it faces temperature swings and moisture every day. We’ll look at the top choices for countertops and cabinetry that are both durable and budget-friendly.

Countertop Showdown
Outdoor countertops must handle hot pans, acidic spills, and freeze-thaw cycles. Two top contenders stand out, but their performance varies.
Stainless Steel (18-Gauge Recommended)
18-gauge stainless steel is now a top choice for outdoor kitchens. It’s thicker than 20-gauge, making it more resistant to dents. Cleaning it is easy with soapy water. Just avoid using abrasive pads to prevent scratches.
Quartz vs Poured Concrete Durability
Engineered quartz is tough indoors, but outdoor use requires UV-stable resins. Look for products that meet ASTM D4060 standards for wear resistance. Poured concrete is cheaper but needs annual sealing. In cold areas, it can crack unless mixed with fibers.
| Material | Weather Resistance | Maintenance | Cost/sq.ft. |
|---|---|---|---|
| Stainless Steel | Excellent | Low | $70-$120 |
| Quartz | Good (UV-protected) | Moderate | $90-$150 |
| Poured Concrete | Fair | High | $45-$75 |
Cabinetry Solutions
Outdoor cabinets face humidity, insects, and temperature changes. They can’t be like standard kitchen cabinets. These solutions are built to last.
Marine-Grade Polymer (Starboard Brand)
Starboard’s marine-grade polymer cabinets look like wood but won’t rot. They’re made from high-density polyethylene that repels water and UV rays. They come with a 10-year warranty against fading, making them great for coastal areas. Use stainless steel hinges to prevent rust.
Powder-Coated Aluminum Frames
Powder-coated aluminum frames offer a sleek, modern look. The electrostatic coating process bonds color to metal at 400°F, making it scratch-resistant. Pair them with cement board panels for extra weather protection.
- Budget-friendly tip: Use polymer doors with aluminum frames to cut costs by 30%
- Pro check: Ensure cabinet feet have adjustable levelers for uneven patios
When planning your affordable outdoor kitchen setup, remember that material choices affect both upfront costs and long-term maintenance. The right choices let you enjoy grilling without worrying about repairs.
Building a Solid Foundation

Your outdoor kitchen’s life span starts with a solid base. You can pick from concrete or modern modular systems. Both are good at avoiding problems like shifting and cracking.
Concrete Slab Specifications
4″ thickness with rebar reinforcement is the top choice for lasting kitchens. Contractors suggest using #3 rebar, spaced 12″ apart, for strength. This setup can handle big appliances and withstand ground movement.
It’s also important to have the right slope. Aim for a 1/4″ drop per foot to keep water away. In cold places like Minnesota or Colorado, dig footings 12″ below the frost line. This is usually 36″-48″ in the north.
| Component | Specification | Purpose |
|---|---|---|
| Concrete Mix | 3,500 PSI with air entrainment | Freeze-thaw resistance |
| Rebar Grid | 12″ OC both directions | Structural integrity |
| Curing Time | 7 days minimum | Full strength development |
Mortar Mixing Pro Tip
For setting stones or bricks, mix 1:2:9 (cement:lime:sand). This mix is flexible and sticks well, even in outdoor weather.
Modular Base Alternatives
Pre-engineered systems like EZE Frame are quicker to set up. They’re made of powder-coated steel and can hold up to 1,200 lbs per cabinet. This is enough for most grills and fridges.
“Our customers finish modular bases 70% faster than poured foundations, with zero curing delays.”
Key Advantages
- Adjustable legs compensate for uneven ground
- Integrated cable channels simplify utility routing
- Expandable design grows with your backyard kitchen setup
When deciding between concrete and modular, think about your time and DIY skills. Concrete lasts longer, but modular lets you start cooking sooner.
Constructing the Support Structure

Your outdoor kitchen’s life span depends on the right framework. Two top choices for DIY projects are CMU block walls and steel frame systems. Each has its own benefits based on your climate, budget, and design.
CMU Block Construction
Laying 8″ Concrete Masonry Units
Begin by mixing Type S mortar at a 1:1:6 ratio (cement:lime:sand). Place the first course of 8″ CMUs over a pre-leveled concrete footing, buttering both ends. Use a 4′ level every three courses to keep things straight. Leave 3/8″ gaps for mortar joints.
Applying Parge Coat Finish
After 48 hours, apply a cement-based parge coat:
- Mix 1 part Portland cement with 3 parts masonry sand
- Dampen CMU surface before application
- Use a steel trowel for a 1/4″ thick layer
- Cure under plastic sheeting for 72 hours
Steel Frame Assembly
Welding 14-Gauge Steel Tubing
Cut A36-grade steel tubing to size with a metal chop saw. Tack-weld joints at 6″ intervals before full seam welding. Always wear ANSI-approved eye protection and fire-resistant gloves. Use 3″×3″ tubes with 1/4″ wall thickness for load-bearing posts.
Anti-Corrosion Treatment Methods
Compare protection methods using ASTM B117 salt spray test results:
| Treatment | Hours to First Rust | Cost per Sq Ft | DIY Difficulty |
|---|---|---|---|
| Hot-Dip Galvanizing | 1,500+ | $2.80 | Professional Only |
| Powder Coating | 800 | $1.20 | Moderate |
| Rust-Oleum Spray | 300 | $0.40 | Easy |
For coastal areas, use galvanized frames with annual touch-ups. In dry climates, powder-coated systems work well.
“Proper structural support isn’t just about strength – it’s about creating a system that outlasts your appliances.”
When planning your DIY outdoor kitchen, think about future maintenance. Steel frames are easier to modify but need more care. CMU constructions are permanent but harder to change.
Installing Gas and Electrical Systems
Your outdoor kitchen needs the right gas and electrical systems to work well. These systems must be installed carefully and follow safety rules. This ensures they last for many years.

Gas Line Safety
Setting up a gas line needs careful planning and the right materials. Always get a licensed pro to do this job. Wrong connections can cause leaks or fires.
Black Iron Pipe vs Flexible CSST
There are two main choices for gas lines: black iron pipes and flexible CSST. Here’s what you need to know:
| Feature | Black Iron Pipe | Flexible CSST |
|---|---|---|
| Durability | Extreme weather resistance | Vulnerable to punctures |
| Installation | Requires threading tools | Easier to route |
| Code Compliance | NFPA 54 approved | Requires bonding wire |
| Cost | $2.50-$4.00 per foot | $3.75-$6.00 per foot |
“CSST systems must include proper bonding to prevent lightning-related damage. This isn’t optional – it’s code.”
Using Leak Detection Solution (Big Blu Brand)
After setting up, test all connections with Big Blu’s leak detector. It finds leaks as small as 500 parts per million. Use it on joints and valves, and watch for bubbles.
Electrical Requirements
Outdoor electrical systems face special challenges from moisture and temperature changes. Follow these guidelines for safe use.
Installing GFCI Breakers (NEC Article 210.8)
The National Electrical Code says all outdoor outlets need GFCI protection. These breakers turn off power quickly if there’s a ground fault. Use weatherproof covers for outlets near cooking areas.
Low-Voltage Lighting Circuits
12V LED systems add ambiance without using a lot of energy. Place fixtures every 4 feet on paths and work areas. Bury cables 6″ deep in Schedule 40 PVC conduit for safety.
Remember, both gas and electrical systems need permits in most places. Plan for inspections in your outdoor kitchen guide to avoid delays.
Selecting Professional-Grade Appliances
Your outdoor kitchen’s success depends on the right appliances. These must handle heavy use and weather well. Unlike indoor ones, they focus on durability, heat, and fitting well in your backyard.

Grill Selection Guide
BTU output shows cooking power. But, size isn’t everything. For a 36-inch grill, aim for 48,000 BTUs. This ensures even heat for tasks like searing steaks.
Infrared burners get hot up to 900°F, great for caramelizing. Conventional burners top out at 500°F but control temperature better for slow cooking. A hybrid grill is good for both fast and slow cooking.
| Burner Type | Max Temp | Fuel Efficiency | Best For |
|---|---|---|---|
| Infrared | 900°F | 30% less gas | Searing, quick cooks |
| Conventional | 500°F | Standard | Simmering, indirect heat |
Essential Add-Ons
Side burners make your kitchen more functional. The Blaze LTE model has 15,000 BTUs. It’s perfect for boiling water or sautéing while grilling. Add a 24-inch-wide counter for more prep space.
“Integrated refrigeration units reduce 73% of back-and-forth trips to the indoor kitchen during gatherings.”
Undercounter refrigeration keeps drinks cold without taking up much space. Look for models with:
- Stainless steel exteriors
- Lockable drawers
- Dual-zone temperature controls
Make sure your grill has enough space for ventilation. Most need 6-12 inches at the back and 24 inches in front. Always check local codes before setting up your kitchen.
Installing Countertops and Backsplash
This phase is all about precision and durability. Countertop installation is key for long-term use. A good backsplash keeps walls safe from grease and weather damage. We’ll guide you through each step for perfect results.
Template Creation Process
Begin by making accurate templates to avoid cutting mistakes. Even small errors can waste materials or cause uneven surfaces.
Using Cardboard Mockups
Cardboard templates help you see layouts before cutting. Here’s how to do it right:
- Trace appliance cutouts with ±1/8″ tolerance for expansion gaps
- Label each template with directional arrows
- Test-fit multiple times before transferring to stone
For complex shapes, use wet tile saw methods with third-party contractors. Wait 24-48 hours for mortar to cure before installing.
Sealing Natural Stone
Unsealed countertops soak up stains and weather damage. Choose sealers that resist heat and UV rays for outdoor use.
Applying Dry-Treat Penetrating Sealer
This top-grade sealer offers 15-year protection, twice as long as standard ones. Here’s how to apply it:
- Clean surfaces with pH-neutral stone cleaner
- Apply sealer in 3’x3′ sections using microfiber cloths
- Wipe excess within 5 minutes to prevent hazing
Surface texture affects safety and upkeep:
- Honed stone (COF 0.65): Slip-resistant but shows stains
- Polished stone (COF 0.58): Glossy finish needs more frequent sealing
“Always seal both faces of natural stone – moisture penetration causes 83% of outdoor countertop failures.”
Implementing Smart Storage Solutions
Smart storage makes your outdoor kitchen better than ever. Start with vertical space using adjustable 18″ shelving systems. These systems change as your needs do. They fit perfectly without making your kitchen look cluttered.
Pest-proof cabinets add durability to your outdoor kitchen. Choose stainless steel units with seals that keep out bugs and moisture. Add custom drawer inserts for grilling tools, so everything has its place. Integrated trash/recycling pull-outs keep waste out of sight and easy to manage.
Multi-zone refrigeration keeps ingredients at the right temperature. Use separate drawers for meats and compartments for produce and drinks. This setup is like a pro kitchen but fits your DIY space. Add mobile islands with locking casters for easy rearrangement during parties.
Your storage choices affect your outdoor cooking experience. By combining practical solutions with smart design, you create a kitchen that works as hard as you do. Now’s the time to organize your outdoor kitchen and enjoy the benefits of careful planning.