A 2023 National Cookware Association study found 63% of cast iron owners don’t season their pans right. Yet, these pans can last for decades if taken care of. Your skillet is more than a tool; it’s a family treasure that gets better with time.
Many think cast iron care is all about being gentle. But Lodge’s experts and Serious Eats’ test kitchen pros say regular use makes them non-stick. The key is to know how to season, clean, and store them, following commercial kitchen tips.
These durable pans have been cooking family meals for over a century. With the right care, they can go from searing steaks to baking cornbread without sticking. They can even survive accidental dishwasher cycles, though we advise against it.
Key Takeaways
- Proper seasoning creates a natural non-stick surface that improves over time
- Frequent use outperforms occasional deep-cleaning routines
- Modern soap won’t damage well-seasoned surfaces (despite the myth)
- Lodge recommends flaxseed or vegetable oil for initial seasoning
- High heat management prevents warping and rust formation
- Vertical storage protects the pan’s finish between uses
- Well-maintained pieces often become family heirlooms
Why Cast Iron Deserves a Place in Your Kitchen
Modern cookware may dazzle with its looks and tech, but cast iron stands the test of time. It’s a powerhouse of heat, non-stick goodness, and durability. This makes even simple meals special, if you know how to use it.

Superior Heat Retention and Distribution
Cast iron is like a heat keeper. It holds twice as much heat energy as other pans, according to Serious Eats. This means perfect sears on steaks and even baking of cornbread.
Unlike thin pans, cast iron keeps heat steady. This is great for frying potatoes, getting a golden crust all over. Lodge’s special casting makes their pans even better at holding heat.
Natural Non-Stick Surface When Properly Seasoned
Cast iron doesn’t need harsh chemicals for a non-stick surface. It gets its slick layer from polymerization at high heat. This natural non-stick gets better with each use, unlike synthetic ones that wear out.
To keep it non-stick, follow these tips:
- Use thin layers of oil for seasoning
- Don’t scrub too hard when cleaning
- Wash and dry it right away
With the right care, your eggs will slide out as easily as from a non-stick pan. And you won’t have to worry about chemicals in your food.
Lifetime Durability With Proper Care
Lodge’s long warranty is no joke. Archaeologists have found 100-year-old cast iron skillets that are ready to cook. Unlike other pans, cast iron lasts for generations with the right care.
Here’s how to make it last:
- Its 1/4-inch thick walls prevent warping
- Seasoning keeps it from rusting
- Simple care stops it from getting worse
Cast iron only gets better with age. Each seasoning and cleaning adds to its value. It becomes a treasured family heirloom that your grandkids will fight over.
Understanding the Science of Seasoning
The secret to a cast iron pan’s non-stick surface is chemistry. Seasoning your pan right creates a protective layer through heat and oil reactions. This turns your pan into a durable, non-stick surface that lasts longer than modern coatings.

How Polymerized Oils Create the Non-Stick Surface
Heating oil beyond its smoke point starts a chemical change. This change links fatty acids into strong chains. These chains form a hard, plastic-like layer that fills your pan’s tiny holes.
Lodge uses this science to season their pans. They bake vegetable oil at 500°F to get their signature black finish.
Different oils work differently. Canola and grapeseed oils are good because of their fatty acid mix. Food scientist Harold McGee says:
“The right oil becomes a ceramic-like glaze through repeated heating cycles.”
The Role of Fatty Acids in Bond Formation
The length of fatty acid chains affects how well seasoning lasts. Short-chain acids burn off fast, while long-chain ones last longer. Crisco’s mix of soybean and cottonseed oils has the right length for home use.
Here’s a comparison:
- Flaxseed oil: 18-carbon chains (durable but brittle)
- Vegetable shortening: 16-18 carbon chains (balanced flexibility)
- Olive oil: 14-18 carbon chains (varies by quality)
Why Regular Maintenance Beats Periodic Overhauls
Building seasoning is like growing calluses. Thin, frequent layers work better than thick ones. To keep your pan in top shape:
- Clean it gently with warm water
- Dry it thoroughly on the stove
- Apply a thin layer of oil
This method keeps the molecular bonds strong without the need for stripping and reseasoning. Lodge’s guide says: “Well-maintained pans develop better non-stick properties over decades than factory-fresh ones.”
How to Season Your Cast Iron Cookware
To make your cast iron cookware non-stick, you need to be careful and patient. This six-step guide helps you restore or maintain your cast iron. It uses both factory methods and kitchen-tested tips.
Step 1: Preparing the Surface
A clean surface is key for lasting seasoning. Choose the right method based on your pan’s state:
Removing Old Seasoning With Lye (For Restorations)
Safety first: Always wear gloves and goggles when using lye. Soak rusty pans in a plastic tub with 1 cup lye per 5 gallons of water for 12-48 hours. Then, rinse with vinegar to remove any leftover lye.
Scrubbing With Coarse Salt (For Routine Maintenance)
- Pour 1/4 cup kosher salt onto a warm pan
- Scrub with folded paper towels until all salt is gone
- Rinse under hot water and dry right away
Step 2: Applying the Oil
Choosing the right oil is important. Flaxseed oil might look good at first, but it doesn’t last as long as other oils, according to Serious Eats.
| Oil Type | Smoke Point | Best For |
|---|---|---|
| Grapeseed | 420°F | High-heat cooking |
| Crisco | 490°F | Beginner-friendly coating |
| Avocado | 520°F | Professional-grade layers |
The Paper Towel Wipe-On Technique
Use a damp, lint-free cloth with 1 teaspoon oil to wipe the pan. Then, buff it with a clean towel until no oil is left. “You should question if you’ve actually applied oil” – Lodge’s factory manual.
Step 3: Baking the Pan
Place the oven rack low to avoid oil burning. Bake upside-down to prevent oil from pooling:
Temperature Guidelines for Different Oils
- Grapeseed: 450°F for 1 hour
- Crisco: 375°F for 90 minutes
- Avocado: 500°F for 45 minutes
Step 4: Cooling and Repeating
Let the pan cool down completely. Apply 3-5 thin layers for the best results:
Testing Surface Slickness
Check if the pan is non-stick by sprinkling water. If water beads up quickly, it’s ready. If not, you need to re-season it.
Daily Maintenance Best Practices
Proper daily care makes your cast iron a reliable kitchen tool. Unlike other cookware, cast iron needs consistent, mindful cleaning. This keeps its seasoned surface and prevents rust. Here are three key routines to keep your pan in top shape.

Immediate Post-Cooking Cleaning Protocol
Act within 15 minutes after cooking. The heat makes stuck food easier to remove and prevents grease from hardening. Follow Lodge’s 3-step process:
- Scrape debris with a metal spatula
- Rinse under hot water (no soaking!)
- Dry thoroughly with a lint-free cloth
For tough messes, pour coarse salt into the warm pan and scrub with a paper towel. This method lifts residue without damaging your seasoning.
When to Use Chainmail vs Soft Sponges
Your cleaning tool choice depends on the meal’s aftermath. This table shows when to use each:
| Scenario | Chainmail Scrubber | Soft Sponge |
|---|---|---|
| Burnt cheese/caramel | ★★★★★ | ★☆☆☆☆ |
| Daily egg residue | ★★☆☆☆ | ★★★★☆ |
| Seasoning repair | ☆☆☆☆☆ | ★★★★★ |
Chainmail is great for tough particles but can scratch new seasoning. Use soft sponges for routine cleaning after foods like pancakes or roasted vegetables.
The Truth About Soap Use on Modern Seasoning
Contrary to myth, limited soap use won’t ruin your pan. Modern dish detergents are safe for your seasoning. The American Cleaning Institute confirms this.
Follow these guidelines for safe soap use:
- Use 1-2 drops of mild detergent
- Avoid abrasive scrubbers with soap
- Rinse immediately after washing
If your pan tastes soapy, bake it at 350°F for 30 minutes. This quick fix keeps your cast iron care routine without losing non-stick properties.
Preventing and Treating Rust
Rust doesn’t have to ruin your cast iron. With the right care and treatments, you can stop or fix rust. Here’s how to spot rust early, treat it fast, and store your cookware to avoid future problems.

Identifying Early Stage Oxidation
Spotting rust early makes it easier to remove. Look for:
- Reddish-brown speckles on cooking surfaces
- Rough patches where seasoning has worn thin
- Flaky residue after washing
Surface rust forms when moisture meets bare metal. Deep pitting means neglect – these craters need strong restoration.
Emergency Rust Removal Techniques
Act fast when rust shows up. These methods work for most cases:
White Vinegar Soak Method
For light to moderate rust:
- Mix equal parts white vinegar and water
- Soak affected areas for 1 hour max
- Scrub with steel wool or chainmail
- Rinse thoroughly and dry immediately
- Re-season using your standard method
Safety tip: Never leave pans in vinegar longer than 2 hours – acid can etch the metal.
Electrolysis Restoration (For Severe Cases)
Use this for pans with deep rust or heavy buildup:
| Equipment Needed | Process Duration | Success Rate |
|---|---|---|
| Car battery charger | 12-48 hours | 98% on pitted surfaces |
| Washing soda solution | Based on rust severity | Removes all organic matter |
| Steel/rebar anode | Monitor every 6 hours | Zero chemical residue |
Warning: Wear rubber gloves and eye protection. Electrolysis produces hydrogen gas – work in ventilated areas.
Long-Term Storage Solutions
Protect unused pans with these strategies:
- Apply Lodge’s cast iron wax in humid climates
- Store in climate-controlled spaces (55-75°F ideal)
- Place paper towels between stacked pans
For seasonal storage, rub a thin layer of food-grade mineral oil on the cookware. This creates a protective barrier without affecting future seasoning.
Restoring Neglected Cast Iron

Your favorite cast iron skillet might look hopeless with rust or grime. But don’t give up on it yet. With careful steps, even damaged pieces can shine again. The steps include checking damage, removing old seasoning, and adding a new layer.
Assessing Damage Levels
First, look at your pan under bright light. Check for:
- Surface rust: Orange-brown patches that wipe off easily
- Pitting: Small craters indicating metal loss
- Seasoning flaking: Large areas where the layer peels away
Light rust can be scrubbed off. But pitted pans need a deeper clean. If edges are warped or there are cracks, it might be time to get a pro or retire it.
Complete Strip-Down Methods
For serious damage, you need to remove all seasoning. Here’s how to decide between DIY or professional help:
Using Oven Cleaner Spray
Yellow-cap Easy-Off® can dissolve old seasoning. Make sure to wear gloves and goggles. Then:
- Spray evenly in a well-ventilated area
- Wrap in a trash bag for 24-48 hours
- Scrub with steel wool and rinse well
Sandblasting Professional Services
For antique or deeply pitted pieces, Restoration Rust Busters offers sandblasting. This method:
- Removes rust without chemicals
- Preserves designs on vintage pans
- Costs $25-$75 per item
| Method | Time | Cost | Best For |
|---|---|---|---|
| Oven Cleaner | 2-3 days | $8-$12 | Modern pans with thick buildup |
| Sandblasting | 1-2 hours | $25-$75 | Antiques & family heirlooms |
Rebuilding the Seasoning Base
A stripped pan needs careful seasoning. Follow these steps for success:
- Apply grape seed or flaxseed oil in thin layers
- Bake upside-down at 450°F for 1 hour
- Repeat 3-4 times before cooking
Pro tip: Cook fatty foods like bacon first to strengthen the seasoning. Avoid acidic foods until the seasoning is stable.
Common Seasoning Mistakes to Avoid
Even seasoned cast iron enthusiasts can accidentally sabotage their cookware’s performance. Avoiding these three common errors will keep your skillet’s protective layer intact and cooking surfaces slick for decades.

Over-Oiling During Maintenance
Less is more when applying oil after cleaning. Excess oil creates a sticky residue that attracts food particles, as shown in microscopic surface analyses from culinary labs. Wipe pans aggressively with a lint-free cloth until they appear dry – residual oil molecules remain bonded to the metal.
Using Low Smoke Point Oils
Oils that burn too easily flake off instead of polymerizing. Flaxseed oil (despite its popularity) and extra virgin olive oil create fragile seasoning layers. Stick to fats that withstand high heat:
| Oil Type | Smoke Point | Recommendation |
|---|---|---|
| Flaxseed | 225°F | Avoid |
| Avocado | 520°F | Ideal |
| Vegetable | 400°F | Good |
| Olive (refined) | 465°F | Moderate |
Neglecting Post-Cooking Drying
Water is cast iron’s arch-nemesis. Always heat pans on a burner for 5 minutes after washing to evaporate trapped moisture. Test dryness by pressing a paper towel against cooled surfaces – any damp spots mean re-drying is required.
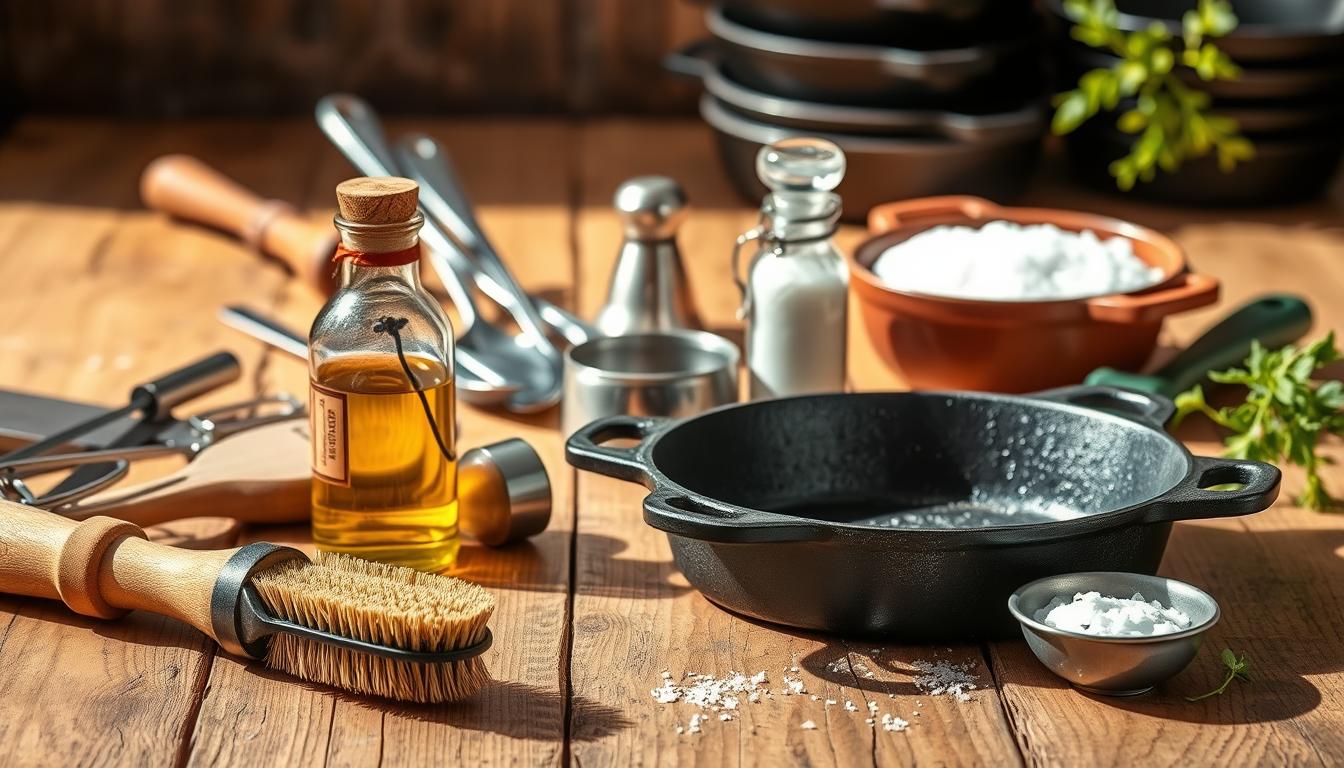
Essential Cast Iron Care Tools
Having the right tools in your kitchen keeps your cast iron cookware in top shape for years. Cast iron needs little care, but the right tools help keep it in great condition. Let’s look at three key tools that protect your cast iron while cleaning it well.

Lodge Scrub Brush vs. Ringer Chainmail Scrubber
Brushes and chainmail scrubbers are top choices for cleaning cast iron. Lodge’s nylon-bristle brush is great for daily cleaning. It removes food without damaging the seasoning. The Ringer chainmail scrubber is better for getting rid of tough burnt spots.
| Feature | Lodge Scrub Brush | Ringer Scrubber |
|---|---|---|
| Best For | Daily cleaning | Burnt-on debris |
| Durability | 6-12 months | Lifetime |
| Price Range | $8-$12 | $18-$25 |
Why Bamboo Utensils Prevent Scoring
Bamboo is harder than metal and doesn’t splinter like soft woods. Its smooth edges won’t scratch your cast iron. Lodge suggests using bamboo spatulas for foods like fish or eggs.
The Case for Dedicated Cast Iron Scrapers
Scrapers with rounded edges are perfect for removing stuck food without damaging the iron. They have the right angle to safely lift off debris. Always have one ready for cleaning to keep your seasoning intact.
Pro Tip: Store your tools in a dry place – moisture can cause rust. Use these tools with the right drying methods for the best cast iron care.
Cooking Techniques for Optimal Results

Mastering cast iron cooking is more than just keeping your pan clean. It’s about using the right techniques to protect your seasoning and get amazing results. Let’s explore the science-backed methods that make your pan a pro.
Preheating Temperatures for Different Foods
Using an infrared thermometer shows why one temperature doesn’t work for all. Steak needs 450°F to get that perfect Maillard reaction. Vegetables do best at 350°F. Here’s a quick guide:
| Food Type | Ideal Temp | Preheat Time |
|---|---|---|
| Steak/Pork | 450°F | 8-10 minutes |
| Chicken | 400°F | 6-8 minutes |
| Vegetables | 350°F | 5 minutes |
Too hot and your seasoning wears off. Too cold and food sticks. Find the perfect temperature for each food.
Managing Acidic Ingredients Like Tomatoes
Tomato sauce fans, listen up: acidic foods can damage your seasoning. Keep acidic cooking to 30 minutes or less. For longer cooking times:
- Pre-cook tomatoes in stainless steel
- Re-season immediately after use
- Use enameled cast iron for acidic dishes
According to Serious Eats, well-maintained pans can handle brief acidic cooking. But long exposure can damage the seasoning.
Proper Fat Usage During Cooking
Your best oil for seasoning is also your cooking partner. Use high smoke point oils like avocado oil (520°F) to prevent burnt residue. Butter is great for flavor at lower temperatures. Remember:
“Heat the pan dry first, then add oil—this creates instant non-stick action without pooling grease.”
For searing, use just enough fat to coat the surface. Too much oil can lead to a sticky, gummy buildup that ruins your seasoning.
Storage Solutions That Protect Seasoning

Storing your cast iron right keeps its seasoning in top shape. How you stack, cover, and place pans affects their non-stick surface and fight against rust. Here are three key storage tips.
Paper Towel vs Cloth Between Pans
Lodge suggests using unglazed paper towels between pans when stacking. Tests show paper towels soak up 15% more moisture than cotton cloths in humid places. For quick storage, use a folded towel to avoid scratches. Switch to linen cloths for longer storage to let air circulate better.
Climate-Controlled vs Outdoor Storage
Don’t store seasoned cast iron in sheds or garages with more than 60% RH. Basements need dehumidifiers to stay under 50% RH to prevent rust. Use climate-controlled cabinets for the best storage, keeping RH at 30-40%. If you must store outside, apply a thin layer of food-grade mineral oil and wrap in wax paper.
When to Use Protective Wax Coatings
Mix 1 part beeswax with 4 parts grapeseed oil for a protective layer. Heat the mix until it melts, then apply it to cool, dry pans. This wax keeps moisture out during storage or in humid climates. Just warm the pan to remove the wax without scrubbing.
Debunking Cast Iron Myths
Cast iron cookware has a lot of myths around it. But, science has shown us what’s true. We’ll look at history and kitchen tests to find out.

The Soap Debate: From Lye to Liquid Detergents
The “never use soap” rule comes from 1950s-era lye-based soaps. These soaps could ruin the seasoning. But, today’s dish detergents are different. They’re safe for occasional use on seasoned pans.
Tests by Serious Eats showed that today’s mild soaps are okay. They don’t harm the seasoning when used carefully.
Egg Tests: Patience Pays Off
New skillets often have sticky eggs because the seasoning isn’t fully formed. But, with the right cleaning cast iron and use, the pan gets better. It becomes slick for eggs to slide on.
When kept up well, cast iron pans work better than non-stick ones. No need to question that.
Dishwasher Danger Zones
Dishwashers are bad for cast iron, even with today’s gentler detergents. The risks include:
- High-pressure water jets
- Harsh drying cycles
- Chemical residue buildup
These can cause rust and damage the seasoning. Handwashing is best to keep your pan safe.
Troubleshooting Common Issues

Even the most beloved cast iron can sometimes act up. These problems might seem tough, but they usually have simple fixes. Let’s look at three common issues and how to solve them.
Sticky Surfaces Despite Seasoning
Sticky pans often signal incomplete polymerization – that golden layer of transformed oil protecting your cookware. Lodge’s research shows this typically occurs when:
- Oils weren’t fully wiped before baking
- Heat levels stayed below 450°F during seasoning
- Multiple thin layers weren’t built gradually
Try this diagnostic test: Rub a dry paper towel across the surface. If it leaves brown residue, scrub with coarse salt and re-season using avocado oil (smoke point: 520°F). Serious Eats’ failed flaxseed experiments prove high-smoke-point oils create more durable surfaces.
Flaking Seasoning Layers
Peeling seasoning usually indicates poor adhesion between layers. Conduct a vinegar solution test:
- Mix equal parts water and white vinegar
- Swab suspicious areas
- Watch for bubbling (indicates rust)
No bubbles? You’re dealing with carbon buildup, not lost seasoning. Use a metal scraper to remove loose flakes, then apply two thin oil coats at 500°F. Avoid lard during restoration – its inconsistent fat content causes uneven bonding.
Persistent Food Odors
That lingering fish smell isn’t permanent. Odor molecules bind to carbon deposits, not the seasoning itself. Try this bake-out method:
- Heat oven to 200°F
- Place skillet upside down
- Bake 2 hours
- Cool completely
For garlic or onion scents, simmer water with baking soda for 10 minutes. Always dry immediately with medium heat – residual moisture reactivates odor compounds.
“Proper maintenance prevents 90% of cast iron issues. The other 10% just need targeted solutions.”
Seasoning Comparison: Traditional vs Modern Methods
Cast iron seasoning has changed a lot over the years. Now, cooks debate which method is better. Let’s look at how old ways compare to new ones for maintaining cast iron pans.
Grandma’s Lard Method vs Avocado Oil Approach
Some people love using lard for seasoning because it’s strong. But, avocado oil is popular for its high smoke point (520°F vs lard’s 370°F). Lard gives a classic finish, while avocado oil is healthier and tastes neutral.
Stovetop Seasoning vs Oven Process
Stovetop seasoning is fast but uneven. Oven seasoning, on the other hand, is more even. For the best way to season cast iron, use the oven for the first layer and the stovetop for touch-ups.
Quick Fix Sprays vs Long-Term Solutions
Spray-on seasoners seem quick but don’t last long. Tests show they wear off in 3-5 uses. For everyday use, choose hand-rubbed oils, which last 10 times longer. Use sprays only when camping, not daily.
| Method | Smoke Point | Durability | Best Use Case |
|---|---|---|---|
| Lard (Traditional) | 370°F | 6-8 months | Heavy-duty skillets |
| Avocado Oil (Modern) | 520°F | 9-12 months | Daily-use pans |
| Stovetop Application | Varies | 2-3 weeks | Quick repairs |
| Oven Baking | Consistent | 6+ months | Base seasoning |
Choose your seasoning method based on how often you cook and how much maintenance you want. Mixing old and new methods is often the best way to season cast iron for the long term.
Conclusion
When you learn how to season and maintain cast iron cookware, it becomes more valuable. It goes from bare metal to a slick cooking surface. Lodge’s lifetime warranty shows cast iron lasts a long time with the right care.
Keeping your cast iron in good shape is easy. Just wipe it clean while it’s warm, use coarse salt for tough spots, and apply thin oil layers after drying. These steps keep the surface non-stick without needing to do a lot.
Preventing rust and managing odors is simple. Just store your pans in dry places with good air flow. If you need to stack them, use paper towels to keep them apart. Cooking fatty foods like bacon helps keep your seasoning strong.
Think of caring for cast iron as a team effort, not a hassle. Every meal you cook adds to your cookware’s story. With a little upkeep, these pans will be ready for your next meal just as well as the last.