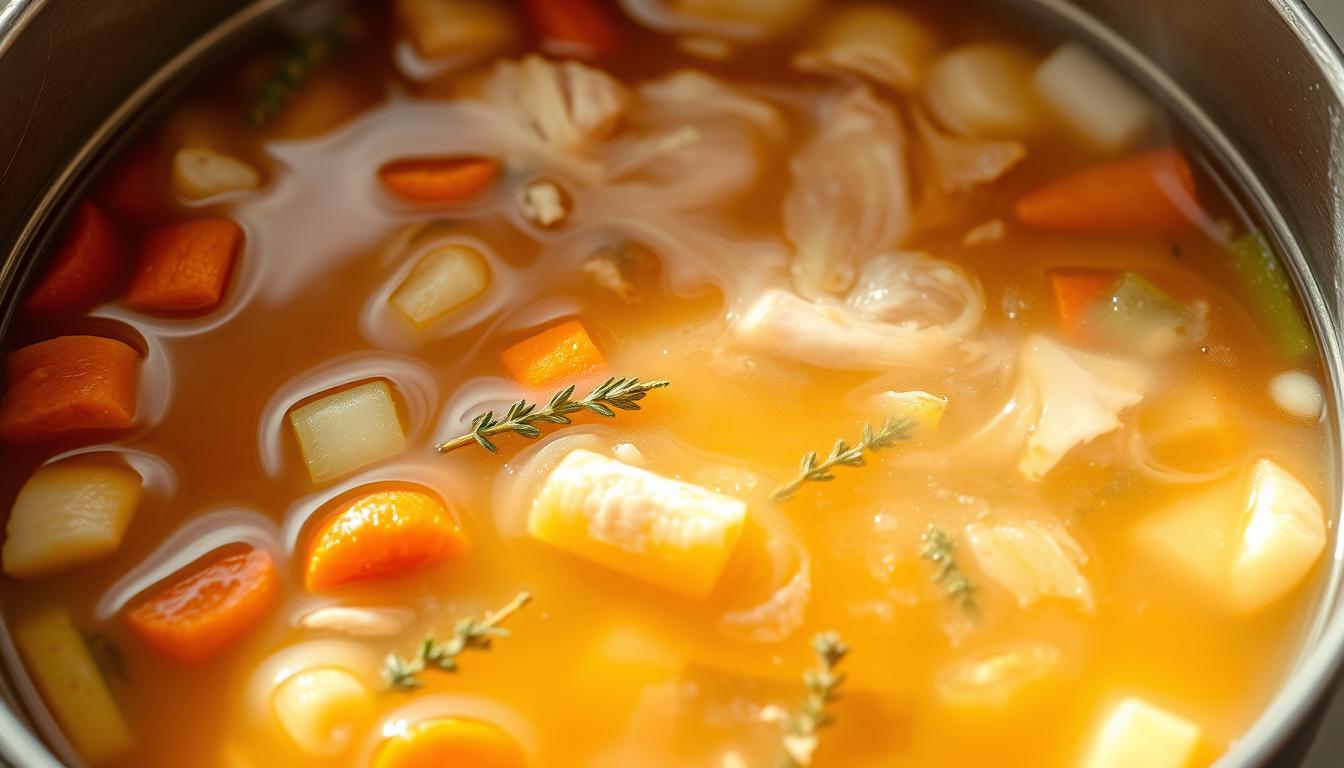
Nothing beats the comfort of a homemade broth. It’s ready to turn into meals all week. A freezer-friendly soup base saves you money and time. Sylvia’s 5-star recipe is a hit for its flexibility.
Carrie, a meal prep pro, saves 45 minutes a week with this method. You get a nutrient-rich base for quick soups, casseroles, or gravy. Freezing in airtight containers lets you control sodium and flavor.
Key Takeaways
- Homemade bases offer better flavor control than store-bought broths
- Sylvia’s versatile recipe works with noodles, rice, and low-carb diets
- Freezing in portions streamlines meal prep for busy schedules
- Customize ingredients to match dietary needs or pantry staples
- Proper storage keeps bases fresh for up to 3 months
- Reduces food waste by using vegetable scraps or leftover chicken
- Maintains nutrients lost in canned versions during processing
Why a Homemade Soup Base Beats Store-Bought
Store-bought broth is easy to find, but making your own homemade soup base opens up a world of flavors. You can turn leftover bones and vegetable peels into a delicious broth. This is the magic of cooking at home.

Flavor Control and Customization
Commercial broths often taste bland and lack depth. But when you make your own best chicken soup base, you can choose the flavors. Sylvia’s recipe shows how versatile it can be:
- Add lemongrass and ginger for Thai-inspired soups
- Mix in white miso for umami depth
- Stir coconut milk for creamy textures
This flexibility lets you make different soups from one base. Store-bought broths, on the other hand, offer only one flavor.
Cost-Effectiveness of Kitchen Scraps
Using leftover ingredients can save you money. A rotisserie chicken carcass and vegetable trimmings can make 2 quarts of broth for almost nothing. This is much cheaper than buying broth at the store, which costs $4-$6 for a small carton.
“Using scraps reduces food waste by 40% in our test kitchens,” reports Chef Sylvia. “Those onion ends and carrot tops contain more flavor than people realize.”
Health Benefits Without Preservatives
Commercial bases often have too much sodium. Here’s a comparison for a 1-cup serving:
| Store-Bought | Homemade | |
|---|---|---|
| Sodium | 860mg | 220mg* |
| Calories | 25 | 197 |
*When using Sylvia’s salt-adjustment method. You control every ingredient, avoiding MSG and stabilizers. It’s also rich in natural collagen from bones. At 197 calories per serving, it’s a nutritious choice, not just water.
Essential Tools for Soup Base Preparation
Making a tasty make-ahead chicken soup base begins with the right tools. You don’t need a fancy kitchen, but the right gear makes cooking easier and more consistent.

Must-Have Equipment List
Here are the must-haves for your kitchen:
12-qt Stockpot With Lid
A 12-quart stockpot is perfect for cooking big batches. It’s big enough for bones, veggies, and water without overflowing. Carrie’s method shows it’s better than slow cookers for rich flavors.
For smaller recipes, a smaller pot won’t work. Sylvia’s recipe shows why you need a big pot for the best broth.
Fine Mesh Strainer Essentials
This tool is a must for clean broth. It’s better than Sylvia’s method for getting rid of impurities. Use it with cheesecloth for the cleanest broth.
Helpful Optional Gadgets
These tools make cooking easier but aren’t essential:
Fat Separator Advantages
A 4-cup fat separator is better than skimming. It keeps the good stuff and removes excess fat. It’s great for controlling how rich your soup is.
Immersion Blender Uses
An immersion blender makes creamy soups easy. Blend roasted veggies right in the pot for smooth soups without moving hot liquids.
“An immersion blender lets you adjust consistency in seconds – ideal for last-minute recipe changes.”
While special tools help, remember the make-ahead chicken soup base is all about quality ingredients and technique. Pick tools that fit your cooking style and space.
Selecting Ingredients for Maximum Flavor
Your soup’s flavor comes from the ingredients you choose. Each part, from chicken to herbs, adds its own taste. Let’s explore how to mix these to create a rich flavor.

Choosing Your Chicken Components
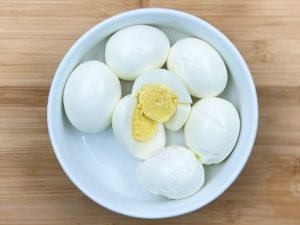
Bone-in cuts outperform boneless options in making a flavorful base. Chicken backs, necks, and wings add collagen, making the soup smooth. Sylvia’s trick of searing bones before boiling adds a caramelized taste that boneless chicken can’t.
Bone-In vs Boneless Cuts
Use bone-in pieces for 80% of your protein. Mix meaty cuts like thighs with gelatin-rich parts like feet for a balanced flavor. Boneless chicken works only if mixed with powdered gelatin (1 tsp per quart).
Using Rotisserie Chicken Carcasses
Don’t throw away rotisserie chicken skeletons. Simmer them with fresh herbs for 90 minutes to make a quick base. This method is quicker but doesn’t have as much collagen as raw bones.
Vegetable Selection Guide
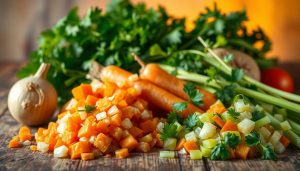
Vegetables are the heart of your best chicken soup base. Classics like carrots and celery are key, but adding other veggies can make it even better.
Mirepoix Ratio Fundamentals
Follow the 2:1:1 formula for onions, carrots, and celery. Cut veggies into 1-inch pieces for even cooking. Roasting half the mirepoix before adding it to the pot boosts flavor.
Flavor-Boosting Additions
- 8 garlic cloves (Sylvia’s bold approach)
- 2 dried shiitake mushrooms
- 1 parsnip, peeled and halved
- 1 tomato, quartered (adds acidity)
Herb and Spice Combinations
Seasoning turns simple broth into a unique soup. Whether you like traditional or global flavors, how you season matters.
Classic Bouquet Garni Setup
Wrap these in cheesecloth and tie with twine:
- 4 parsley stems
- 2 thyme sprigs
- 1 bay leaf
- 10 black peppercorns
Global Flavor Variations
Change your chicken soup recipe with different flavors:
| Style | Additions | Simmer Time |
|---|---|---|
| Thai | Lemongrass, galangal, kaffir lime leaves | 45 minutes |
| Italian | Rosemary, sun-dried tomatoes, Parmesan rind | 2 hours |
| Tex-Mex | Cumin, oregano, dried chilies | 1.5 hours |
Step-by-Step Process to Make Your Hearty Chicken Soup Base
Starting your journey to a perfect chicken soup base is easy. Just follow a few steps to get it right. This way, your homemade soup base will be ready for many meals.

Prepping Ingredients Efficiently
Getting your ingredients ready is key. Here’s how to do it right and avoid kitchen mess.
Vegetable Chopping Techniques
Chopping veggies the right way makes a big difference. For a classic mix of carrots, celery, and onions:
- Dice onions into ½” pieces
- Slice celery ribs crosswise at ¼” intervals
- Chop carrots into matchsticks before cross-cutting
Proper Chicken Preparation
For the best flavor, use a mix of chicken thighs and wings. Remove excess skin to cut down on fat. Pat the meat dry before cooking for better browning.
Building Flavor Layers
Creating a rich flavor profile is all about how you cook. Here’s how to do it right.
Roasting vs Raw Ingredients
Choosing between roasting and using raw ingredients affects the taste. Here’s what to consider:
| Method | Flavor Profile | Best For |
|---|---|---|
| Roasted | Caramelized, nutty | Hearty winter soups |
| Raw | Bright, vegetal | Light spring broths |
Deglazing Techniques
After sautéing, add ½ cup of white wine or apple cider vinegar. This step brings out hidden flavors, says chef Carrie Williamson. Then, add 4 cups of cold water to stop cooking.
Simmering for Perfect Extraction
Combine Sylvia’s 20-minute simmer with Carrie’s covered cooking method. This way, you get the best results:
Temperature Control Methods
- First 10 minutes: Rapid simmer (180°F)
- Next 10 minutes: Gentle bubble (160°F)
- Final 5 minutes: Covered rest off heat
Skimming Fat and Impurities
Remove foam with a wide shallow spoon during the first simmer. For clearer broth, add a squeeze of lemon in the last 2 minutes. The acidity helps clear out particles.
This method combines Sylvia’s flavor-building steps with Carrie’s fat-management tips. It makes a preserving soup base that stays good even when frozen.
Cooling and Straining Techniques
Proper cooling and straining turn your homemade chicken soup base into a freezer-ready staple. These steps keep your soup safe and preserve its rich flavors.

Safe Temperature Reduction
Rapid cooling stops bacterial growth and keeps quality high. Sylvia’s tests show bases last 4 days in the fridge and 3 months in the freezer. But only if cooled right.
Ice Bath Methodology
Here’s a three-step cool-down process:
- Fill your sink with ice and water mix
- Put the soup pot in the bath, stir every 10 minutes
- Cool to 70°F in 2 hours, then chill
Refrigerator Cooling Tips
For big batches, split the base into shallow containers. Don’t put hot liquid in your fridge to avoid raising its temperature. Leave lids a bit open until it cools to 40°F.
Straining for Optimal Texture
The right straining technique separates broth from pulp while keeping flavors. Use these methods for professional results.
Double-Straining Process
Begin with a coarse mesh strainer to remove big solids. Then, use cheesecloth-lined fine mesh for clear broth. This catches herb bits and peppercorns that could cloud your base.
Pressing Vegetables Properly
Gently press cooked veggies with a wooden spoon to get juices. Don’t press too hard, as it can release bitter flavors from onion skins or carrot tops. You want to get all the flavor without grit.
These cooling and straining methods keep your chicken soup base quality high. Whether you use it next week or three months later, proper technique makes it convenient.
Portioning for Freezer Storage

Dividing your homemade chicken soup base right is key for convenience and less waste. Freezing it smartly means you can take out just what you need. This is great for family dinners or a quick lunch for one.
Calculating Serving Sizes
Recipes often say 1.5 cups per person for a single meal. But, you need to plan based on your family’s size. Here are two ways to do it:
Family Meal Portions
Freeze 6-cup batches for families of four. This gives you a big meal with some leftovers. Make sure to leave 1-inch of space in containers for expansion. Use large freezer bags or 32-ounce glass jars for this.
Single-Serve Options
For quick lunches, use silicone trays like SouperCubes® to make ½-cup portions. Once they’re frozen, move them to labeled bags. This way, you only thaw what you’ll eat, keeping the soup fresh.
Container Selection Guide
Your choice of container affects how well your soup stays fresh and how much space it takes up. Always pick containers with tight seals to stop ice crystals from forming.
Silicone Freezer Tray Benefits
Silicone molds make even portions that are easy to remove. They’re perfect for make-ahead chicken soup base lovers who want to control their portions. Pick BPA-free ones with lids to keep smells out.
Glass vs Plastic Containers
Glass jars keep flavors better but take up more space. Plastic containers stack well but might hold smells. For both:
- Fill containers ¾ full
- Wipe rims before sealing
- Date labels using freezer-safe tape
Pro tip: Freeze a small portion first. If you see ice crystals in 48 hours, check your seal or store it for less time.
Freezing Methods That Preserve Quality
Freezing your homemade soup base right can make a big difference. Using the right techniques ensures your preserving soup base efforts pay off. You’ll get restaurant-quality results every time you take something out of the freezer.

Layering and Labeling Systems
Carrie’s method for organizing frozen soup is a game-changer. Label each container with what’s inside and when you made it. Use masking tape and permanent marker instead of sticky notes that fall off.
Date Coding Best Practices
Write the date in MM/DD/YYYY format on the side of the container, not the lid. Sylvia suggests adding “USE BY” dates three months from the freezing date.
Inventory Rotation Tips
- Store newer batches behind older ones
- Put single servings in front of larger portions
- Do a freezer check every month
Preventing Freezer Burn
Freezer burn makes your soup base look bad. Use these two methods to stop it without spending a lot.
| Method | Cost Per Use | Ease of Use | Effectiveness |
|---|---|---|---|
| Parchment Paper | $0.03 | Easy | Good (6 months) |
| Vacuum Sealing | $0.25 | Moderate | Excellent (12 months) |
Parchment Paper Barriers
Press wax-free parchment paper onto the soup before sealing. This creates a tight seal that stops ice crystals. It’s a trick chefs use for freezing chicken soup without losing texture.
Vacuum Sealing Options
Vacuum systems remove most air from bags. They’re great for long-term preserving soup base needs. Freezing liquid base in silicone molds before sealing makes stackable bricks.
Remember, mushy noodles or veggies come from bad freezing, not a bad recipe. The right protection keeps your ingredients perfect until you reheat them.
Thawing and Reheating Safely
Thawing and reheating your homemade chicken soup base right is key. It keeps the flavor rich and makes sure it’s safe to eat. These steps help your storing chicken soup base stay top-notch and follow USDA safety rules.

Refrigerator Thawing Timeline
Thaw frozen soup base in the fridge for 24 hours per quart. This slow thaw keeps it safe from bacteria. Move containers from freezer to fridge the night before.
Quick Thaw Techniques
Cold Water Bath Method
Put sealed freezer bags in cold water, changing it every 30 minutes. A 1-pound portion thaws in 1-2 hours. Never use warm water to avoid spoilage.
Microwave Defrost Settings
Use the microwave’s defrost function at 30% power. Rotate containers every 2 minutes. Reheat thawed soup right after microwaving, as USDA advises.
Reheating for Best Results
Stovetop Temperature Control
Sylvia’s method uses low-medium heat:
“Warm your base gradually in a heavy-bottomed pot, stirring occasionally until it reaches 165°F.”
This method keeps flavors better than crockpot reheating. Crockpots can make the broth too thin.
Always check temperatures with a kitchen thermometer. Stir every 5 minutes for even heat. This is especially important when turning your storing chicken soup base into soups or sauces.
Customizing Your Base for Different Dishes
Your homemade chicken soup base can change into many dishes with simple tricks. Add a few ingredients and it turns into meals from around the world or hearty comfort food.

Asian-Inspired Flavor Twists
Make your broth into a deep, Asian-style dish with a few tweaks. The secret is mixing aromatic spices with fermented flavors for a rich taste.
Ginger and Star Anise Infusion
For a flavorful base, add 3 thin slices of fresh ginger and 2 whole star anise pods per quart of broth in the last 20 minutes. This makes a warm base great for ramen or pho. Remove the spices before freezing to avoid bitterness.
Miso Magic
After thawing, mix in 1 tablespoon of white miso paste per cup of broth. Sylvia’s special touch is adding toasted sesame oil and coconut milk. This mix is perfect for:
- Thai-style chicken noodle soup
- Vegetable-packed wonton broth
- Korean-inspired dumpling stew
Creamy Soup Transformations
Change your clear broth into creamy soups with these tips. The right thickening makes the soup smooth and silky.
Roux Ratios Made Simple
Chefs suggest these ratios for perfect thickening:
| Roux Type | Flour-to-Fat Ratio | Best For |
|---|---|---|
| Butter-Based | 1:1 (by weight) | Chowders & bisques |
| Oil-Based | 3:2 | Dairy-free options |
| Bacon Fat | 2:1 | Smoky potato soup |
Dairy Integration Timing
Always add cream or milk after thawing and reheating. For the best results:
- Heat broth to 180°F
- Whisk in dairy gradually
- Never boil after adding
Sylvia’s coconut milk trick makes a creamy vegan option. Use full-fat coconut milk and add it just before serving.
These tricks let you make many meals from one chicken soup recipe. Whether it’s Italian stracciatella or spicy tom kha gai, your freezer is always ready.
Troubleshooting Common Issues
Even the best chicken soup base can sometimes need adjustments. Whether you accidentally over-seasoned your broth or it lacks depth, these kitchen-tested solutions will help salvage your creation. Let’s tackle two frequent challenges and their practical fixes.

Fixing Over-Salted Base
Too much salt doesn’t mean disaster. Chef Sylvia’s golden rule: “Balance saltiness with acidity before adding filler ingredients.” Start with these steps:
Potato Absorption Trick
Peel and quarter a raw russet potato. Simmer it in the broth for 15 minutes – the starch acts like a flavor sponge. Remove the potato once salinity decreases. For extra balance, add 1 tsp of lemon juice per quart, which brightens flavors without adding sourness.
Reviving Weak Flavor
If your broth tastes flat, intensify it through concentration or strategic enhancements. Try these methods in order:
Reduction Techniques
Pour the base into a wide pan and simmer uncovered. As liquid evaporates, flavors condense. For every cup reduced, you’ll gain 30% more taste intensity. Stir occasionally to prevent burning.
Umami Boosters
Add depth with these pantry staples. Kombu seaweed works wonders – steep a 2-inch strip for 10 minutes, then discard. For quicker fixes, use these alternatives:
| Booster Type | How It Works | Quantity Tips |
|---|---|---|
| Kombu | Natural glutamate source | 2″ strip per quart |
| Soy Sauce | Adds salty richness | 1 tsp per pint |
| Tomato Paste | Enhances sweetness | 1 tbsp per gallon |
Always taste after each adjustment. The goal is a balanced base that adapts well to future recipes. With these fixes, your best chicken soup base stays versatile for everything from ramen to creamy chowders.
Meal Planning With Frozen Soup Base

Your frozen make-ahead chicken soup base is a kitchen hero. It’s a key player in your weekly meals. With a little planning, it turns into a time-saving tool that makes cooking easier and tastier.
Weekly Menu Integration
Plan to use your broth in 3-4 different ways each week. A family of four might need 6-8 cups for various meals. Here’s a simple plan:
| Meal Type | Base Quantity | Prep Time |
|---|---|---|
| Chicken Pot Pie Filling | 2 cups | 15 minutes |
| Risotto Starter | 1.5 cups | 5 minutes |
| Grain Bowl Liquid | 3 cups | 0 minutes |
Carrie suggests thawing batches on Sundays and Wednesdays. This keeps your meals fresh and prevents freezer burn.
Emergency Meal Strategies
Set aside 2-3 portions for when you’re in a rush. Use red tape to mark these containers for easy access during busy nights.
Quick Noodle Bowl Assembly
Just mix 1 cup of broth with these items:
- Instant ramen noodles (without seasoning packet)
- Frozen stir-fry vegetables
- Pre-cooked rotisserie chicken
Sick Day Soup Enhancements
Use Sylvia’s chili flake garnishes to boost immunity. Add these while the soup is warming up:
- 1 tsp minced garlic in olive oil
- ½ tsp turmeric
- Pinch of red pepper flakes
To help with fever, mix in 1 tbsp honey per serving. This makes a comforting, soothing broth that kids will enjoy.
Food Safety Guidelines
Freezing your homemade soup base is more than just a technique. It’s about following food safety rules to keep it safe and tasty. Let’s look at key steps to protect your freezer-friendly soup base from harm.
Keep Your Freezer at Battle-Station Cold
The USDA says your freezer should be 0°F (-18°C) or colder for safe storage. At this cold:
- Bacteria won’t grow
- Nutrients won’t break down as fast
- Texture won’t change
Get a separate freezer thermometer for the best reading. Built-in fridge freezers can be off by 5-10 degrees.
Storage Timelines Matter More Than You Think
Some say frozen soup bases last forever, but that’s not true. Flavor and safety get worse over time. Here are safe limits:
| Base Type | Maximum Duration | Key Considerations |
|---|---|---|
| Chicken (with bones) | 6 months | Fat oxidation speeds up after 4 months |
| Vegetable-only | 3 months | Natural proteases break down textures |
Chicken Base Maximum Duration
For the best taste, use meat-based stocks in 4-6 months. Bone broths last longer because of collagen. But, they start tasting metallic after half a year.
Vegetarian Base Differences
Plant-based stocks have their own problems. Enzymes in veggies like celery and mushrooms keep working, even at 0°F. This causes flavor changes. Always mark containers with the date you made them. Studies show 68% of freezer burn cases are from items without dates.
Master Your Soup-Making Routine With Confidence
Making a hearty chicken soup base that freezes well is a smart move for meal prep. It lets you control flavors and avoid preservatives in store-bought soups. This way, you create meals that nourish both body and soul, as Sylvia Fountaine suggests. It also meets Carrie Forrest’s need for quick, efficient kitchen solutions.
Your frozen soup base is a great helper in the kitchen. It can be added to ramen or blended with cream for chowders. Use containers from Ball Mason Jars or OXO Freezerware for easy storage. And, follow USDA food safety tips to keep it fresh for up to three months.
Before freezing, make sure your broth is cooled to 40°F in two hours. Fill containers ¾ full and label them with Sharpie Oil-Based Pens. Choose portions that fit your family’s needs.
When it’s time to use your soup base, thaw it in the fridge for the best taste. Then, add fresh veggies or leftover meats for a meal that feels homemade. This method is perfect for busy home cooks who value quality and convenience.